EasyManuals Logo

Lexmark CX310 Service Manual

Lexmark CX310
430 pages
To Next Page IconTo Next Page
To Previous Page IconTo Previous Page
Page #320 background imageLoading...
Page #320 background image
AIO release lever removal
1 Remove the right scanner cover. See “Right scanner cover removal” on page 331.
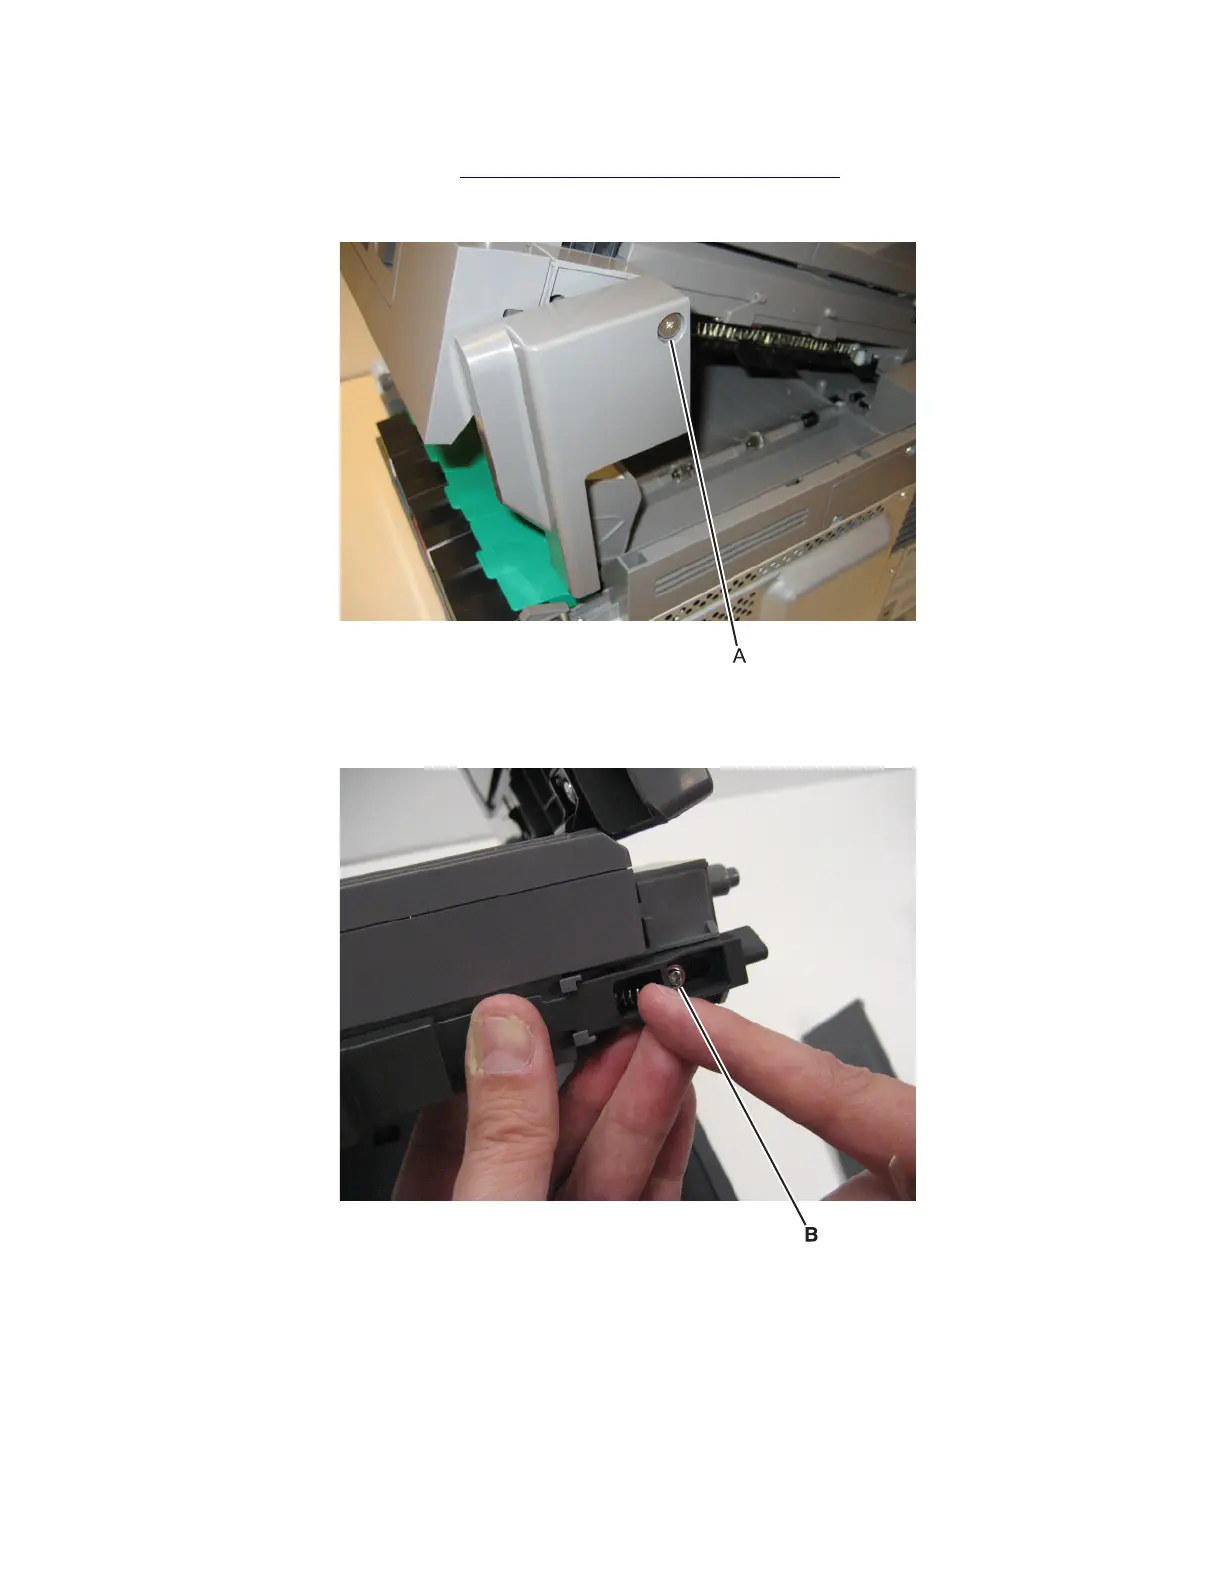
2 Remove the screw (A) securing the AIO link to the flatbed unit.
3 Disengage the AIO link from the flatbed unit.
4 Remove the screw (B) securing the AIO release lever to the flatbed.
5 Slide the AIO release lever towards the back of the flatbed.
6 Remove the spring and AIO release lever.
Installation note: When reinstalling the AIO release lever, place the release lever on the flatbed, and then inset
the spring before replacing the screw.
7527
Repair information
320

Table of Contents

Other manuals for Lexmark CX310

Questions and Answers:

Question and Answer IconNeed help?

Do you have a question about the Lexmark CX310 and is the answer not in the manual?

Lexmark CX310 Specifications

General IconGeneral
Print TechnologyLaser
Scan TechnologyCIS
Scan ResolutionUp to 600 x 600 dpi
Duplex PrintingManual
Display2.4-inch color LCD
Processor Speed800 MHz
Standard Memory256 MB
Fax Speed33.6 Kbps
Operating System CompatibilityWindows, Mac OS, Linux
Print ResolutionUp to 600 x 600 dpi
ConnectivityUSB, Ethernet
Standard Paper Input250 sheets
Scanner TypeFlatbed, ADF
Fax Resolution300 x 300 dpi
Paper Capacity250 sheets
Network ConnectivityEthernet
Copy SpeedUp to 22 cpm (black), Up to 18 cpm (color)

Related product manuals