EasyManuals Logo

Lexmark CX310 Service Manual

Lexmark CX310
430 pages
To Next Page IconTo Next Page
To Previous Page IconTo Previous Page
Page #89 background imageLoading...
Page #89 background image
Printhead service check
Actions Yes No
Step 1
POR the printer.
Does this solve the problem?
The problem is solved. Go to step 2.
Step 2
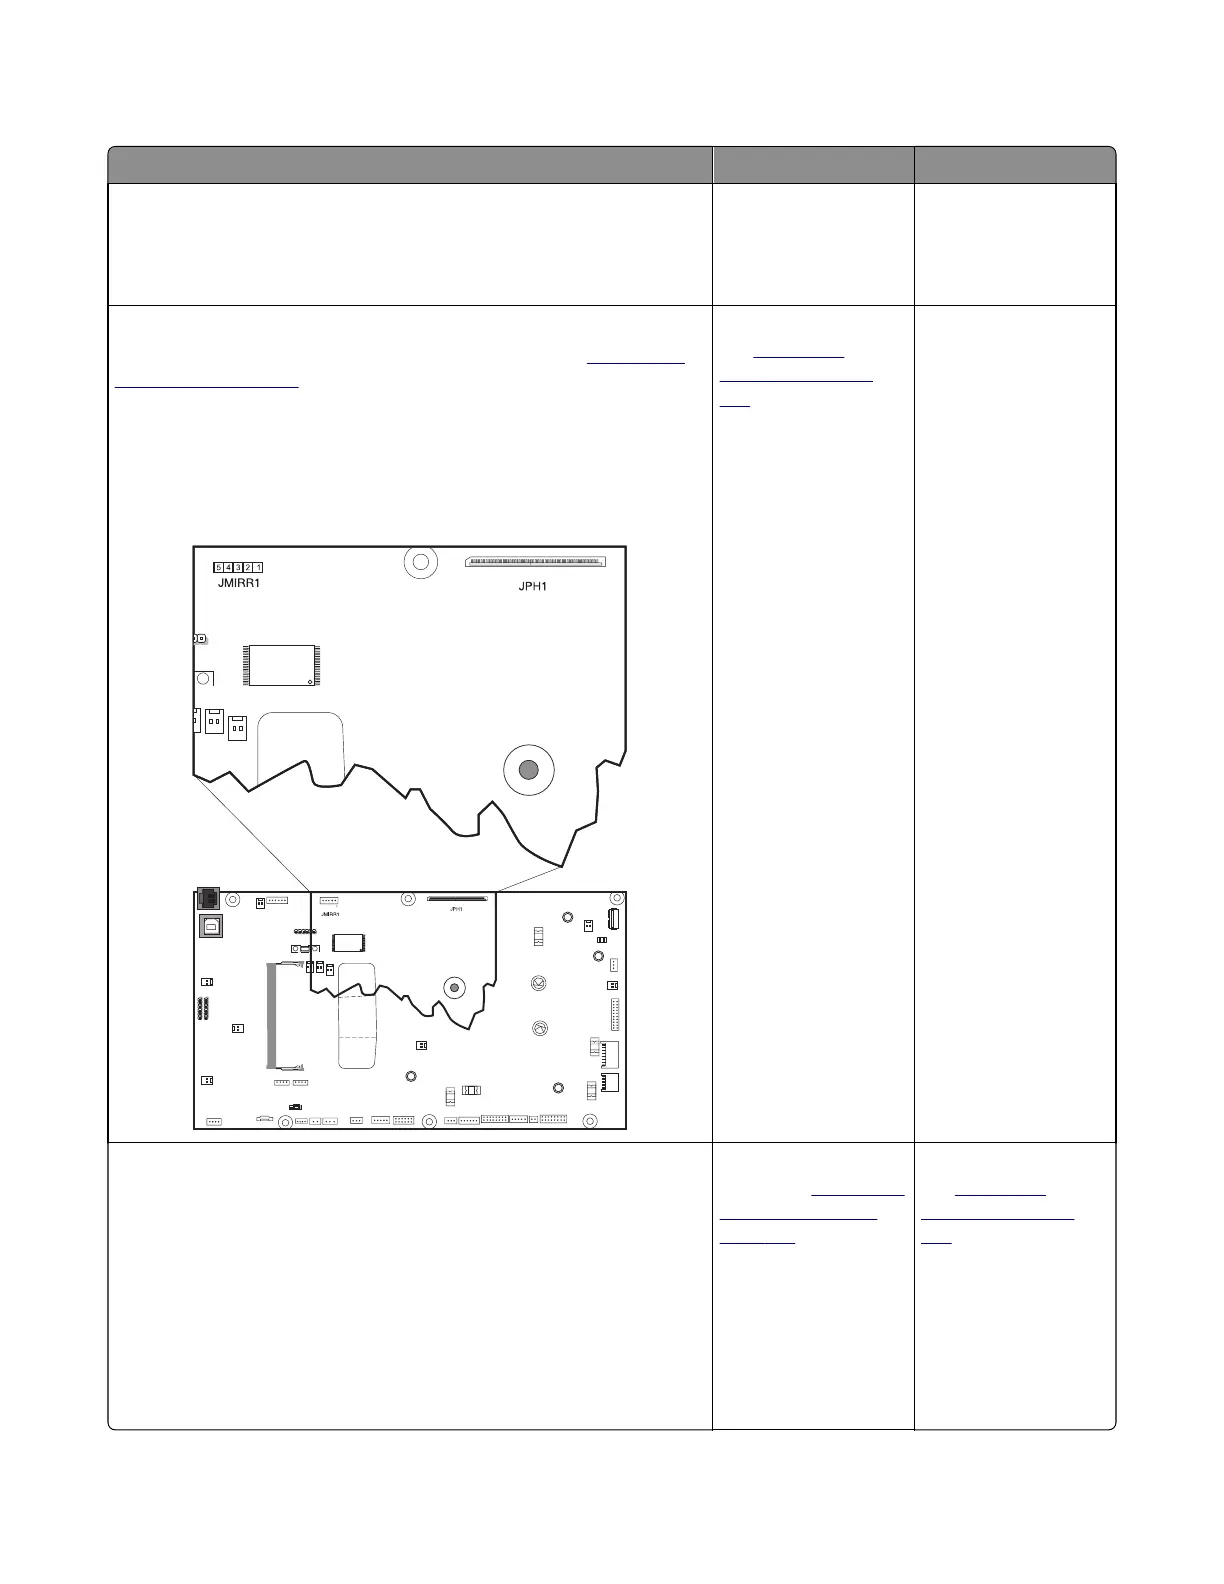
Turn the printer off, and then remove the rear cover. See
“Rear cover
removal” on page 307.
Check the cables at JMIRR1 and JPH1 on the controller board for proper
connection, the printhead cable for pinch points, and the cable or
connector for any other damage.
Is the cable damaged?
Replace the printhead.
See
“Printhead
removal” on page
324.
Go to step 3.
Step 3
Turn the printer on, and then wait until the printer posts an error. Using
a voltmeter, check the following values at JMIRR1:
Pin 1: +5 V dc
Pin 2: +3.3 V dc
Pin 3: +5 V dc
Pin 4: Ground
Pin 5: +24 V dc
Are the values approximately correct?
Replace the controller
board. See
“Controller
board removal” on
page 309.
Replace the printhead.
See
“Printhead
removal” on page
324.
7527
Diagnostic information
89

Table of Contents

Other manuals for Lexmark CX310

Questions and Answers:

Question and Answer IconNeed help?

Do you have a question about the Lexmark CX310 and is the answer not in the manual?

Lexmark CX310 Specifications

General IconGeneral
Print TechnologyLaser
Scan TechnologyCIS
Scan ResolutionUp to 600 x 600 dpi
Duplex PrintingManual
Display2.4-inch color LCD
Processor Speed800 MHz
Standard Memory256 MB
Fax Speed33.6 Kbps
Operating System CompatibilityWindows, Mac OS, Linux
Print ResolutionUp to 600 x 600 dpi
ConnectivityUSB, Ethernet
Standard Paper Input250 sheets
Scanner TypeFlatbed, ADF
Fax Resolution300 x 300 dpi
Paper Capacity250 sheets
Network ConnectivityEthernet
Copy SpeedUp to 22 cpm (black), Up to 18 cpm (color)

Related product manuals