EasyManuals Logo

Lexmark CX310 Service Manual

Lexmark CX310
430 pages
To Next Page IconTo Next Page
To Previous Page IconTo Previous Page
Page #92 background imageLoading...
Page #92 background image
Fuser service check
Actions Yes No
Step 1
Some of these errors are caused by a faulty component on the LVPS. Check
the history file in the printer to verify other occurrences. If there are
others, then replace the LVPS. See
“Lowvoltage power supply (LVPS)
assembly removal” on page 253.
Does this solve the problem?
The problem is solved. Go to step 2.
Step 2
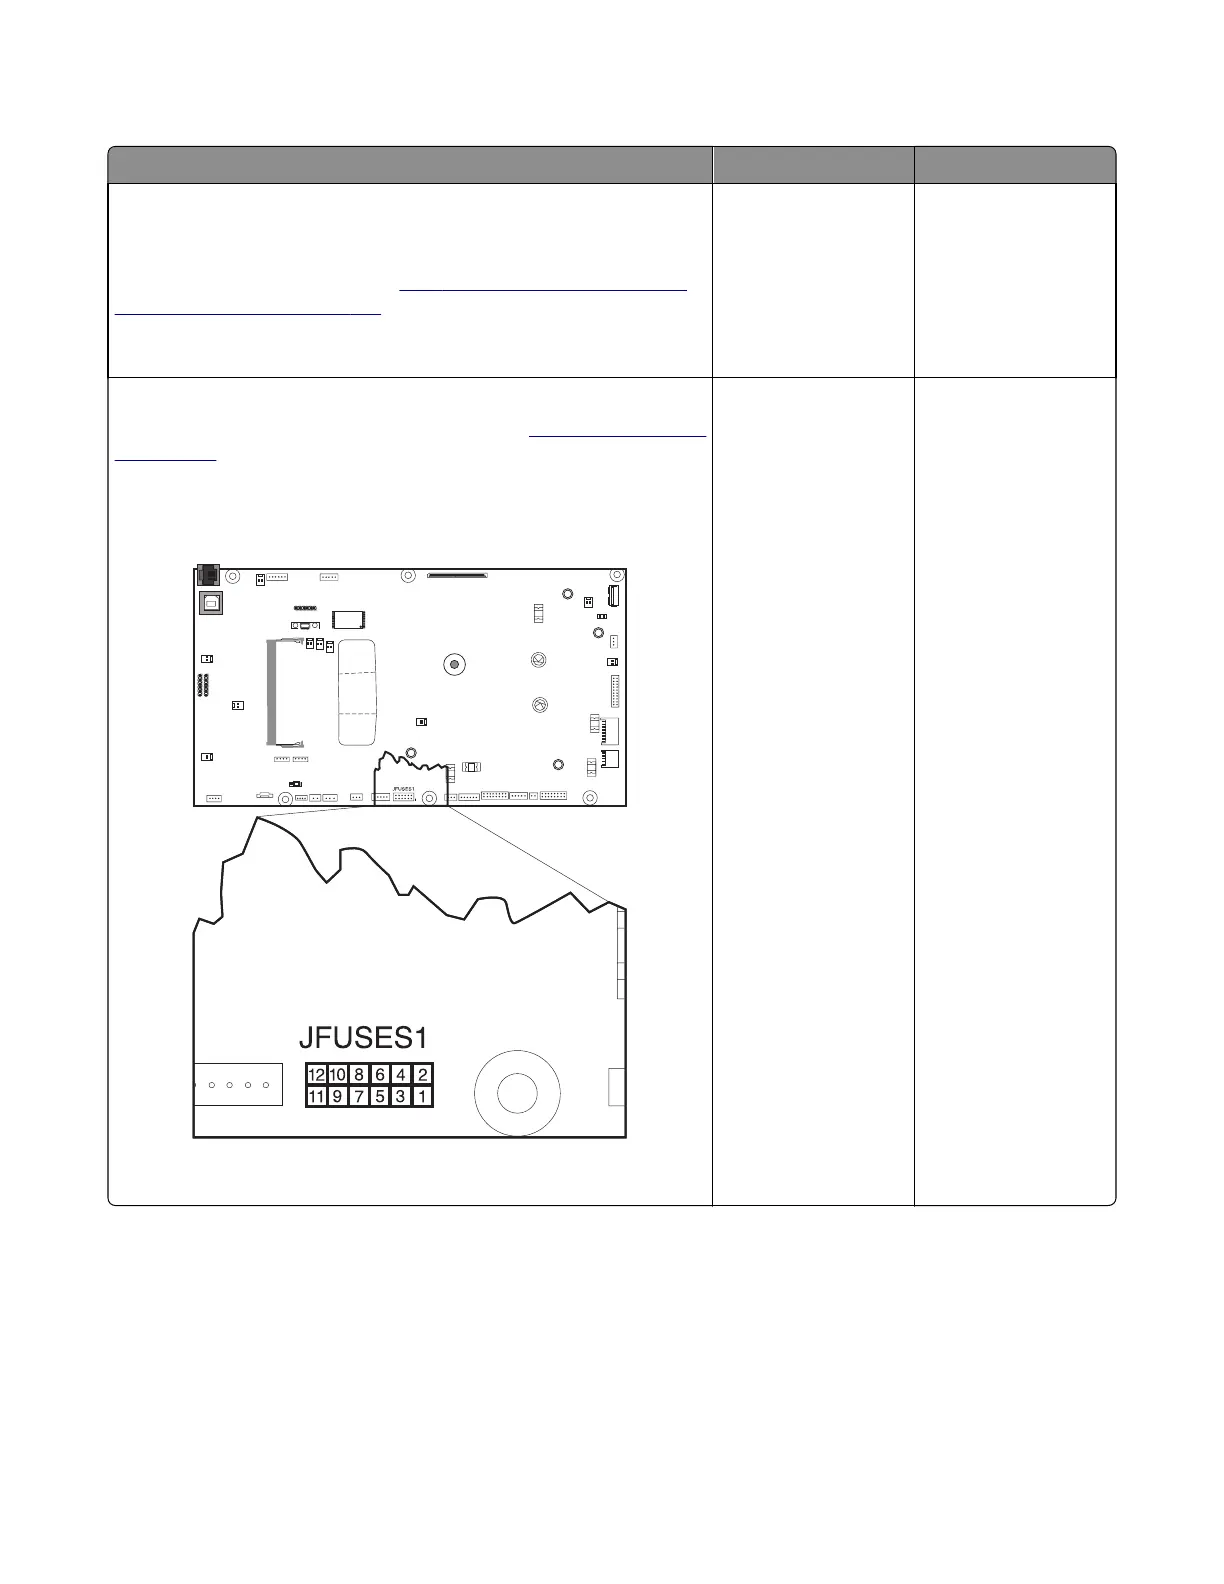
Turn the printer off, and remove the rear cover. See
“Rear cover removal”
on page 307.
Check the cable at JFUSES1 for proper connection to the controller board,
the cable for pinch points, and the cable or connector for any other
damage.
Is the cable damaged?
Replace the fuser
cable.
Go to step 3.
7527
Diagnostic information
92

Table of Contents

Other manuals for Lexmark CX310

Questions and Answers:

Question and Answer IconNeed help?

Do you have a question about the Lexmark CX310 and is the answer not in the manual?

Lexmark CX310 Specifications

General IconGeneral
Print TechnologyLaser
Scan TechnologyCIS
Scan ResolutionUp to 600 x 600 dpi
Duplex PrintingManual
Display2.4-inch color LCD
Processor Speed800 MHz
Standard Memory256 MB
Fax Speed33.6 Kbps
Operating System CompatibilityWindows, Mac OS, Linux
Print ResolutionUp to 600 x 600 dpi
ConnectivityUSB, Ethernet
Standard Paper Input250 sheets
Scanner TypeFlatbed, ADF
Fax Resolution300 x 300 dpi
Paper Capacity250 sheets
Network ConnectivityEthernet
Copy SpeedUp to 22 cpm (black), Up to 18 cpm (color)

Related product manuals