AIO toner cover removal
1 Life the scanner unit to the up position.
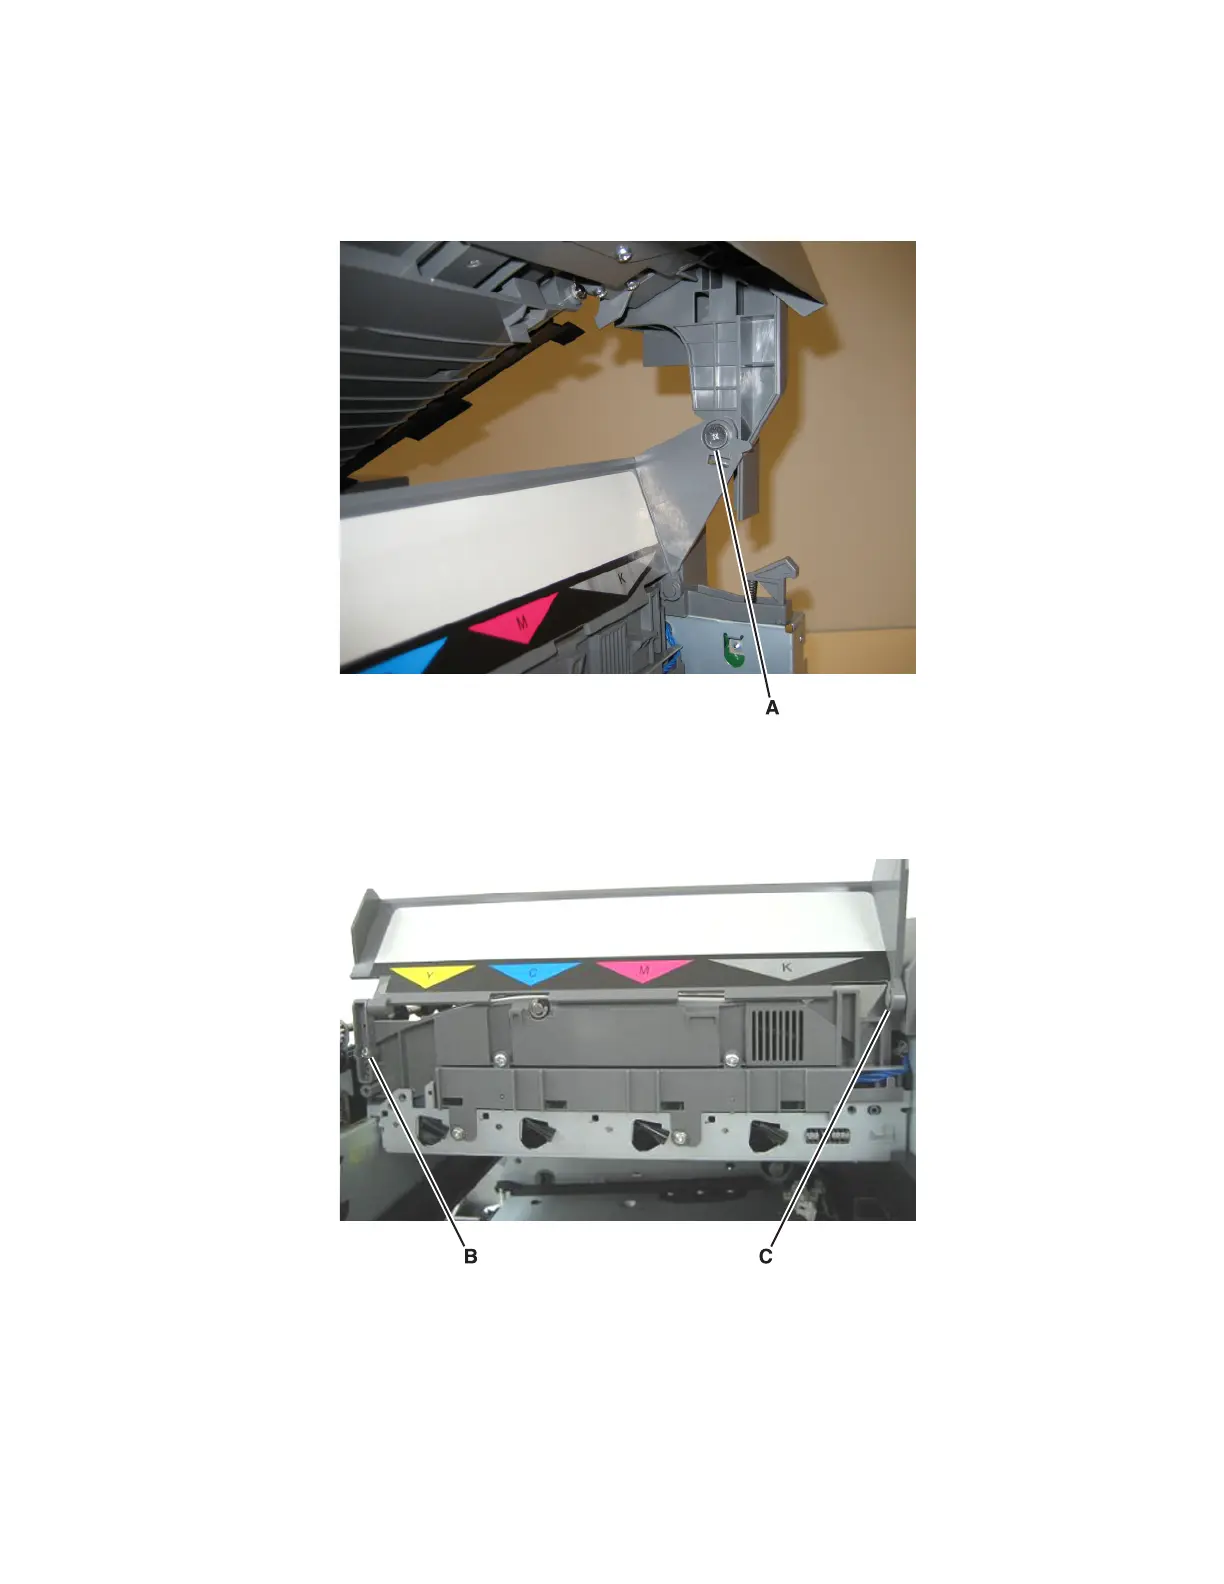
2 Remove the screw (A) fastening the AIO toner cover to the scanner unit.
3 Remove the screws (B) securing the AIO hinge to the MFP.
4 Remove the hinge (C). Save this for the new AIO toner cover, or top cover.
5 Rotate the AIO toner cover so the tab (D) on the cover lines up with the hole on the AIO toner cover.
6 Pull the AIO toner cover to the left, and remove it from the printer.
7527
Repair information
318