EasyManuals Logo

Lexmark CX310 Service Manual

Lexmark CX310
430 pages
To Next Page IconTo Next Page
To Previous Page IconTo Previous Page
Page #286 background imageLoading...
Page #286 background image
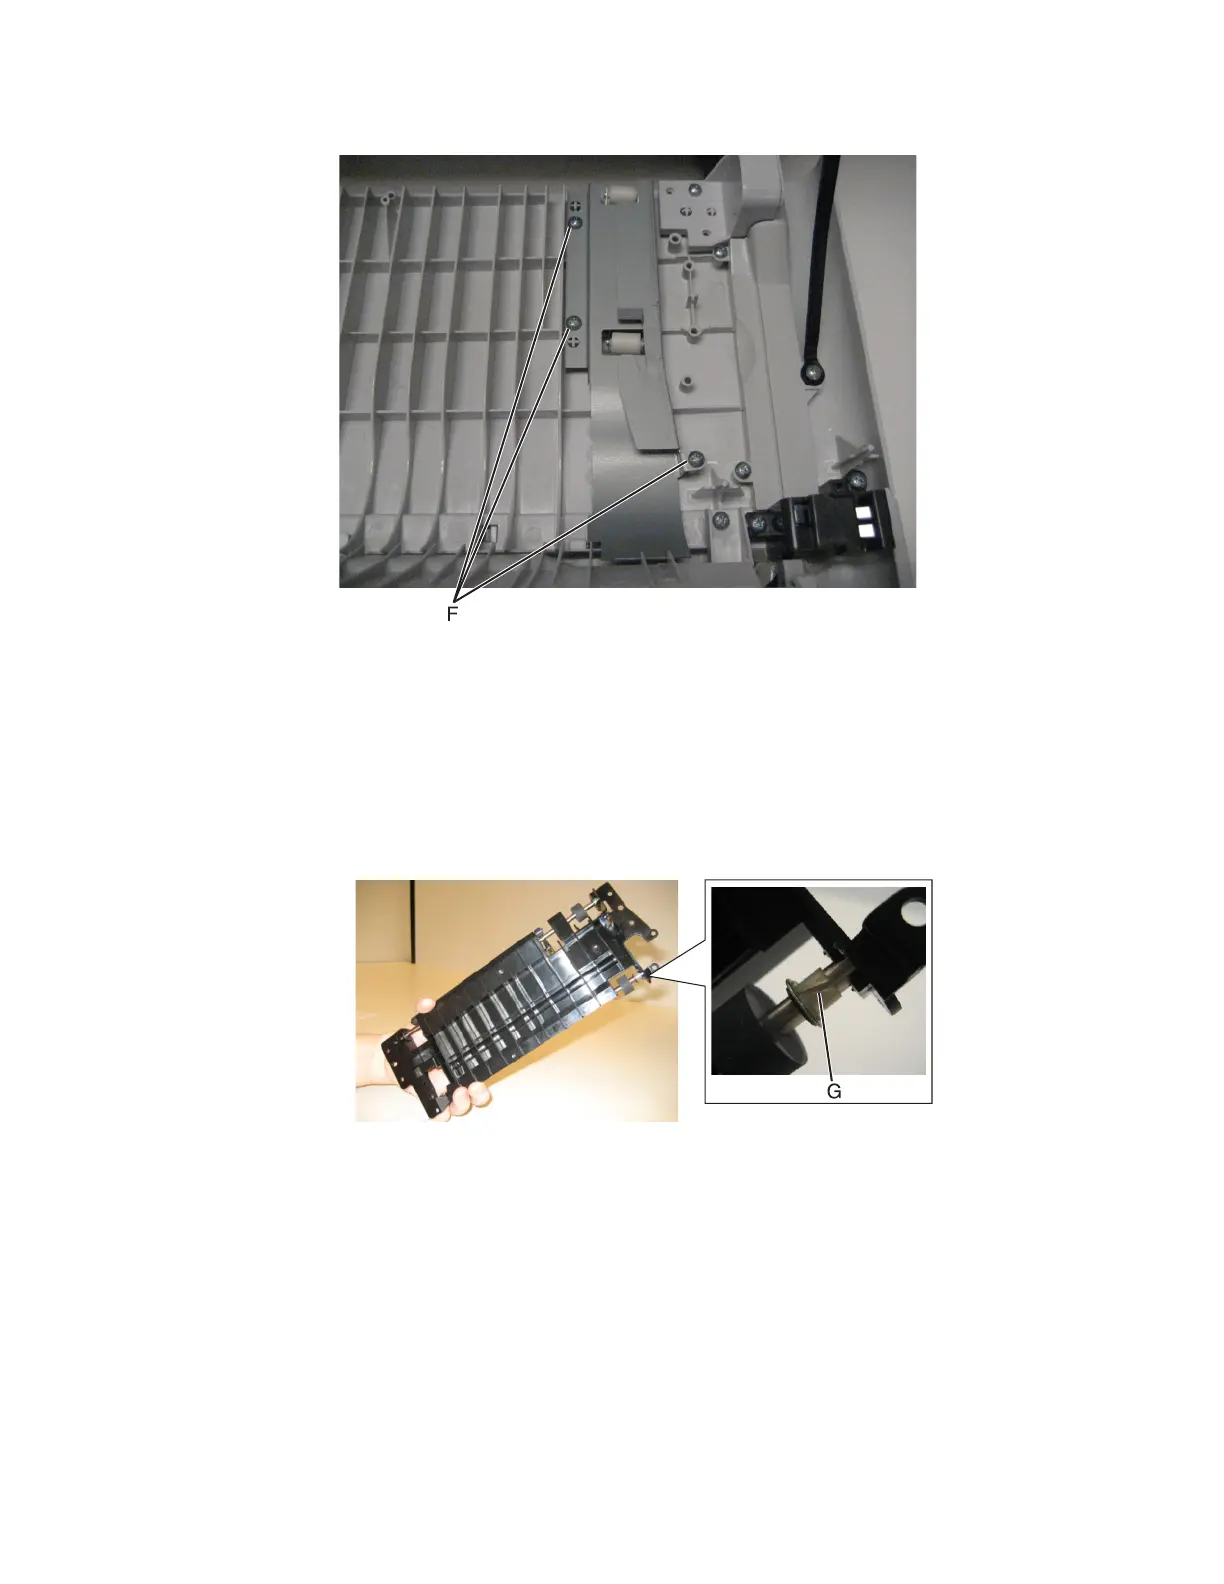
4 Remove the three screws (F) from the duplex reference guide, and remove the guide.
Installation notes:
a Align the duplex reference guide so that the tabs are inserted into the slots, and the top of the reference guide
fits under the door ribs.
b Replace the three screws in the duplex reference guide.
c Be sure that the shaft and bearing have not shifted out of the guide. If they have, then make sure that the
bearing on the left is aligned with the slot (G) facing down (towards the front door).
Note: Improperly aligned bearings or seated shafts may cause vibration and noise in the front door.
7527
Repair information
286

Table of Contents

Other manuals for Lexmark CX310

Questions and Answers:

Question and Answer IconNeed help?

Do you have a question about the Lexmark CX310 and is the answer not in the manual?

Lexmark CX310 Specifications

General IconGeneral
Print TechnologyLaser
Scan TechnologyCIS
Scan ResolutionUp to 600 x 600 dpi
Duplex PrintingManual
Display2.4-inch color LCD
Processor Speed800 MHz
Standard Memory256 MB
Fax Speed33.6 Kbps
Operating System CompatibilityWindows, Mac OS, Linux
Print ResolutionUp to 600 x 600 dpi
ConnectivityUSB, Ethernet
Standard Paper Input250 sheets
Scanner TypeFlatbed, ADF
Fax Resolution300 x 300 dpi
Paper Capacity250 sheets
Network ConnectivityEthernet
Copy SpeedUp to 22 cpm (black), Up to 18 cpm (color)

Related product manuals