Actions Yes No
Step 5
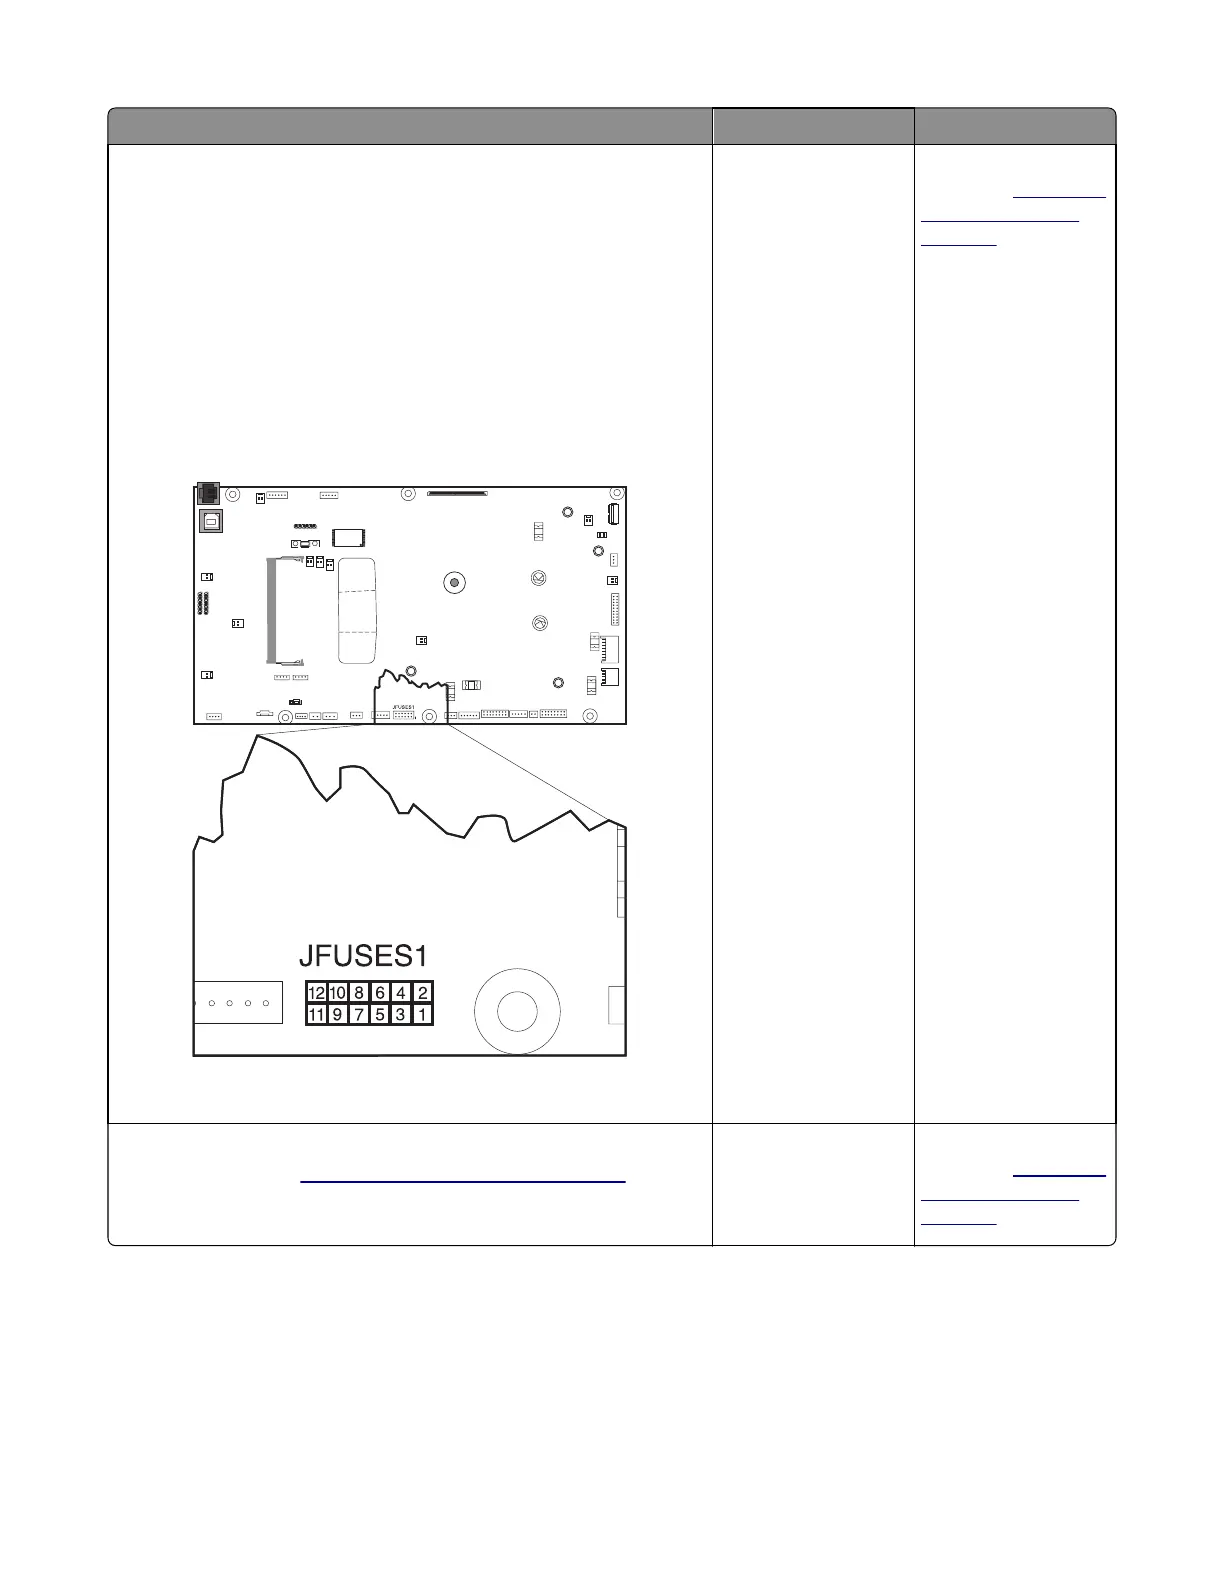
Check the following values at JFUSES1:
Pin 1: +24 V dc (door closed)
Pin 2: +24 V dc (doors closed)
Pin 3: +24 V dc (doors closed)
Pin 4: +24 V dc (doors closed)
Pin 5: Between 0.6 and 3.28 V dc
Pin 6: Ground
Pin 8: Ground
Pin 10: Between ‑3 and +3.3 V dc
Pin 11: Ground (no wire)
Are the values correct?
Go to step 6. Replace the controller
board. See
“Controller
board removal” on
page 309.
Step 6
Replace the fuser. See
“Fuser assembly removal” on page 287.
Does the error clear?
The problem is solved. Replace the controller
board. See
“Controller
board removal” on
page 309.
7527
Diagnostic information
95