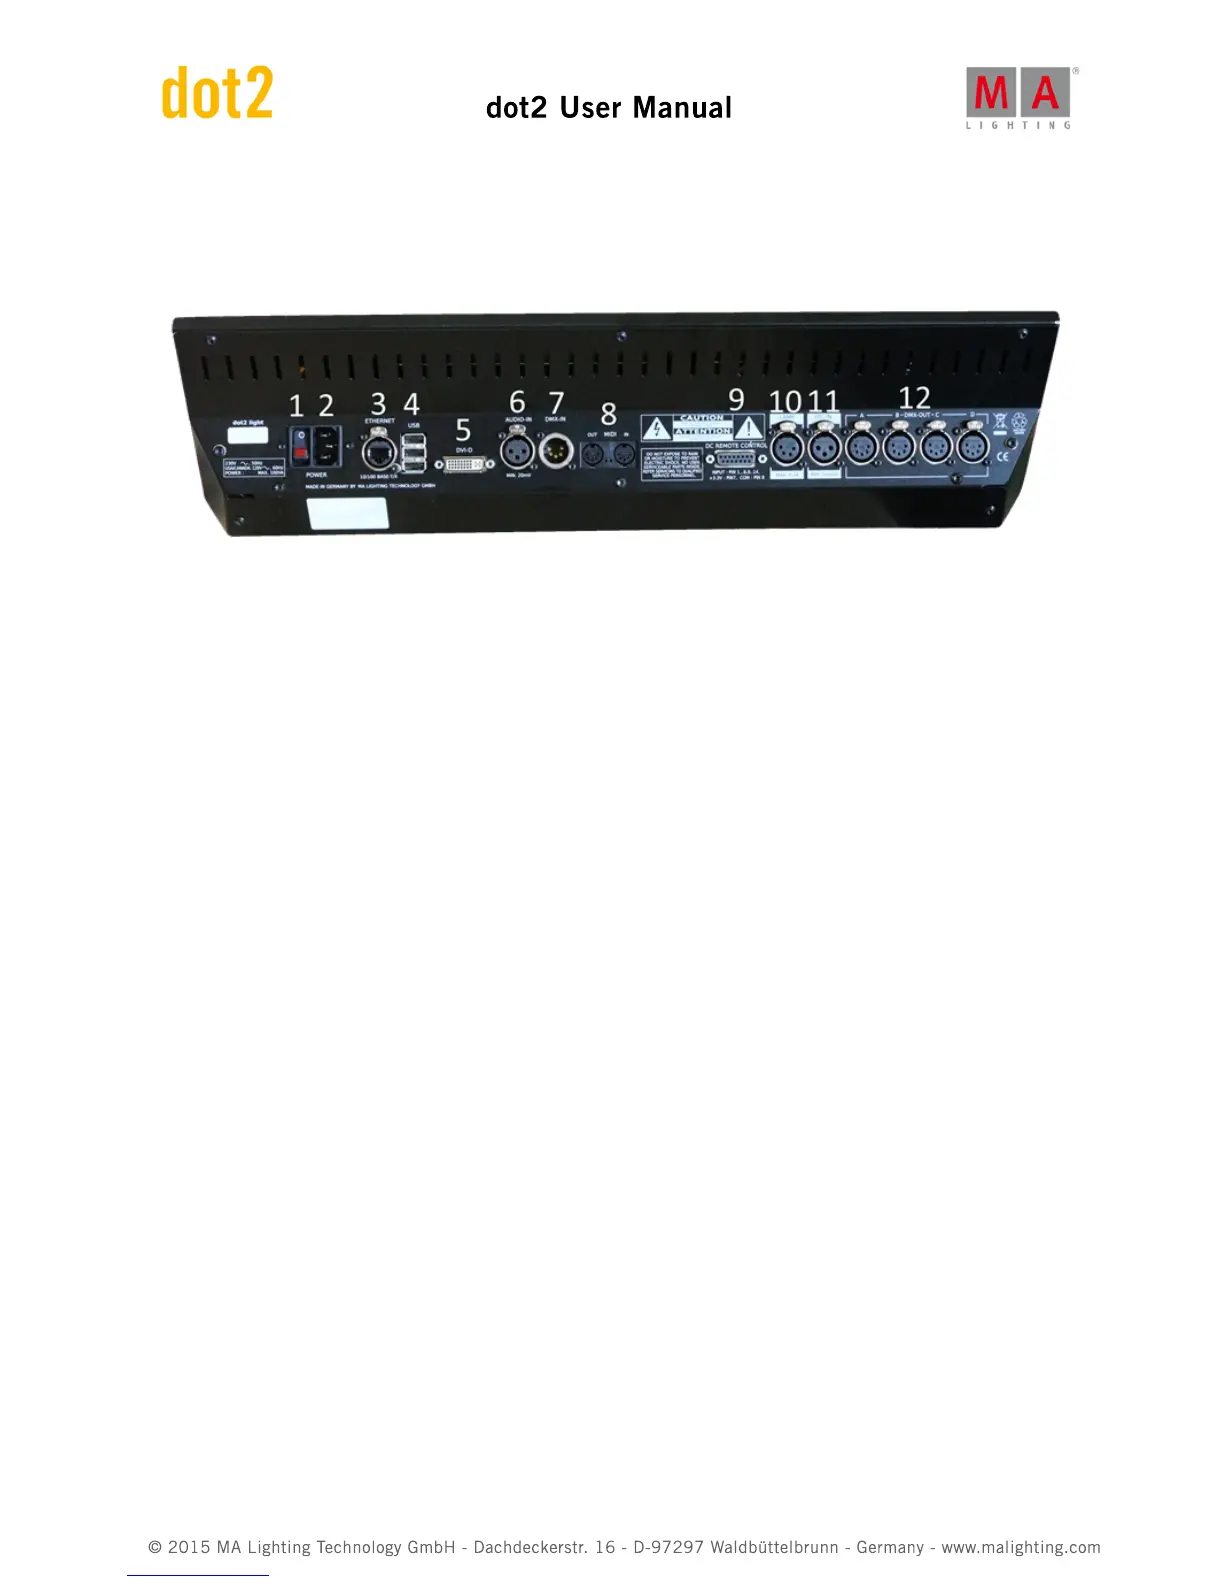
The back
The back panel looks like this (on a dot2 core):
There's a lot of different connectors on the back of the console. For this tour we'll need to connect power (the
connector at number two) and I would suggest that you connect a USB keyboard to one of the USB connectors at
number four. You should also connect an external screen (connector number five). The best is a screen with touch
function (be aware that many screens don't work with this console). If you don't have a touch screen then you
should connect a mouse. Both are connected to the USB connectors at number four. That's the devices we need
for the beginning of this guide. Later we'll look at connecting the console to a network (using the Ethernet
connector at number three).
When you have connected the needed devices, then you can press the power button (at number one) to turn on the
console - remember to connect it to a suitable power source.
The following is a short description of all the connectors on the back:
1. Power switch - This is used to turn on or off the console.
2. Power connector - Here you connect the power cord.
3. Ethernet connector - This is for connecting to a network.
4. 3 x USB connectors - for USB memory sticks, touch screen, Keyboard & Mouse, etc.
5. DVI connector - for en external screen.
6. Balanced Audio in - this is a mono audio input for sound to light functionality.
7. DMX input - This DMX input is currently only for DMX remote control.
8. MIDI in and out - The MIDI can be used also as a remote control and for MIDI Time Code.
9. DC Remote Control - this is for contact closure remote control.
10. Lamp connector - this if for the console goose neck lamp.
11. LTC connector - this is used for SMPTE Time Code.
12. 4 x DMX out - here you can get universe 1 to 4 out of the console.
The front