If you want to reselect the entire group then you can press the Set key.
When you feel comfortable (maybe check if you need some more coffee or tea) you should move on to the next
chapter, where we are going to store our first cue - yeah it's about time!
2.8. Getting Started Guide - Storing a cue and playback
Let's make a cue with something in it.
Clear your programmer. Then select fixtures 5 and 7. Put them at 40%.
Now press Store Please .
Now we have created cue number one on the main executor. Try to clear your programmer. If you look at a Fixture
view, you can see that your fixtures don't output the 40%. You'll need to activate the cue and make sure the fader is
up for the values to be outputted.
We stored the cue on the main executor so this it the one we need to play back the cue.
The dot2 don't have motorized faders. So there might be some inconsistencies regarding where the console believe
a fader should be and then where it actually is.
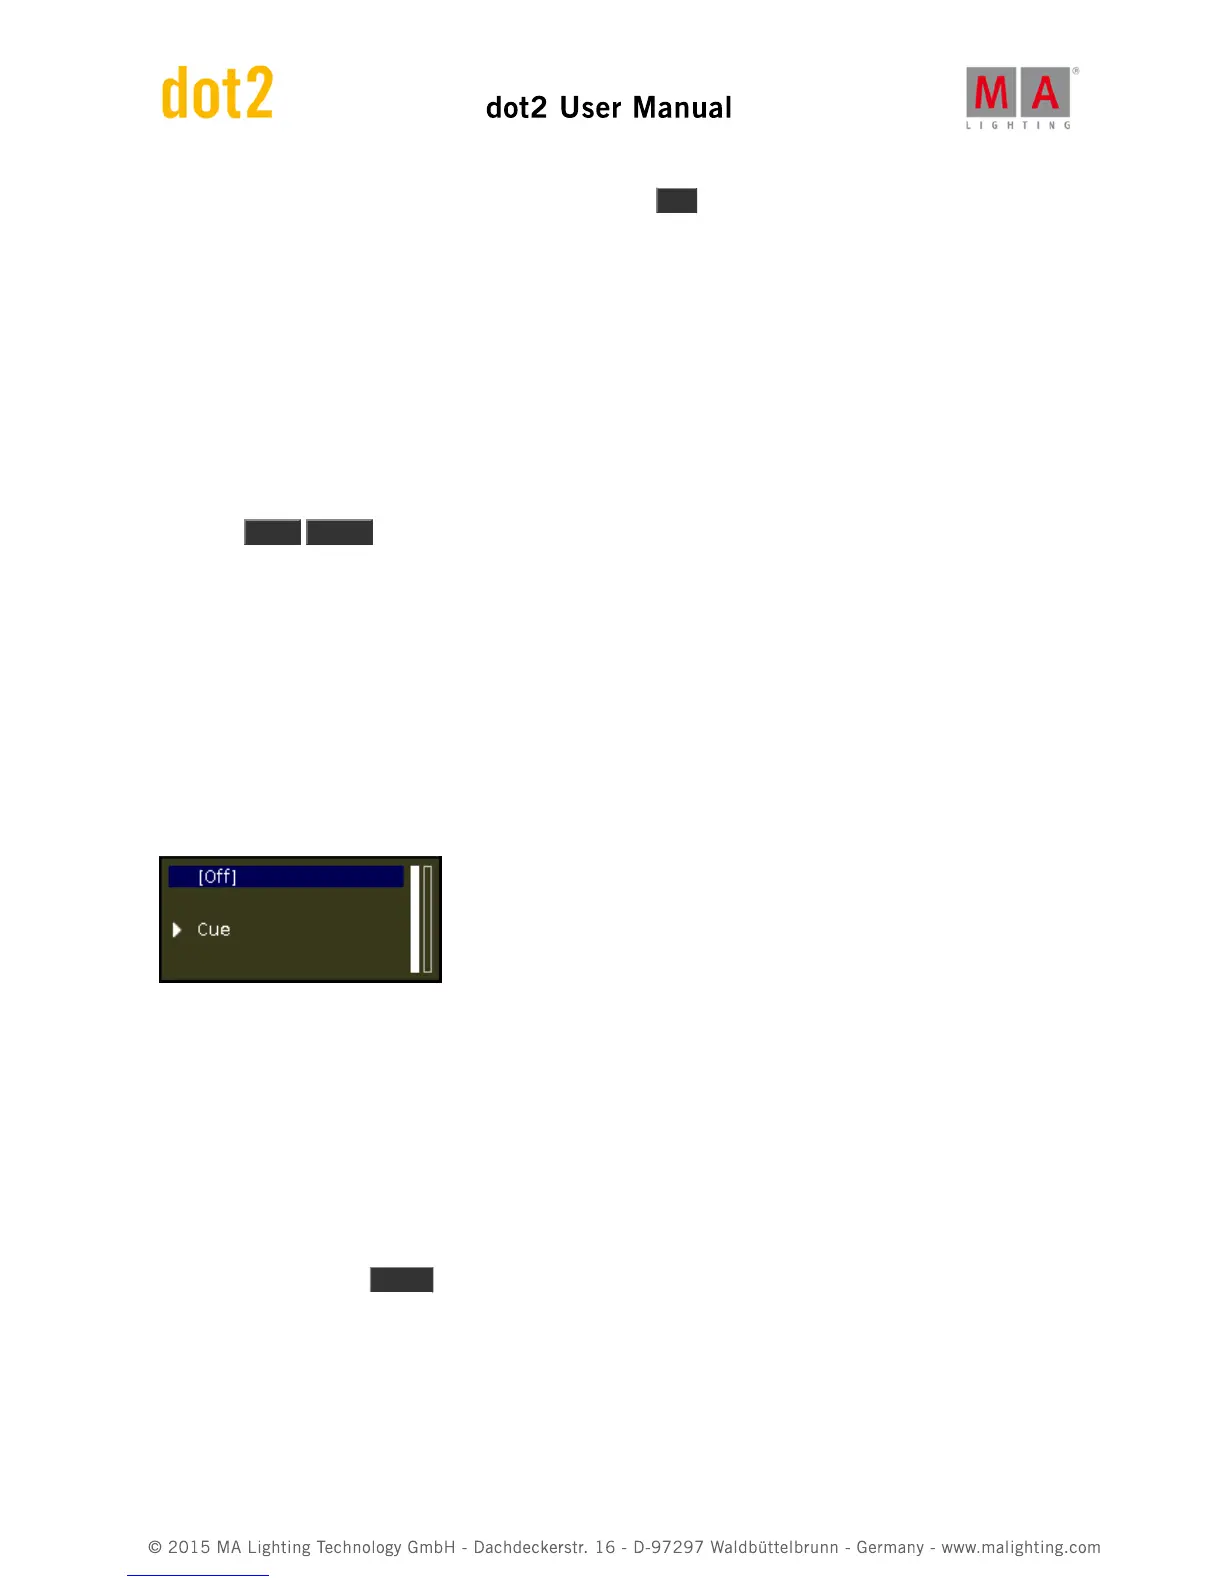
Have a look at this picture:
Here we can see what the console is doing on the main executor. It says the executor is currently off.
On the right side of this you'll see two vertical bars. These show us where the console thinks the two faders are. The
rightmost fader is at the bottom and the left one is at the top. Most faders are executor masters. They control the
overall dimmer level for the fixtures stored on the executor. That's why we often refer to the top position as 100 and
the bottom position as 0. The Main executor have two faders. The left one is the master, the right one is used to
manually cross fade between two cues. Moving the fader to the opposite position will fade between cues using the
timing of your fader movement.
If you left physical fader (the master) isn't at 100, please move it there. We might still needs to activate the cue. We
do this by pressing the big Go + key below the faders.