214683 328 Revision A
1. If necessary to improve access and ease installation, remove float module from combine. For instructions, refer
to 4 Header Attachment/Detachment, page 307.
NOTE:
Some parts have been removed from the illustrations for clarity.
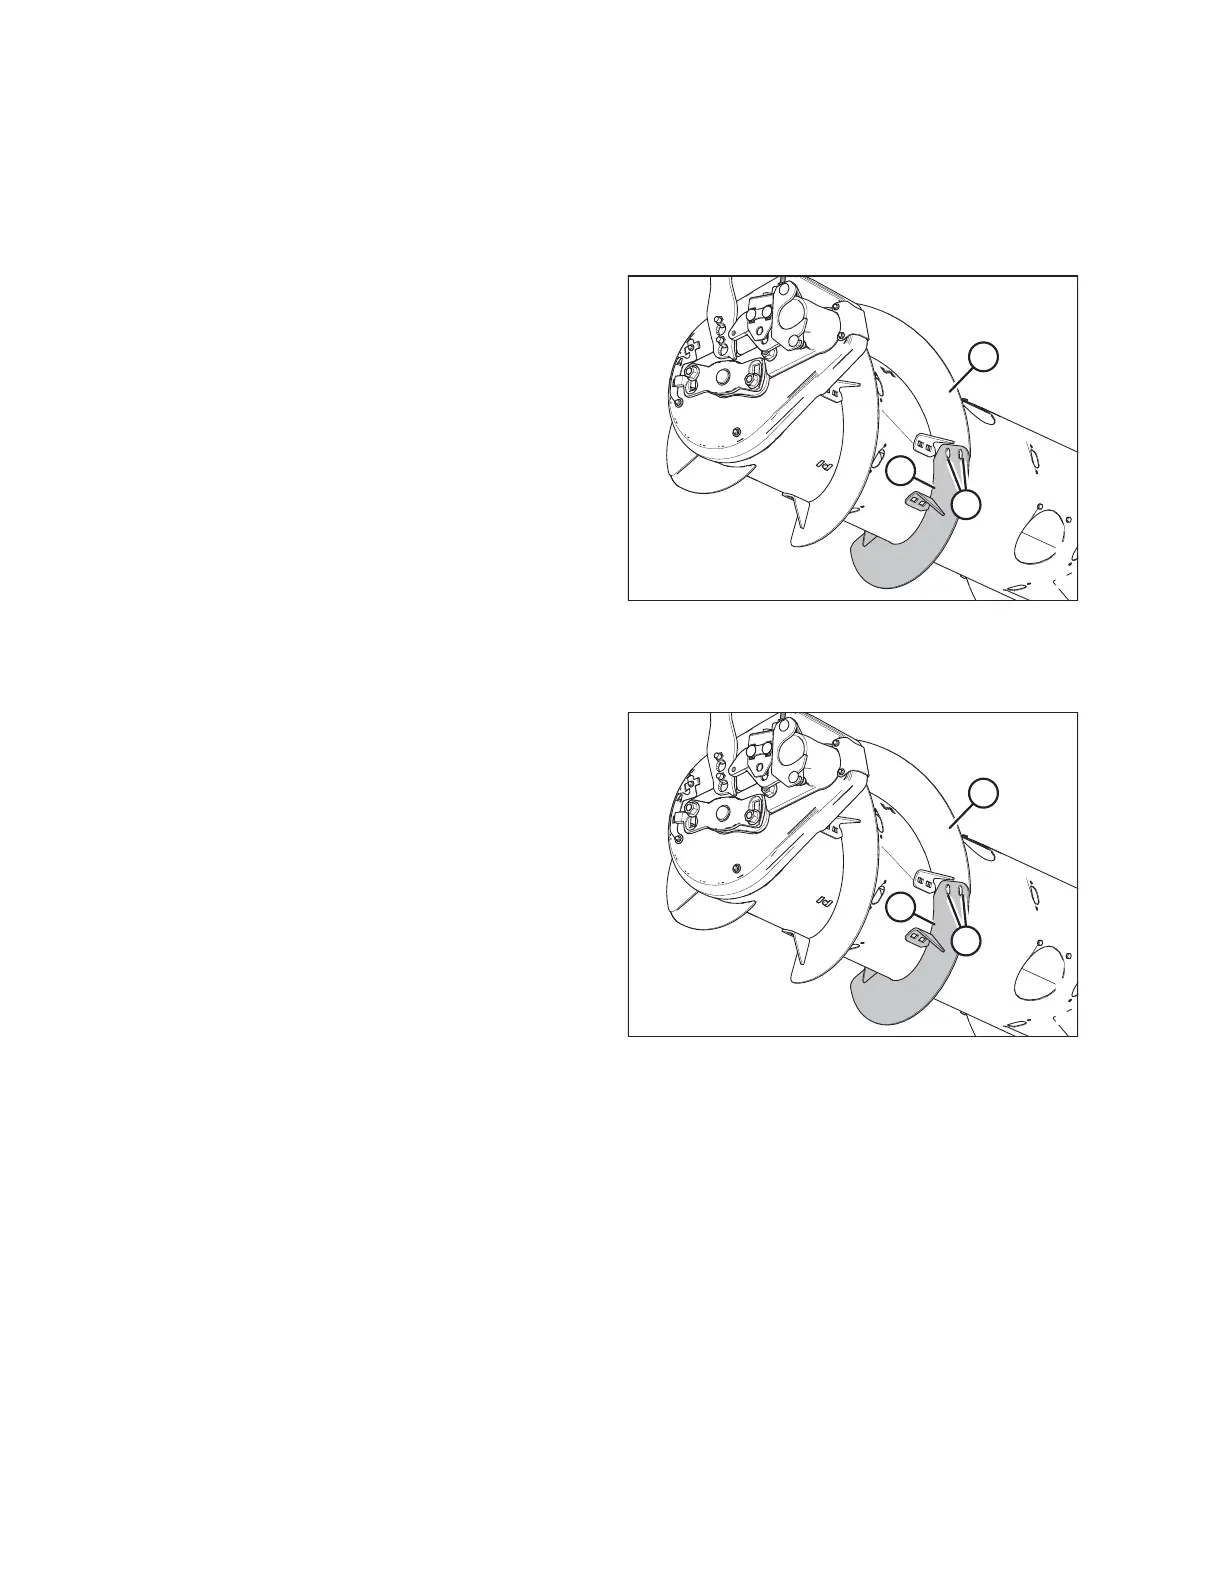
Figure 4.43: Left Side of Auger
2. Place new bolt-on flighting (A) outboard of the existing
flighting (B) on the left side of the auger, as shown.
3. Mark hole locations (C) of the new bolt-on flighting (A)
onto existing bolt-on flighting (B).
4. Remove nearest access cover to existing bolt-on
flighting (B). Retain hardware for reassembly.
5. Remove existing bolt-on flighting (B) from the auger.
Retain hardware for reassembly.
6. Drill two 11 mm (7/16 in.) holes at the marked locations
of existing bolt-on flighting (B).
7. Reinstall existing bolt-on flighting (B) on the auger.
NOTE:
Ensure carriage bolt heads are on the inside of the
auger to prevent damage to internal components.
Figure 4.44: Left Side of Auger
8. Place new bolt-on flighting (A) outboard of the existing
flighting (B) of the left side of the auger, as shown.
9. Secure with two button head bolts (MD #135723) and
nuts (MD #135799) at location (C).
IMPORTANT:
Ensure bolt heads are on the inboard (crop side) and
nuts are on the outboard side of the flighting.
HEADER ATTACHMENT/DETACHMENT