214683 329 Revision A
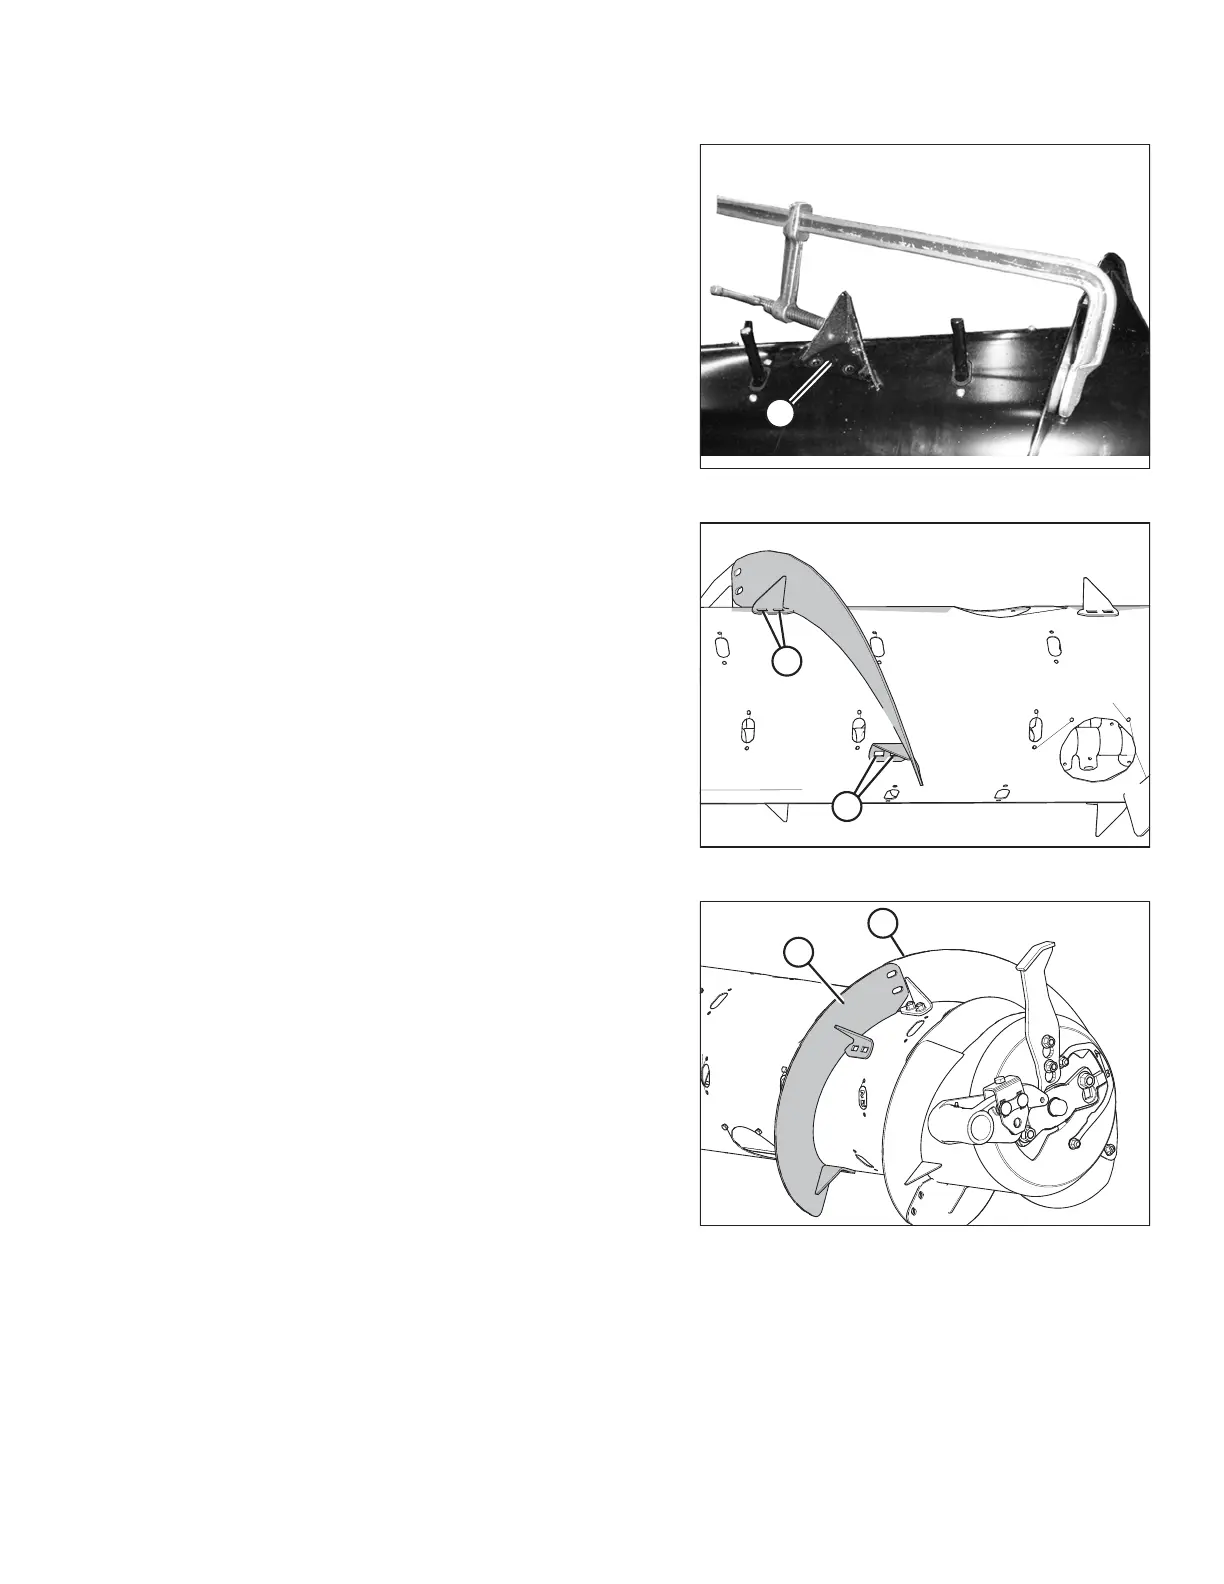
Figure 4.45: Flighting Stretched Axially
10. Stretch flighting (A) to fit auger tube as shown. Use
slotted holes on flighting to get the best fit around the
auger tube.
Figure 4.46: Flighting on Left Side of Auger
11. With flighting in desired position, mark hole
locations (A) and drill 11 mm (7/16 in.) holes in
auger tube.
12. Remove nearest access cover(s). Retain for
reinstallation.
13. Secure bolt-on flighting on the newly drilled holes (A)
using four flange head bolts and nuts.
14. Repeat Steps 2, page 328 to 13, page 329 for the other
flighting on the left side of the auger.
Figure 4.47: Flighting on Right Side of Auger
15. Place flighting (A) outboard of the existing flighting (B)
on the right side of the auger, as shown.
16. Repeat Steps 3, page 328 to 13, page 329 for both
flightings on the right side of the auger.
17. Install flighting slot plugs (MD #213084) in the flighting
mounting locations and secure with M6 bolts
(MD #252703) and tee nuts (MD #197263).
18. Torque all nuts and bolts to 47 Nm (35 lbf·ft) to eliminate
deflection on flighting, then torque nuts and bolts again
to 58–64 Nm (43–47 lbf·ft).
NOTE:
The flighting should fit tightly against the auger tube; however, gaps are not uncommon. Crop material may collect
in these gaps, but this should not affect performance. If desired, use silicone sealant to fill these gaps.
HEADER ATTACHMENT/DETACHMENT