4. Allow the mold to cool to room temperature. Continue to circulate the
mold cooling water in all plates to cool the mold more quickly.
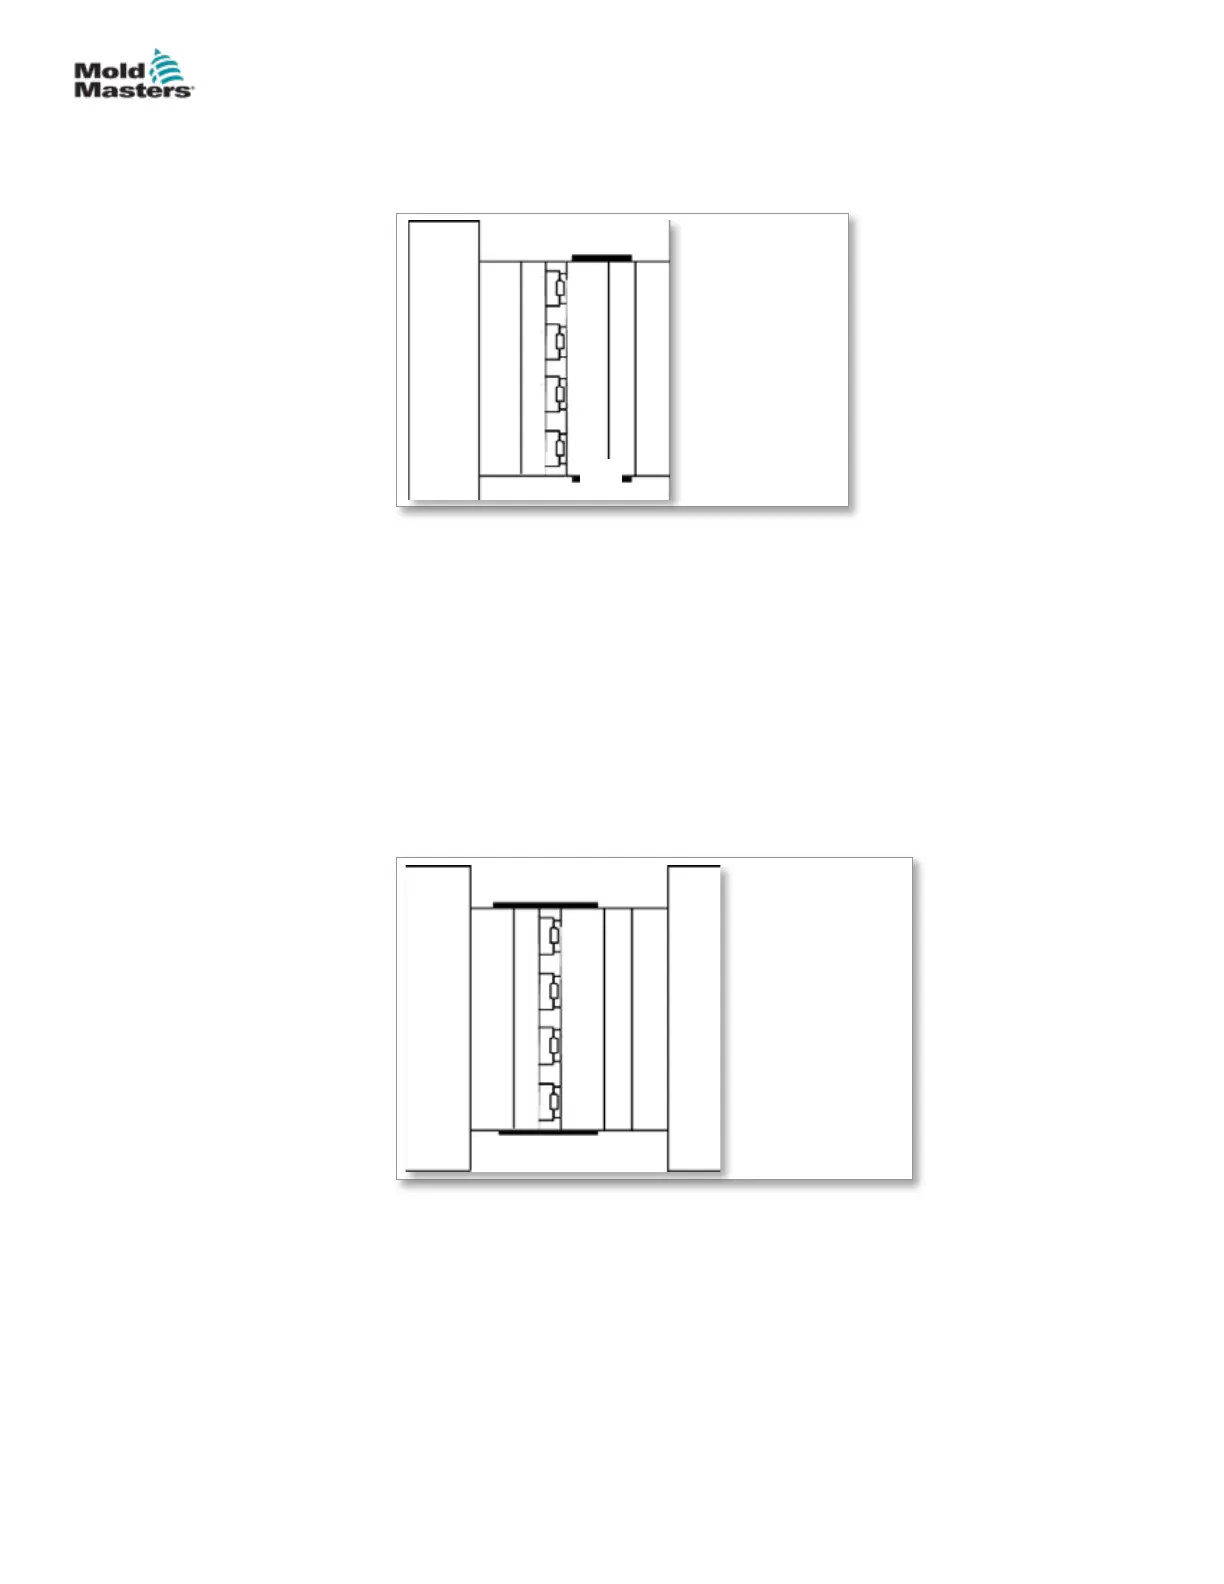
1. Latches
2. Manifold plate
3. Cavity plate
1
1
2
3
5. If the mold has no leader pins, attach a crane that is rated to adequately
support the weight of the cavity plate.
6. Latch the cavity plate to the manifold or manifold backing plate.
7. Check that the cavity plate hoses are long enough to allow the cavity
plate to be latched over to the core half (Cold Half), without damaging the
hoses.
8. Remove all cavity plate mounting screws.
9. Remove lockout / tagged out.
10. Place the machine in Mold Set mode.
11. Close the mold slowly.
1
2
2
3
4
5
1. Stationary platen
2. Latches
3. Moving platen
4. Core plate
5. Cavity plate
Figure 15-11 Cavity plate to core plate
12. Apply lockout / tagged out. Refer to machine manufacturer’s
documentation for procedures.
13. Remove the latches.
14. Latch the cavity plate to the core plate or Cold Half.
15. Remove lockout / tagged out.
Latch the Cavity Plate to the Core Half - continued
15-21MAINTENANCE
Hot Runner User Manual
© 2020 Mold-Masters (2007) Limited. All Rights Reserved.
 Loading...