ELECTRICAL COMPONENTS 26 July 2002
3-44
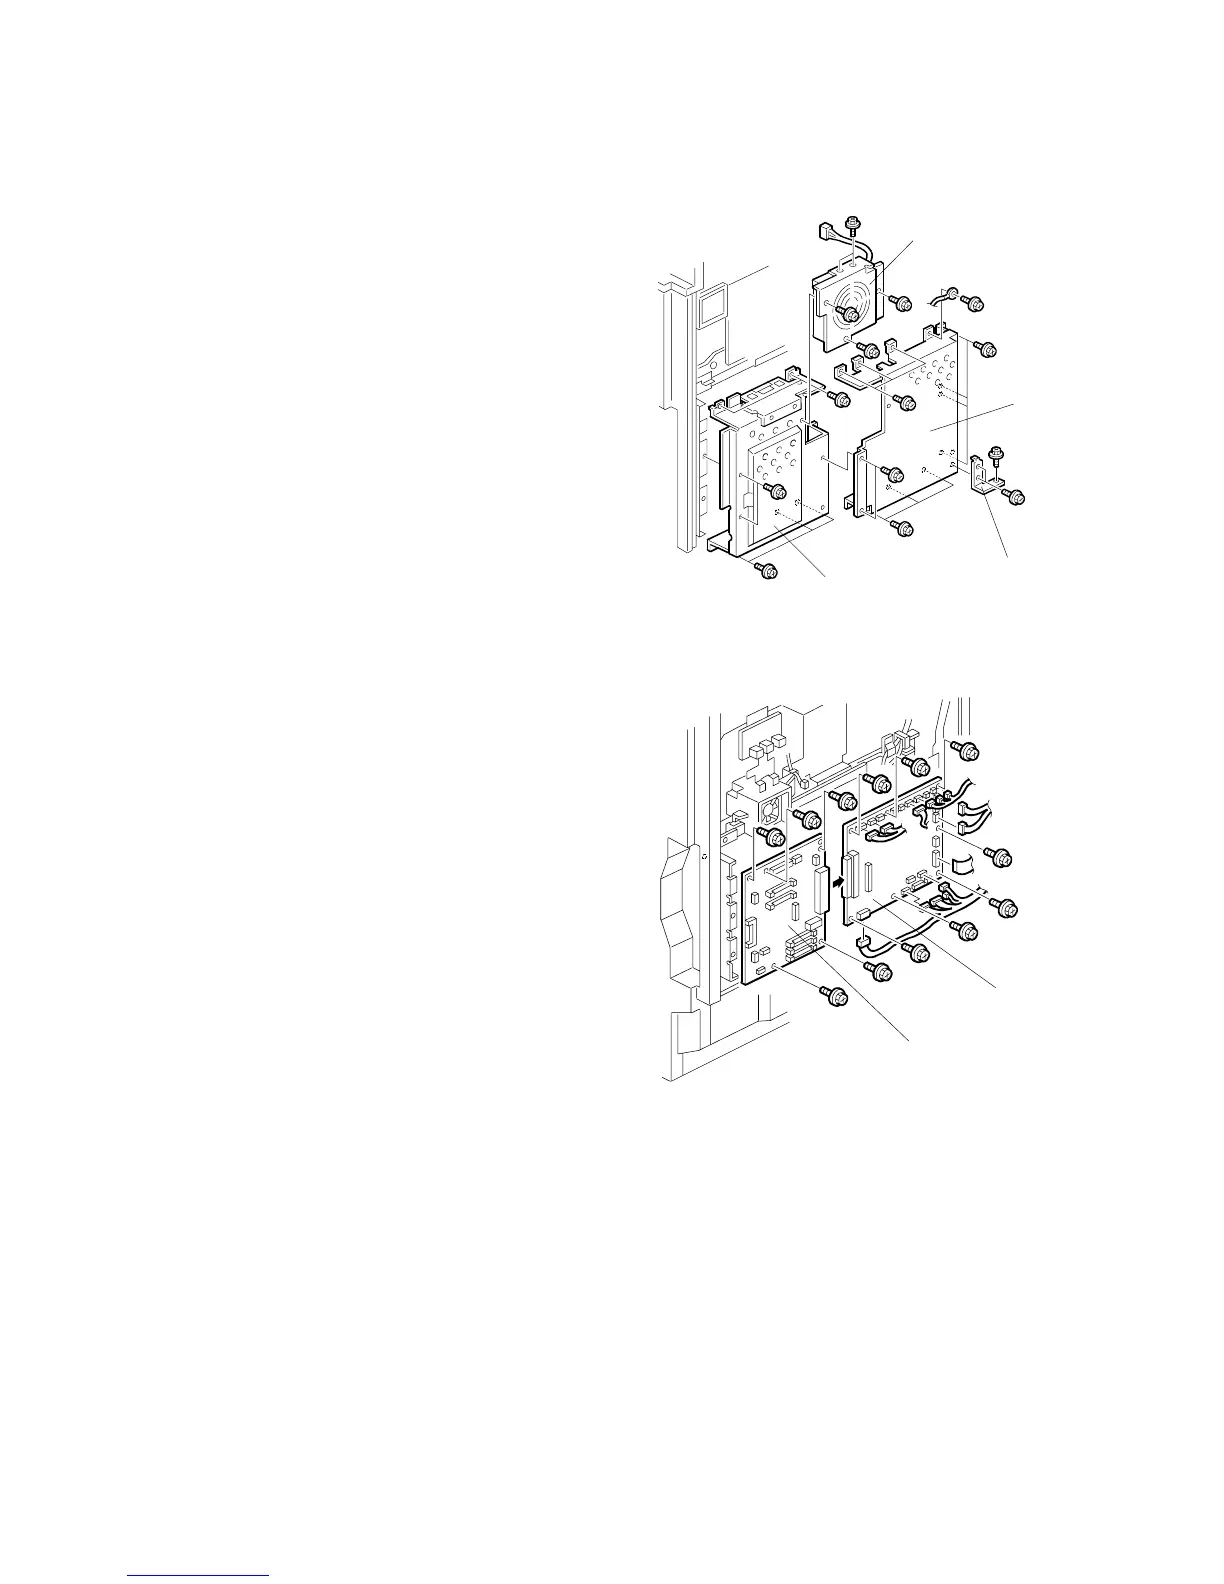
3.10.3 BICU BOARD AND CONTROLLER BOARD
1. Rear cover (☛ 3.4.2)
2. Fan [A] (" x 1, ! x 5)
3. Bracket [B] (! x 2)
4. BICU board cover [C] (! x 11)
5. Option component cover [D]
6. BICU board [E] (" x 15, ! x 7)
NOTE: 1) Compare the settings of the
dip switches on the old
board with the settings on
the new board. If they are
different, change the
settings on the new board
to make them identical.
2) When replacing the
controller board only; leave
the 15 connectors
connected, remove the
seven screws, and
disconnect the BICU board
from the controller board.
7. Controller board [F] (! x 6)
NOTE: Remove the NVRAM, DIMM,
and optional boards from the
old controller board and install
them on the new one.
B051R821.WMF
B051R817.WMF
[A]
[B]
[C]
[D]
[E]
[F]
 Loading...