EN
40
General Layout of weQube Software
10.1.1. Connecting the Sensor (Connect to Device)
10.1.1.1. Device list
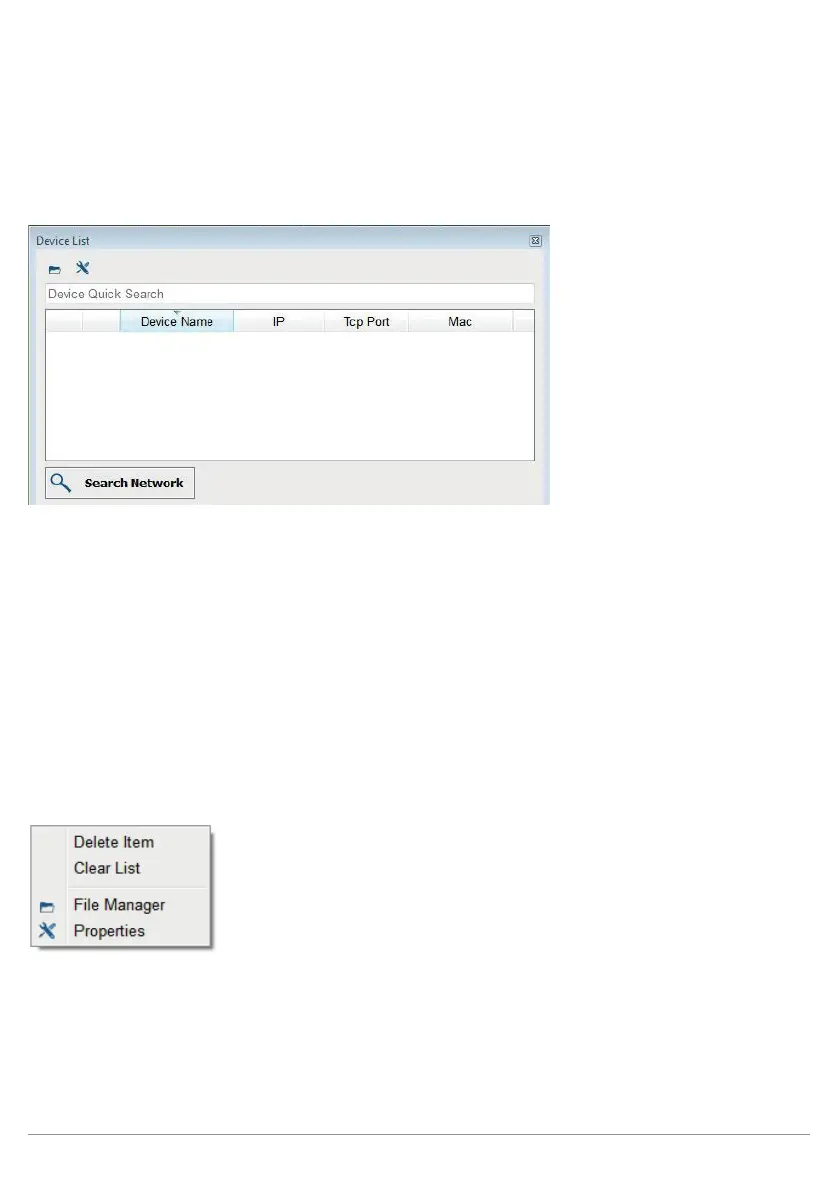
The following window appears after clicking “Connect to Device”:
Note: It’s not possible to access the sensor simultaneously with the software and via the website. If applicable,
close the website before connecting the software to the sensor. Furthermore, under no circumstances should
you make changes in the software and at the OLED display at the same time.
All previously used sensors are displayed in the device list. You can search for a certain sensor in the “Device
Quick Search” field, for example by entering its MAC address. The sensors can also be sorted according to
various criteria. Simply click the desired heading to this end – for example click “IP” in order to sort the sensors
according to IP address. Various sensor information can be added or removed by right clicking the header.
Any sensor displayed in the list can be directly connected to the software by double clicking the respective list
entry.
The software starts up in the operating mode. Switch to the editing mode in order to be able to change settings
in the software (see section 10.2.3.8).
The following actions can be executed after right clicking a sensor: