63
Smart Camera / Vision-Sensor / 1D-/2D-Code-Scanner / OCR Reader
Teach+ recording
Note: Recording and playback of Teach+ files are also explained in the tutorial
entitled “How to Use Teach+ Files”, which is available on our website at www.
wenglor.com.
The recording function makes it possible to compress complete image se-
quences, along with all of the settings for the current project, into a file and save
them (Teach+).
A window appears at which the memory location can be specified for the file.
All files are first copied to the target directory and then a compressed archive
is created. The file is automatically named. The filename consists of the term
“TeachRec_” and the date and time at which the file was created. The filename
consists of the current date and time, as well as the project name.
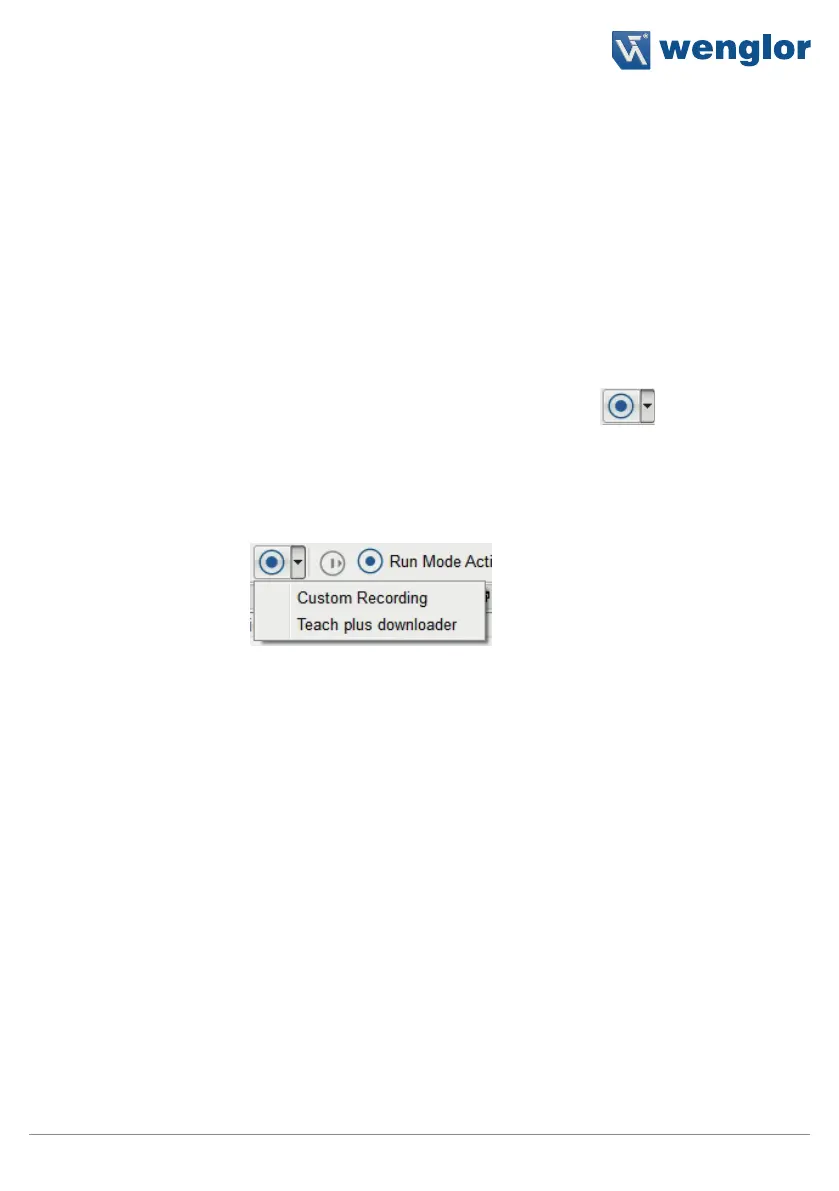
The recording function is activated by clicking the
icon. The number of
images specified for the sequence is then recorded. The default value for the
number of images to be recorded can be changed under options. All recorded
images are then compressed, added to a single file and saved to the previously
specified target directory. The target directory must be large enough to store
all of the images.
Additional recording functions appear after clicking the arrow next to the record-
ing icon. The number of images to be recorded can be specified with the “In-
dividual recording” function. This setting corresponds to those which can also
be configured under “Options” in the “Settings” menu (see section 10.2.2.3).
If a Teach+ file has been recorded directly via the OLED display, it can be stored
to the PC with the “Teach plus downloader” function..
Run Mode active
The live image from the sensor is refreshed cyclically in the operating mode.
However, no changes can be made to the software settings in this mode.
Note: Compressing and transmitting the settings to the PC takes time and al-
lows roughly 1 to 2 refresh operations per second in the software.
Edit Mode
The software settings can be changed in the edit mode. A current image is only
retrieved from the sensor in the event that the module is replaced or the
settings are changed.
Note: Priority is placed upon editing the settings in this mode. As a result, it’s
possible that trigger signals might be missed when settings and accepting pa-
rameters.