EasyManuals Logo

Zebra ZXP 9 Series User Manual

Zebra ZXP 9 Series
450 pages
To Next Page IconTo Next Page
To Previous Page IconTo Previous Page
Page #244 background imageLoading...
Page #244 background image
236 ZXP Series 9 Card Printer Service Manual P1086708-001
Replacement Procedures for the Printer
Procedures: Right Side Cover
Right Side Cover
For replacement, use Kit Side Enclosures (L & R) 105936G-372. Contact Zebra Customer Service
at +01 877-275-9327 for ordering information.
Step 1. If not already done, remove the input hopper.
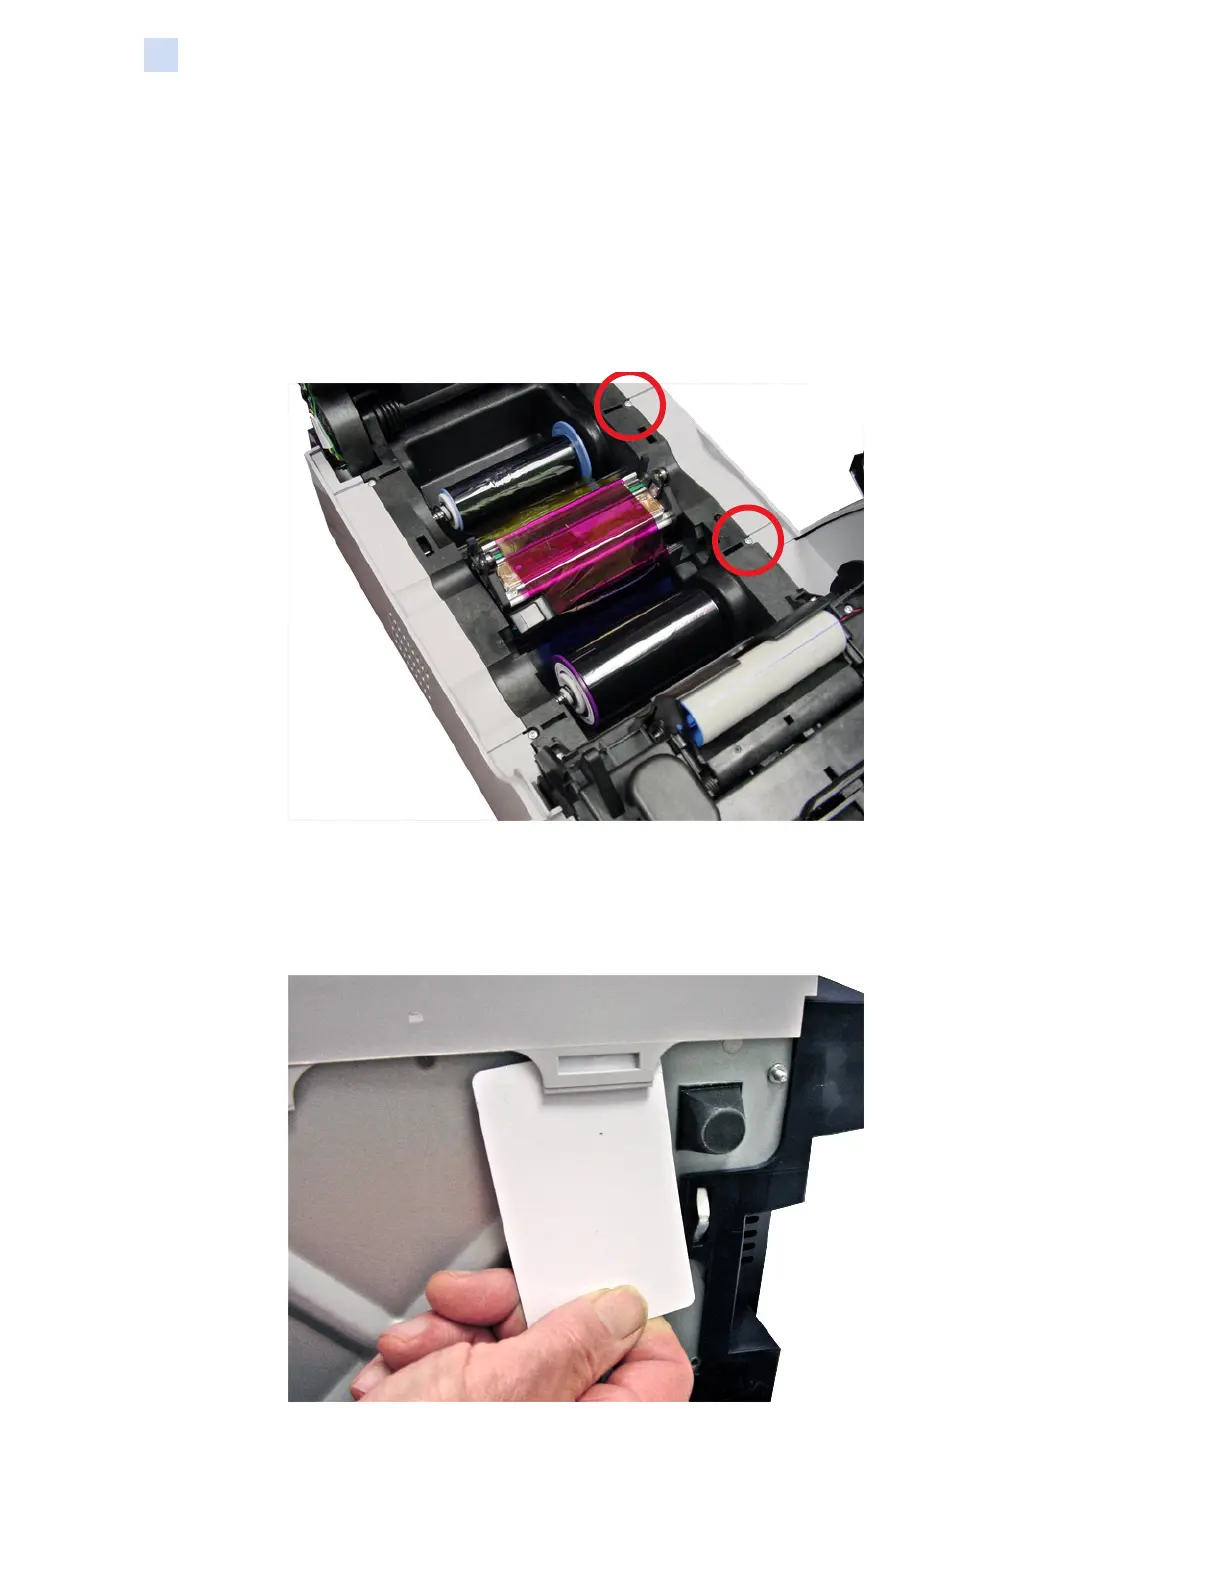
Step 2. With a TORX T10 driver, remove the two screws (circled below) holding the right side
cover in place.
Step 3. Set the printer on its left side.
Step 4. Lift the locking tab and slide a card under the lip of the front bezel to release. Leave
the card in place and release the other locking tab. Do not use a screwdriver as
damage may occur to the main PCBA.
Step 5. Lift the right side cover up and away from the printer thereby clearing the EMI line
lter.

Table of Contents

Questions and Answers:

Question and Answer IconNeed help?

Do you have a question about the Zebra ZXP 9 Series and is the answer not in the manual?

Zebra ZXP 9 Series Specifications

General IconGeneral
Resolution300 dpi
Card Capacity Output100 cards
Memory64 MB
InterfaceUSB, Ethernet
Operating Humidity20% to 80% non-condensing
Print TechnologyDye Sublimation
Print Speed YMCKUp to 190 cards/hour
Card Capacity Input100 cards
Card SizesCR-80 ISO 7810
ConnectivityUSB, Ethernet
Operating SystemWindows, Linux
OptionsMagnetic stripe encoding
Power Requirements100-240V AC, 50/60Hz
Operating Temperature15°C to 35°C
Card Thickness10-40 mil

Related product manuals