EasyManuals Logo

Zebra ZXP 9 Series User Manual

Zebra ZXP 9 Series
450 pages
To Next Page IconTo Next Page
To Previous Page IconTo Previous Page
Page #259 background imageLoading...
Page #259 background image
P1086708-001 ZXP Series 9 Card Printer Service Manual 251
Replacement Procedures for the Printer
Procedures: Transfer Station Assembly
Transfer Station Assembly
For replacement, use Kit Transfer Station Assembly 105936G-109. Contact Zebra Customer
Service at +01 877-275-9327 for ordering information.
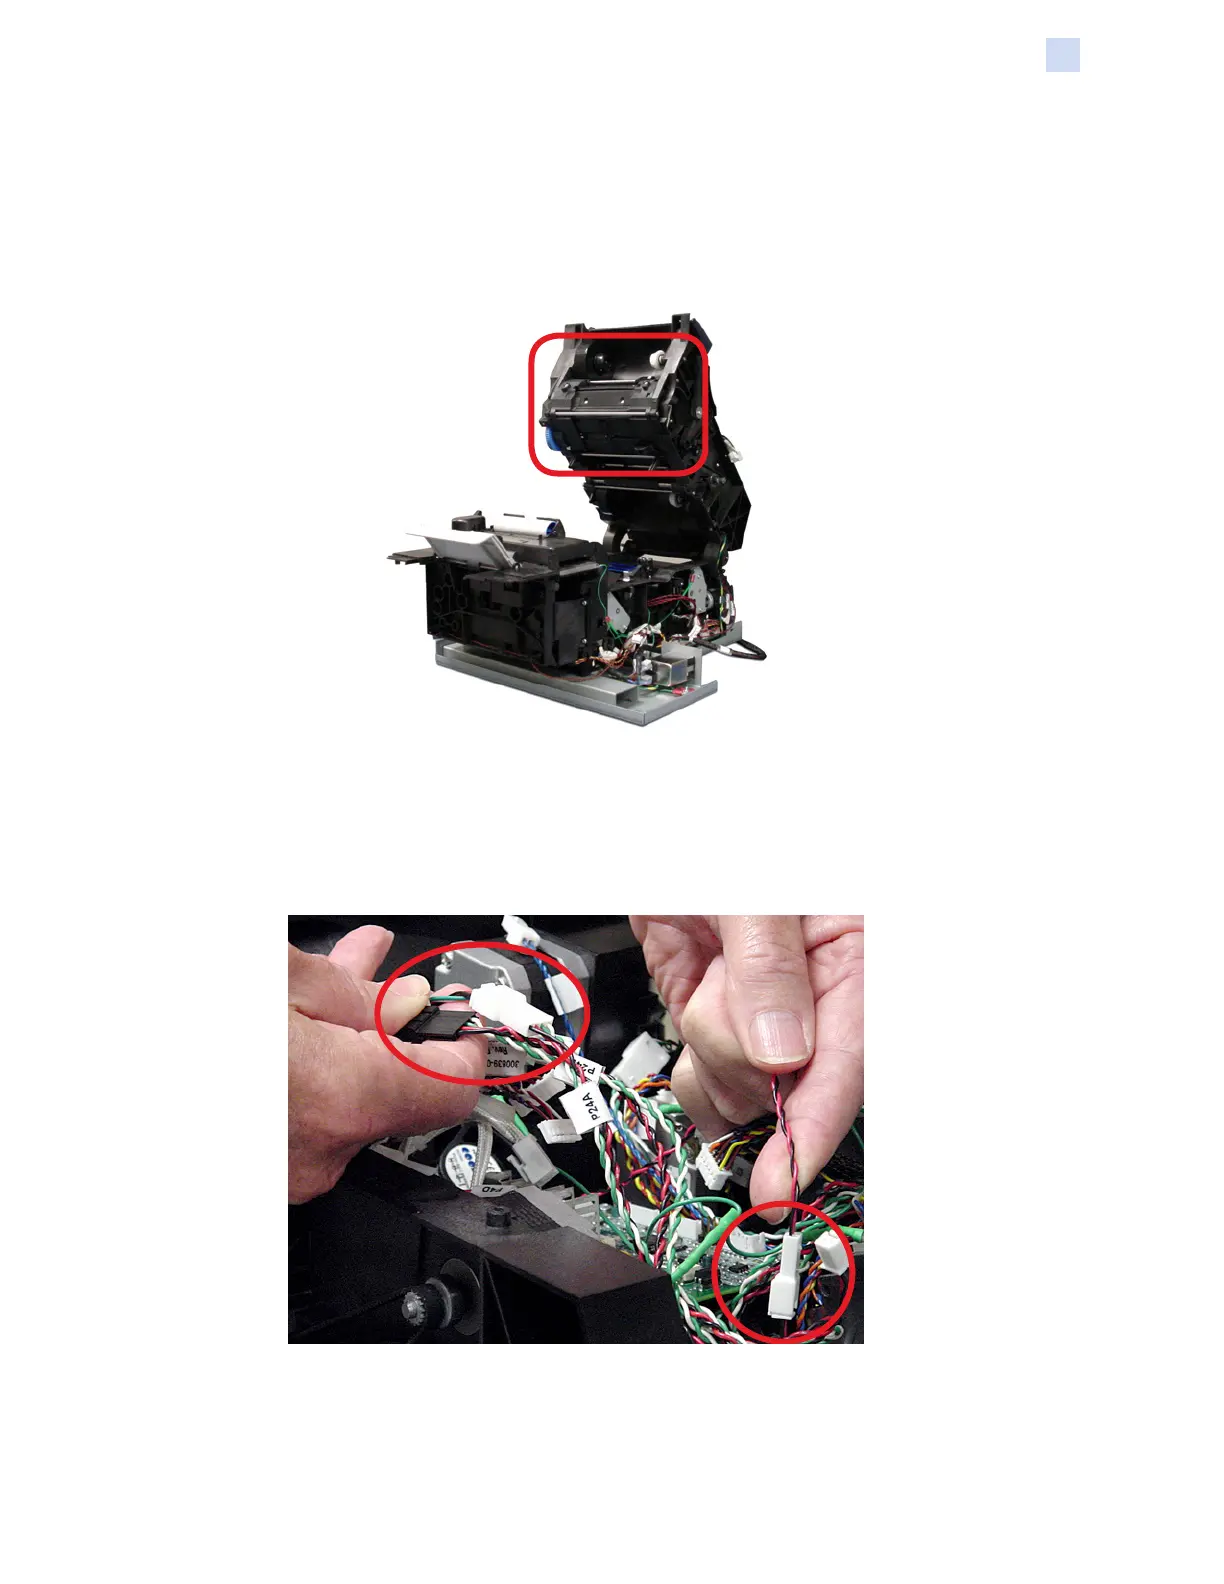
Step 1. Locate the transfer station assembly.
Step 2. If not already done, remove the transfer lm and disconnect J2, J3, J4, J6, and J7
from the halogen lamp control PCBA (see “Halogen Lamp Control PCBA” on page
249 for details).
Step 3. Disconnect P24A, P24B, and the fan (circled below). Note: To avoid confusion when
reinstalling, mark each plug and associated connector.

Table of Contents

Questions and Answers:

Question and Answer IconNeed help?

Do you have a question about the Zebra ZXP 9 Series and is the answer not in the manual?

Zebra ZXP 9 Series Specifications

General IconGeneral
Resolution300 dpi
Card Capacity Output100 cards
Memory64 MB
InterfaceUSB, Ethernet
Operating Humidity20% to 80% non-condensing
Print TechnologyDye Sublimation
Print Speed YMCKUp to 190 cards/hour
Card Capacity Input100 cards
Card SizesCR-80 ISO 7810
ConnectivityUSB, Ethernet
Operating SystemWindows, Linux
OptionsMagnetic stripe encoding
Power Requirements100-240V AC, 50/60Hz
Operating Temperature15°C to 35°C
Card Thickness10-40 mil

Related product manuals