EasyManuals Logo

Zebra ZXP 9 Series User Manual

Zebra ZXP 9 Series
450 pages
To Next Page IconTo Next Page
To Previous Page IconTo Previous Page
Page #317 background imageLoading...
Page #317 background image
P1086708-001 ZXP Series 9 Card Printer Service Manual 309
Replacement Procedures for the Printer
Procedures: Print Engine (from Base Plate)
Print Engine (from Base Plate)
Step 1. From the left side of the printer, disconnect all connections (plugs and grounds) from
the print engine to the main PCBA and base plate.
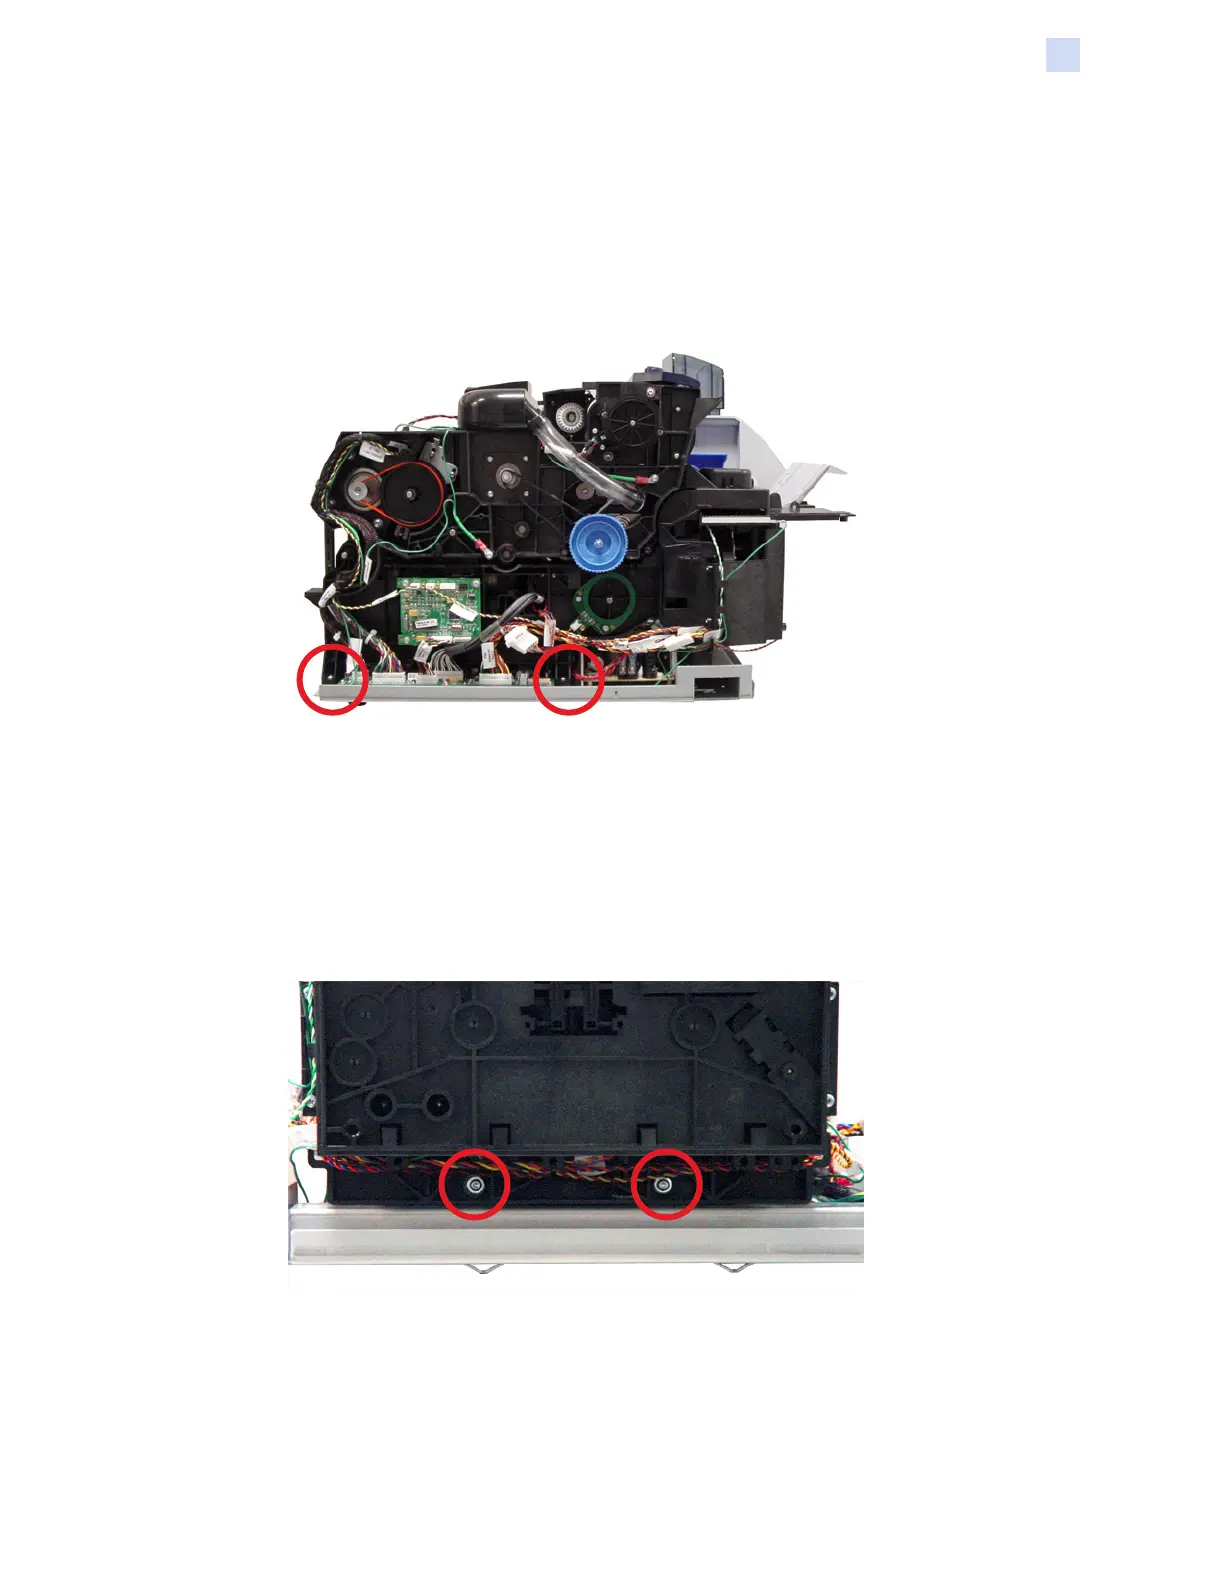
Step 2. With a TORX T10 driver, remove the two left-side screws (circled below) holding the
print engine to the base plate.
Step 3. From the right side of the printer, disconnect all connections (plugs and grounds)
from the print engine to the main PCBA and base plate. Use a 5.5 mm hex driver to
remove the three grounds.
Step 4. With a TORX T10 driver, remove the two right-side screws holding the print engine to
the base plate.
Step 5. With a TORX T10 driver, remove the two front screws (circled below) holding the
print engine to the base plate.
Step 6. Unplug the two EMI line lter connectors.

Table of Contents

Questions and Answers:

Question and Answer IconNeed help?

Do you have a question about the Zebra ZXP 9 Series and is the answer not in the manual?

Zebra ZXP 9 Series Specifications

General IconGeneral
Resolution300 dpi
Card Capacity Output100 cards
Memory64 MB
InterfaceUSB, Ethernet
Operating Humidity20% to 80% non-condensing
Print TechnologyDye Sublimation
Print Speed YMCKUp to 190 cards/hour
Card Capacity Input100 cards
Card SizesCR-80 ISO 7810
ConnectivityUSB, Ethernet
Operating SystemWindows, Linux
OptionsMagnetic stripe encoding
Power Requirements100-240V AC, 50/60Hz
Operating Temperature15°C to 35°C
Card Thickness10-40 mil

Related product manuals