EasyManuals Logo

Zebra ZXP 9 Series User Manual

Zebra ZXP 9 Series
450 pages
To Next Page IconTo Next Page
To Previous Page IconTo Previous Page
Page #348 background imageLoading...
Page #348 background image
340 ZXP Series 9 Card Printer Service Manual P1086708-001
Replacement Procedures for the Printer
Procedures: Card Transport Assembly
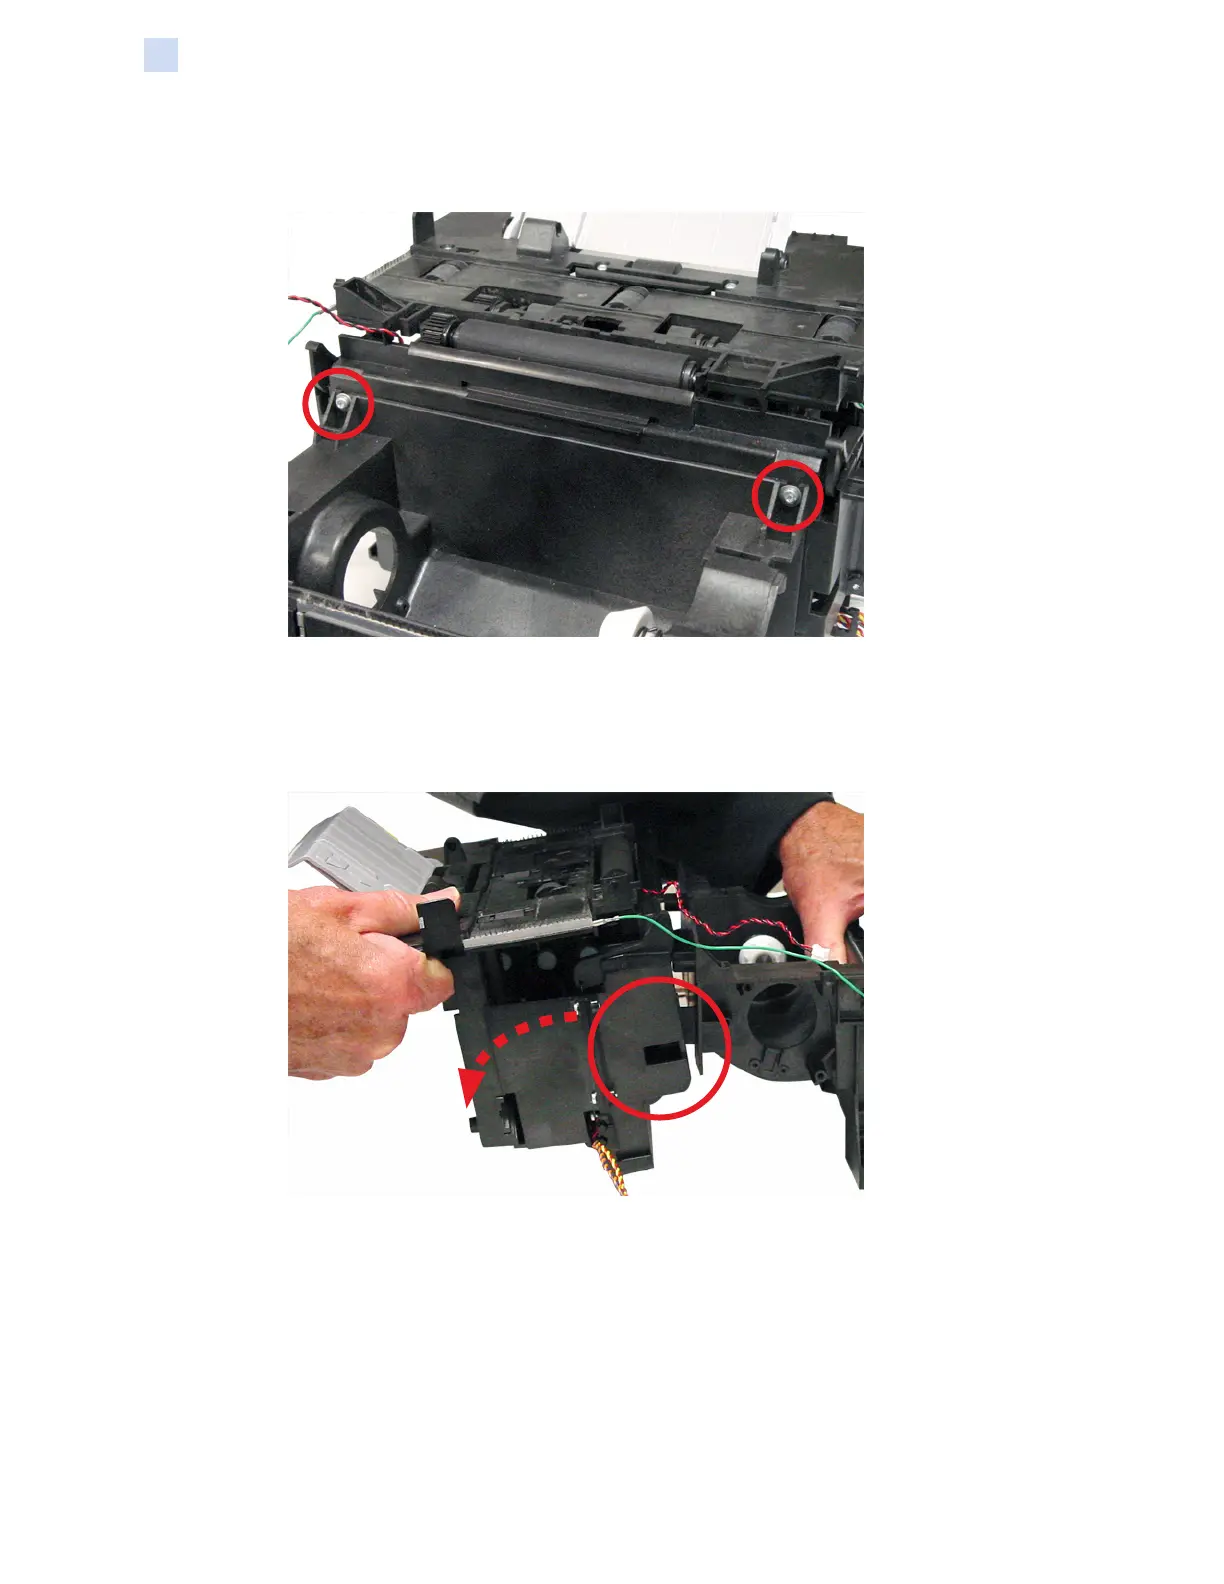
Step 5. With a TORX T10 driver, remove the two screws (circled below) that hold the card
transport assembly to the frame.
Step 6. Release the two locking tabs. Note that these tabs can be reached via the two
access holes (circled below), one on each side of the card transport assembly.
Step 7. Pull out and downward (arrow below) to free the card transport assembly from the
frame; then remove the single-card feed tray.
Step 8. Set the card transport assembly aside.

Table of Contents

Questions and Answers:

Question and Answer IconNeed help?

Do you have a question about the Zebra ZXP 9 Series and is the answer not in the manual?

Zebra ZXP 9 Series Specifications

General IconGeneral
Resolution300 dpi
Card Capacity Output100 cards
Memory64 MB
InterfaceUSB, Ethernet
Operating Humidity20% to 80% non-condensing
Print TechnologyDye Sublimation
Print Speed YMCKUp to 190 cards/hour
Card Capacity Input100 cards
Card SizesCR-80 ISO 7810
ConnectivityUSB, Ethernet
Operating SystemWindows, Linux
OptionsMagnetic stripe encoding
Power Requirements100-240V AC, 50/60Hz
Operating Temperature15°C to 35°C
Card Thickness10-40 mil

Related product manuals