EasyManuals Logo

Zebra ZXP 9 Series User Manual

Zebra ZXP 9 Series
450 pages
To Next Page IconTo Next Page
To Previous Page IconTo Previous Page
Page #358 background imageLoading...
Page #358 background image
350 ZXP Series 9 Card Printer Service Manual P1086708-001
Replacement Procedures for the Laminator
Procedures:
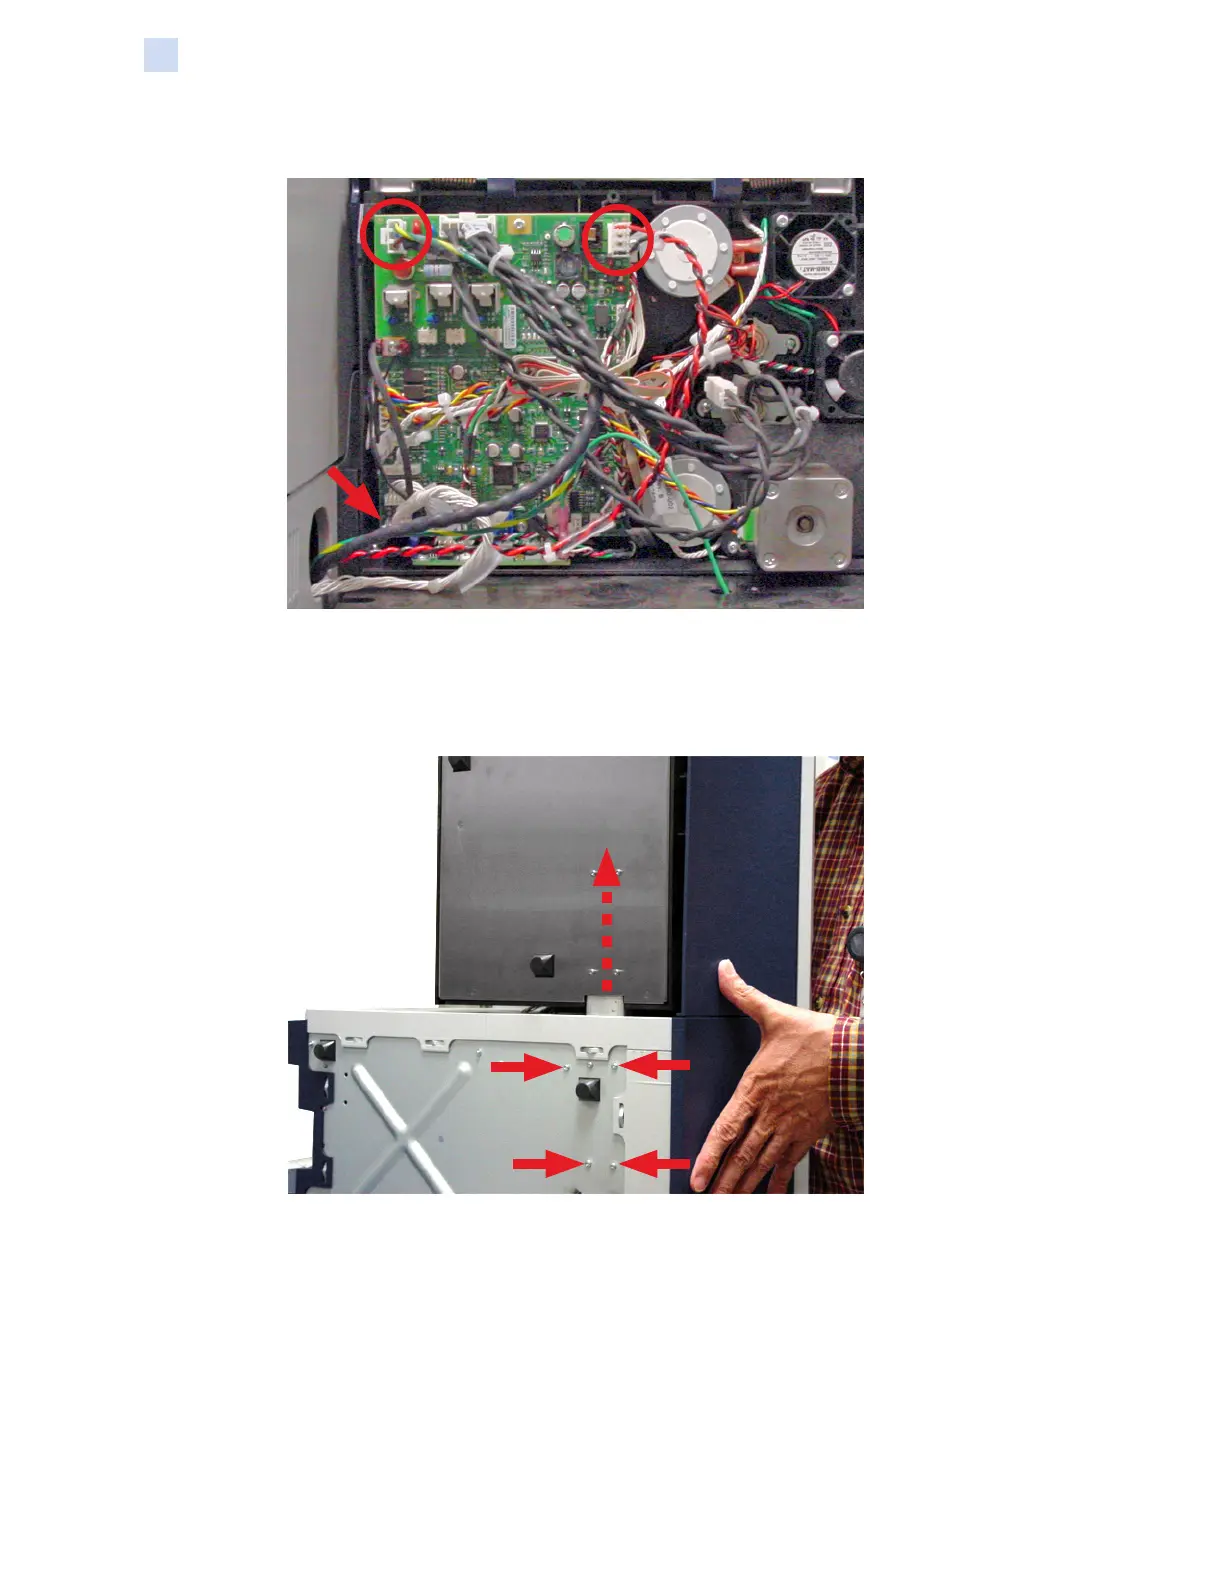
Step 5. Unplug the AC power cable from J8, EXTERNAL PWR.
Step 6. Unplug the DC power cable from J15, DC PWR INPUT.
Step 7. Unplug the logic interface cable from J14 (arrow above).
Step 8. Set the printer on its right side.
Step 9. Remove the four machine screws (arrows above) that attach the laminator (via the
support attachment beam) to the printer.
Step 10. While supporting the printer, slide the support attachment beam and laminator out of
the slot (dashed arrow above) on the left side of the printer.

Table of Contents

Questions and Answers:

Question and Answer IconNeed help?

Do you have a question about the Zebra ZXP 9 Series and is the answer not in the manual?

Zebra ZXP 9 Series Specifications

General IconGeneral
Resolution300 dpi
Card Capacity Output100 cards
Memory64 MB
InterfaceUSB, Ethernet
Operating Humidity20% to 80% non-condensing
Print TechnologyDye Sublimation
Print Speed YMCKUp to 190 cards/hour
Card Capacity Input100 cards
Card SizesCR-80 ISO 7810
ConnectivityUSB, Ethernet
Operating SystemWindows, Linux
OptionsMagnetic stripe encoding
Power Requirements100-240V AC, 50/60Hz
Operating Temperature15°C to 35°C
Card Thickness10-40 mil

Related product manuals