Commissioning B 3
ekrPro Com
60
web guide controller EDV No.: MD.191.01.05/1.6.x Chapter: B 3
with analog sensors Date: 23.11.2007 Page: 10/73
B 3.5.2 Carry out master setup
The sensor type will already have been set when the standard
system was set.
The procedure is described for Sensor 1.
The master set-up for Sensors 2 and 3 is the same.
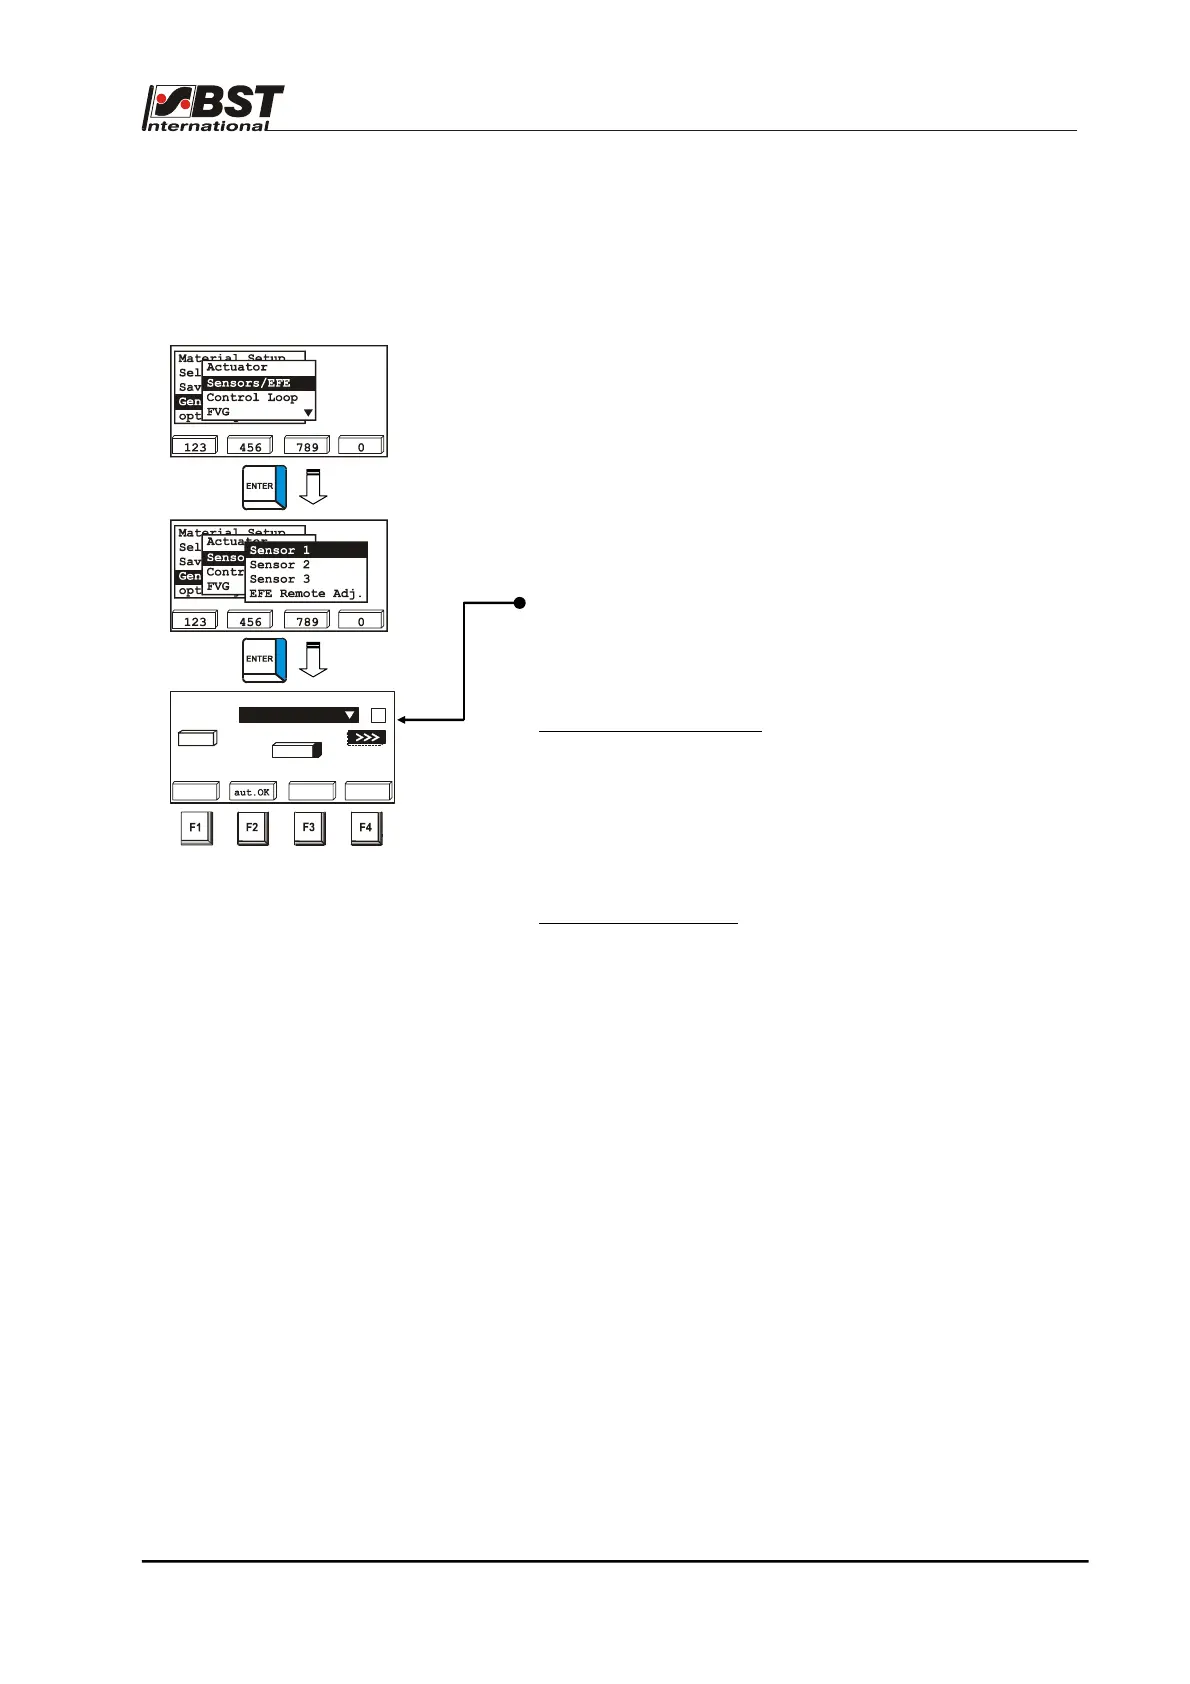
1. Select Sensors/EFE in General set-up and then select the
Sensor 1 sub-directory afterwards. Confirm the respective
selection by pressing ENTER.
2. Select the type of sensor that is connected to the system from
the option list displayed in the new window that has opened
up and then enter it.
Attention!
If the mounting position of the selected sensor differs from the
BST setting (see chapter A 1.4) or if the sensor outputs an
inverted signal (e.g. another manufacturer’s sensor is being
used), then the checkbox Inv. must be checked.
A master set-up will be carried out afterwards.
Master set-up can be run automatically or manually.
3. Automatic master set-up:
► Press the F1 button and then cover the sensor’s scanning
window with an opaque material for two seconds
afterwards.
► Remove the material from the scanning window and press
the F2 button two seconds later.
► This completes the master set-up for this sensor.
4. Manual master set-up:
► Cover the sensor’s scanning window with an opaque
material and then press the F3 button.
► Remove the material so that the window is completely
uncovered and press the F4 button.
5. Run the master set-ups for Sensors 2 and 3.
Select a sensor type
sensor1
dark
bright
-2048 abs. 1775
2047
auto
dark
bri.
<<<
IR 2005
Inv.
7%