5
-6
Apr. 2007
DSC48
1.2.5 CRAWLER
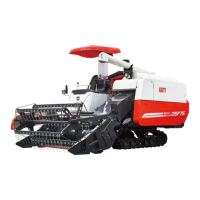
A. ADJUSTMENT OF CRAWLER TENSILITY
1. Check the gap between the 2nd roller (from the front)
and crawler. If the gap is out of the specifi ed range, ad-
just it.
2. Check whether the tensility of both crawlers is the
same.
B. REPLACEMENT OF CRAWLER
1. Detach the reaping unit.
• Refer to page 3-5 (detachment of reaping unit).
2. Crawler
a. Set the jack under the center of the main frame and
lift the crawler off the ground.
b. Lift the rear side of the main frame to remove the
crawler.
c. Remove the snap pin (2), plain washer and fixing
plate (3).
d. Turn the tension bolt (1) to move the wheel tension (5)
toward the frame (4). Then, remove the crawler.
<When assembling>
Installation is carried out in reverse order of removal.
417W508A
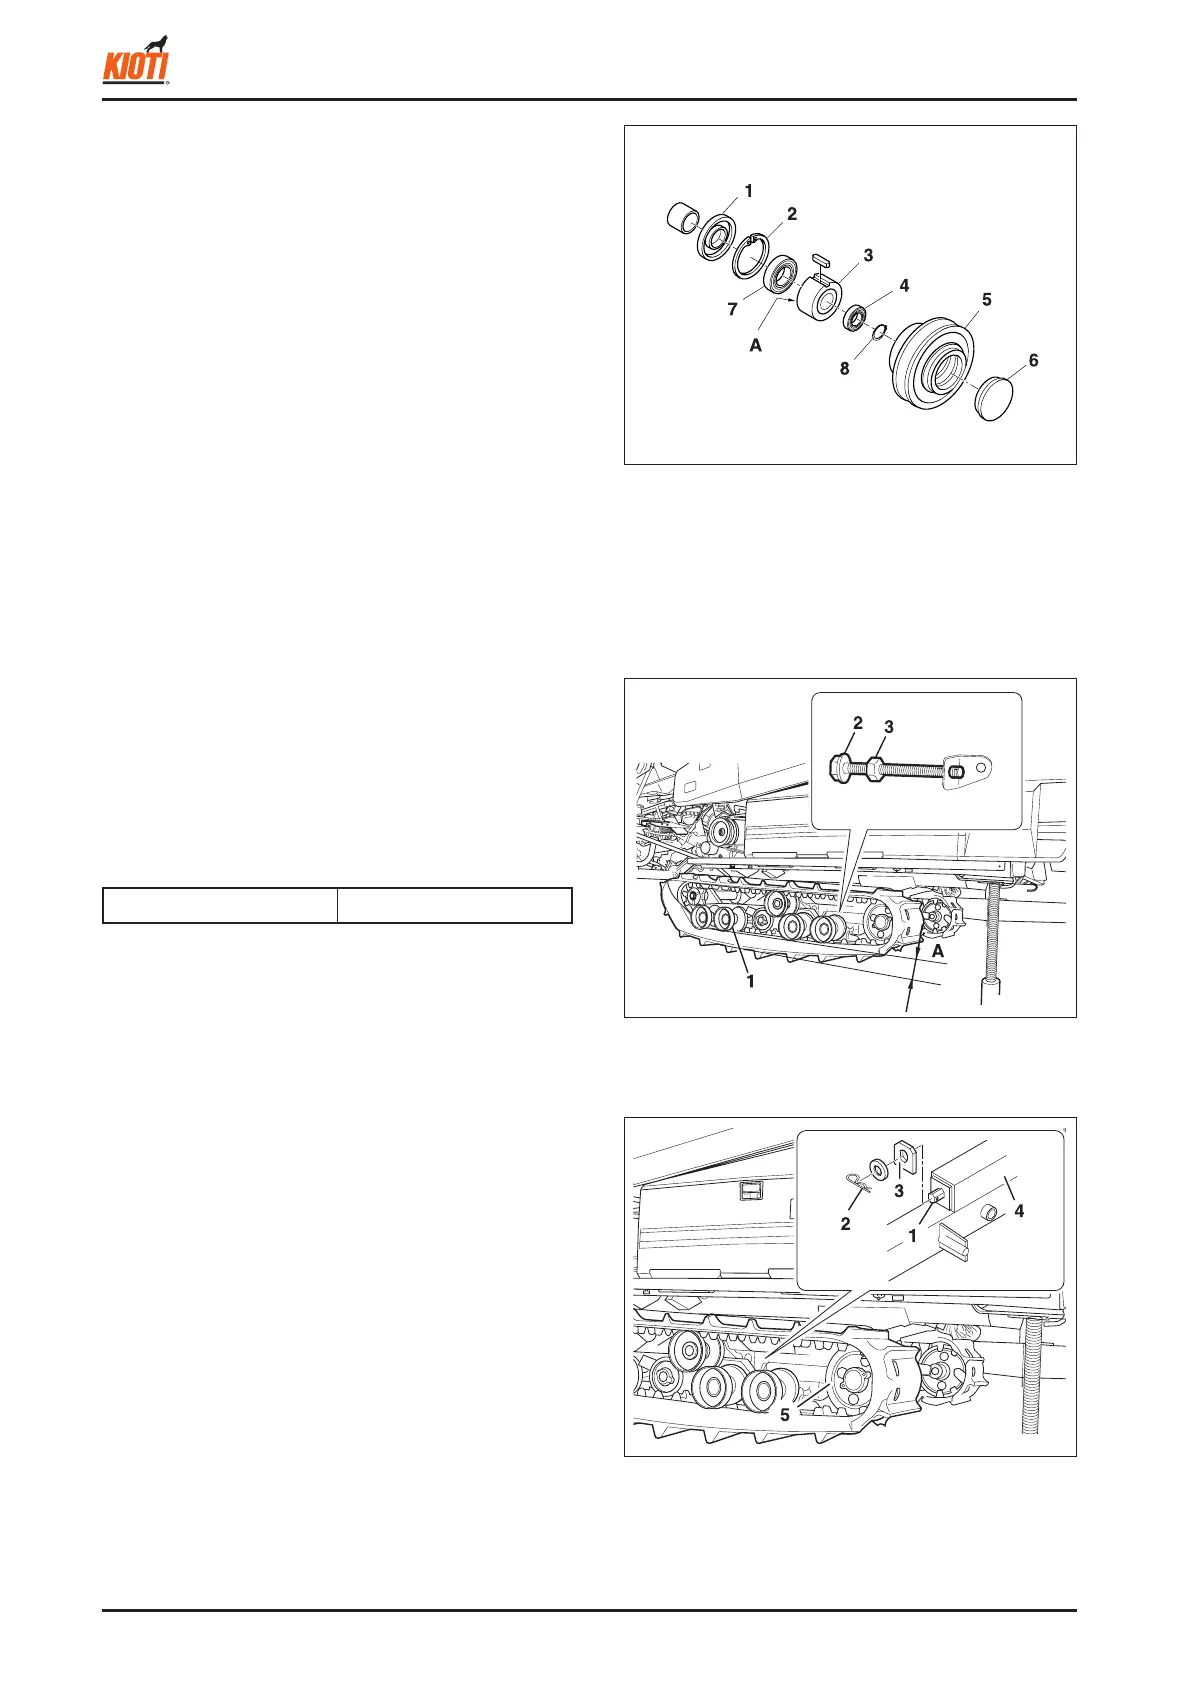
1.2.4 CAM CLUTCH OF REAPING DRIVE
PULLEY
1. Remove the seal plug (6) and shaft snap ring (8).
2. Remove the reaping drive pulley (5) by turning it clock-
wise (from the seal plug side) and pulling it out.
<When assembling>
1. Apply grease to the gap between balls of the two ball
bearing units (4 & 7).
2. Apply grease to the inner surface of the oil seal (1).
3. When installing the cam clutch (3), make sure that its
marked side is facing the oil seal (1) (transmission case
side).
4. When installing the reaping drive pulley to the shaft,
turn the pulley counterclockwise. Do not tap it with a
rubber hammer.
5. Apply instant glue to the outer surface of the seal plug
(6).
(1) Oil seal (6) Seal plug
(2) Hole snap ring (7) Ball bearing unit
(3) Cam clutch (8) Shaft snap ring
(4) Ball bearing unit (A) Marked direction
(5) Reaping drive pulley
417W509A
(1) Roller (3) Mounting nut
(2) Tensility bolt (A) 13 ~ 18 mm
417W510A
3. Apply grease to the crawler tension bolt.
(1) Tension bolt (4) Frame
(2) Snap pin (5) Roller tension
(3) Fixing plate
Tensility (when installed) 13 ~ 18 mm