Chapter 8 - Monitoring Standard Screen
110 Apollo Operator’s Manual
Part Number: 90 38 237, 6th edition
Customizing the Standard Screen
Display
Selecting a Default Layout
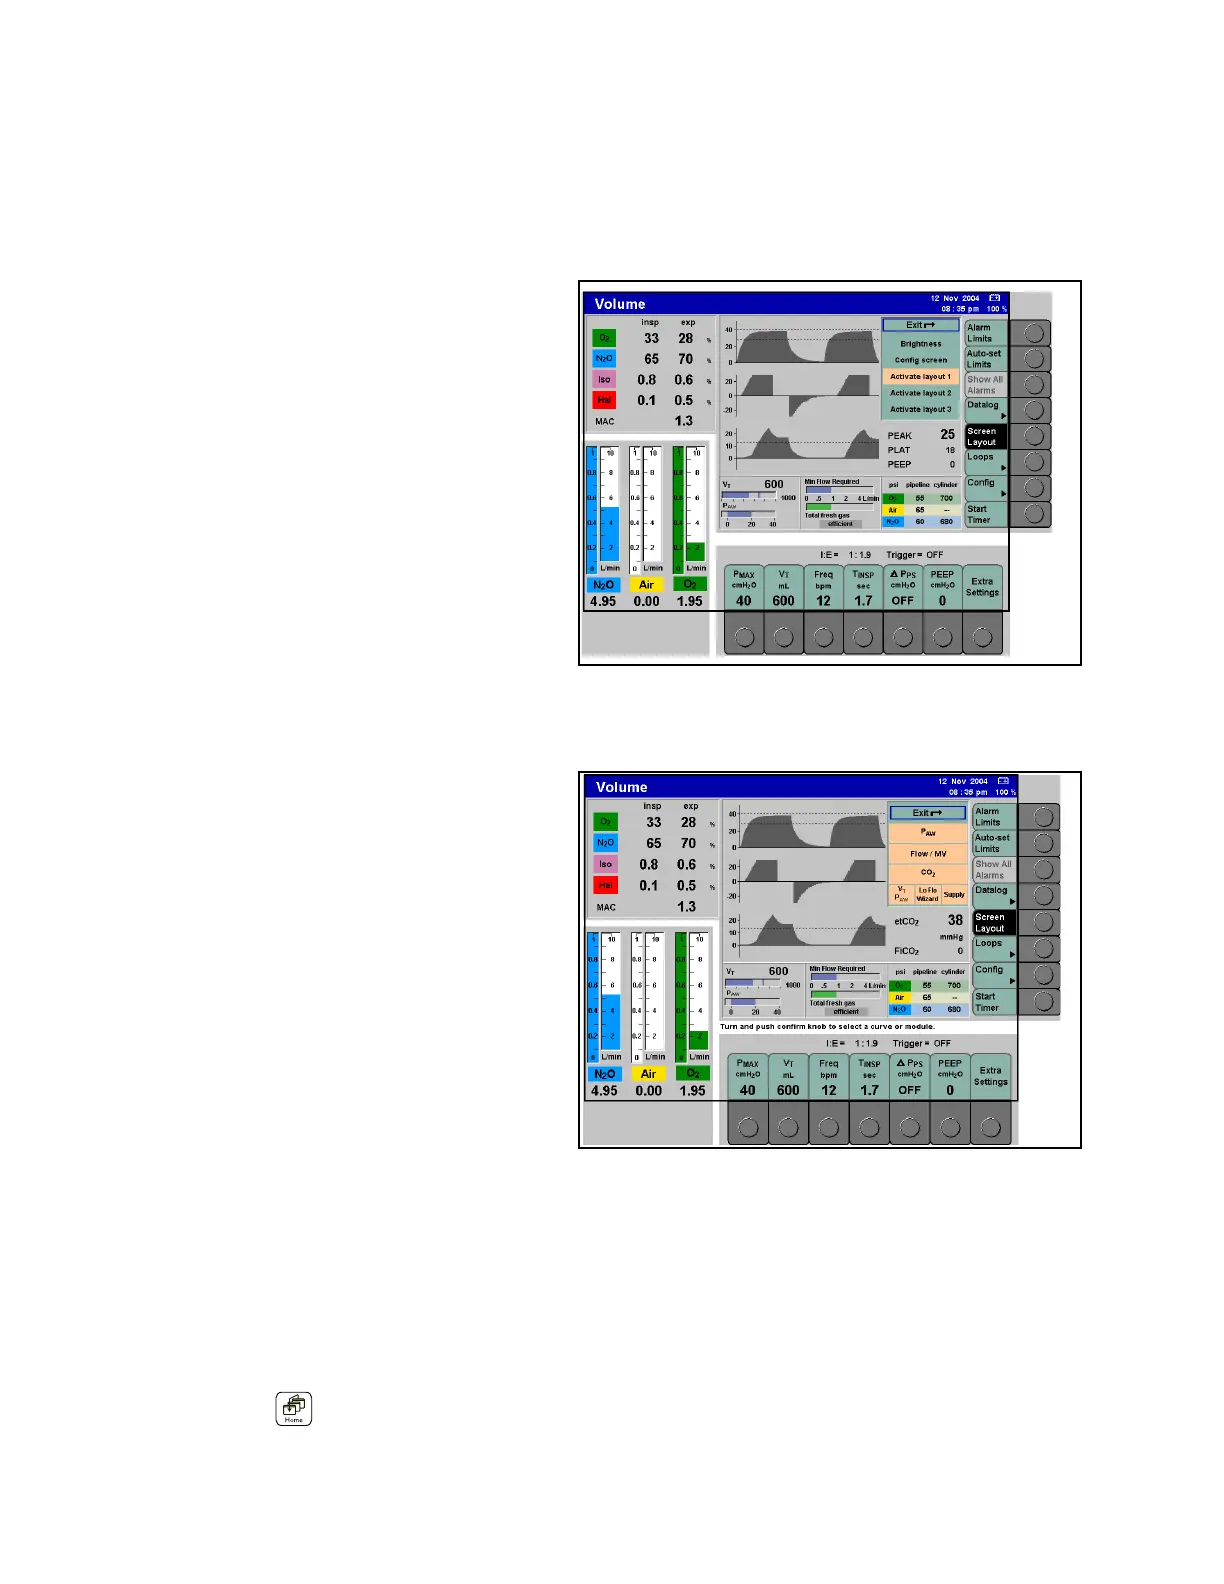
Figure 78. Standard Screen - Screen Layout Window
The user can select a default screen layout for the
standard screen. The selection determines the three
curves that are displayed, as well as the three
modules that are shown below the curves.
Three default layouts are available. They can only be
configured in the Standby Configuration screen. See
the “Configuration” section of the manual for
complete information.
1. Press the >Screen Layout< key on the standard
screen (1 in Figure 78). The screen layout
window appears (2 in Figure 78), with the
currently selected layout highlighted.
2. Turn the confirm knob to select a different layout,
and press the knob to confirm.
The screen layout window is removed and the
standard screen is displayed with the selected
layout.
Modifying Current Layout
Figure 79. Standard Screen - Screen Config. Window
The user can also modify the layout of the currently
selected screen:
1. Press the >Screen Layout< key on the standard
screen (1 in Figure 78). The screen layout
window appears (2 in Figure 78).
2. Turn the confirm knob to select the
>Config screen< option, and press the knob to
confirm. The screen configuration window
appears (1 in Figure 79).
The top three options in the configuration window
are used to select the curves to be displayed,
and the bottom three options determine the
modules to be displayed below the curves.
3. Turn the confirm knob to select an option, and
press the knob to confirm. The option becomes
highlighted in yellow.
4. Turn the confirm knob until the desired curve or
module is displayed, and press knob to confirm.
Continue to select other curves/modules.
5. Exit the config window by either:
• confirming the exit symbol >
z< with the
confirm knob, or
• pressing the > < key.
1
2
1