Displaying and Setting Alarm Limits Chapter 9 - Alarms
Apollo Operator’s Manual 141
Part Number: 90 38 237, 6th edition
Displaying and Setting Alarm
Limits
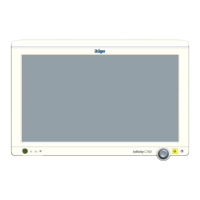
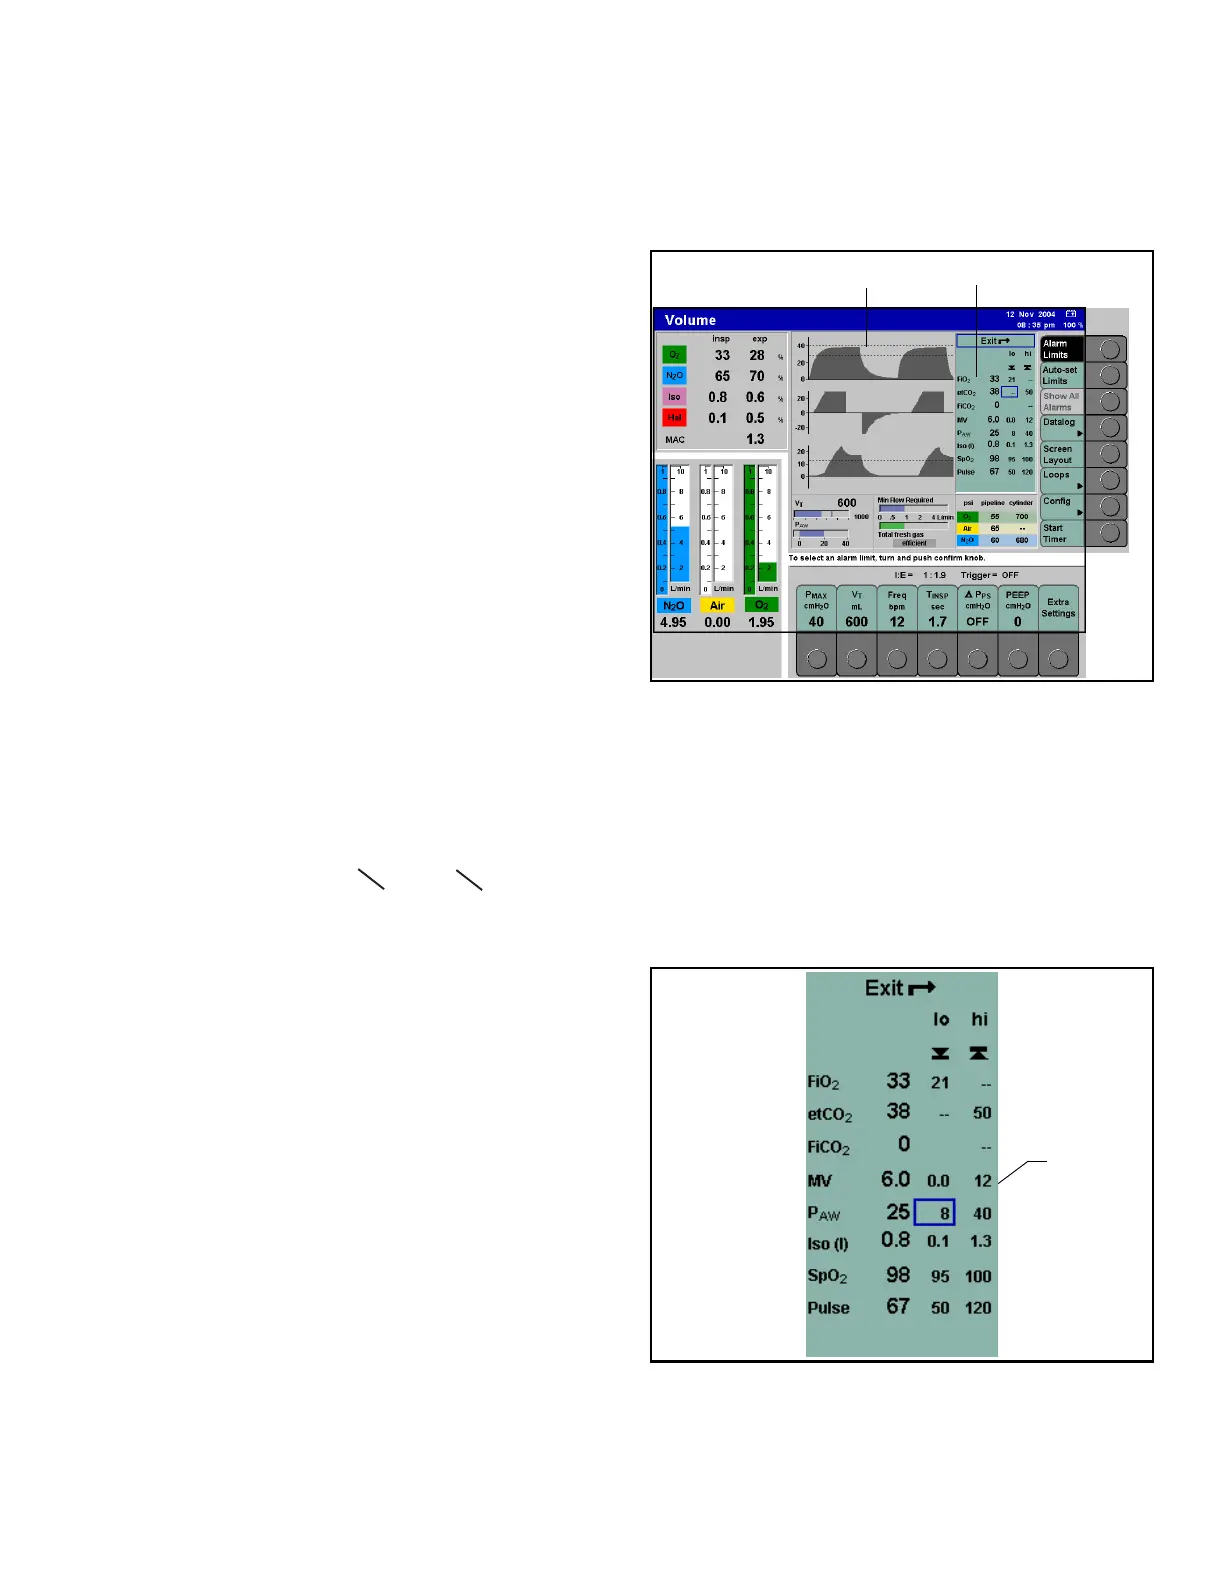
Figure 108. Alarm Limits MenuThe user can configure alarms in the Standby
configuration screen to be used as defaults (see the
”Configuration” chapter of this manual). In addition,
the user can change alarm limits during operation via
the alarms limits menu as described below.
The alarm limits menu can be displayed from all
three basic screens (standard, data, and trend). It is
used to change or disable alarm limits during
operation to customize alarms to the patient.
To display the alarm limits menu during operation:
• Press the >Alarm Limits< soft key (1 in Figure
108).
When the alarm limits menu appears, the standard
screen is automatically displayed, regardless of
which screen was displayed previously. The alarm
limits menu is displayed on the right side of the
screen next to the curves (2 in Figure 108). The
menu lists the parameters, their current measured
values, and the current low and high alarm limits. The
alarm limits also appear on the curves as dashed
lines (3 in Figure 108).
A disabled alarm limit is indicated by two dashes (--).
Alarm limits that have been disabled globally by the
user (see page 139) are indicated in the alarm limits
menu by the symbols “ “ and “
“. These
symbols cannot be selected with the cursor.
Figure 109. Placing the CursorNote: If configured, the alarm limits menu is
opened automatically whenever an alarm
limit is violated. See the “Configuration”
chapter of this manual for information on
enabling/disabling this function.
To set an alarm limit:
1. Turn the confirm knob to place the cursor on the
desired alarm limit (Figure 109 shows the cursor
on the P
AW low alarm limit), and push to confirm.
The alarm limit becomes highlighted in yellow.
2. Turn the confirm knob until the desired value is
displayed, and push to confirm.
The new alarm limit is now active. The cursor returns
to the exit “
z“ symbol.
1
2
3
>
<
Cursor