Chapter 5 - Preuse Checkout Checking the Workstation According to the Check List
64 Apollo Operator’s Manual
Part Number: 90 38 237, 6th edition
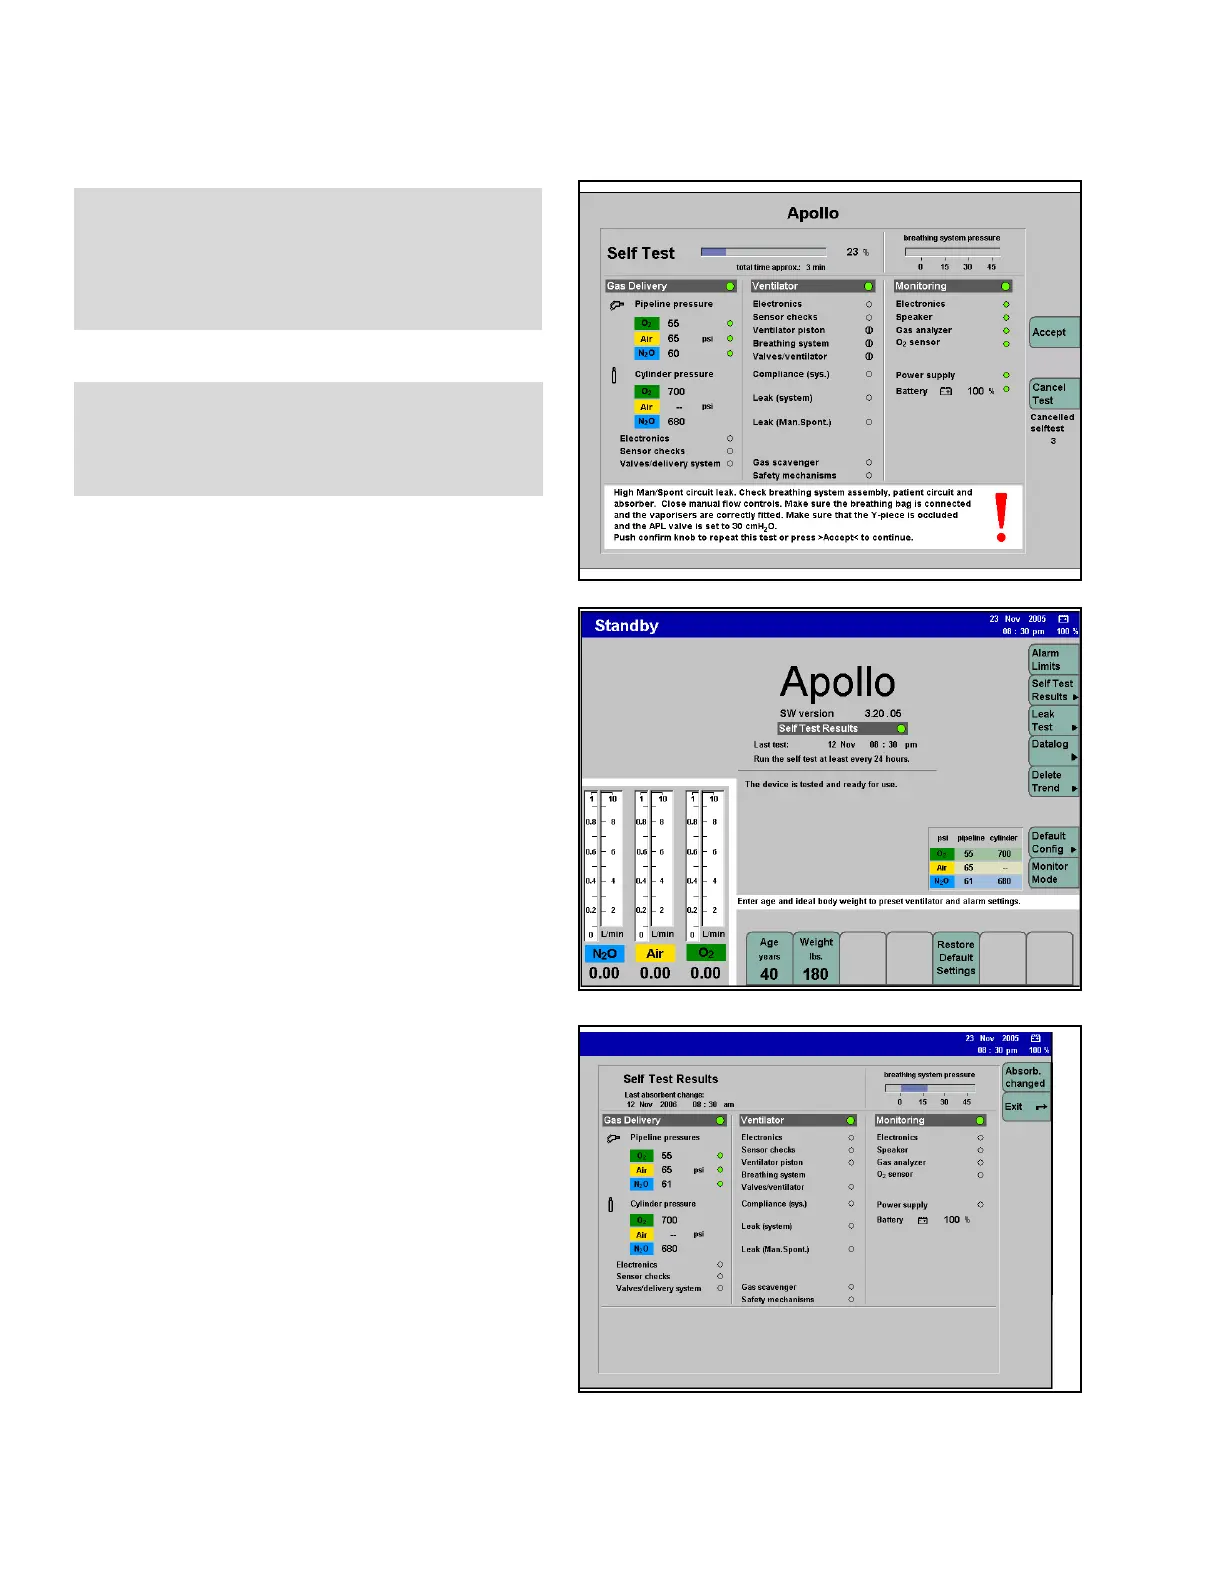
Figure 46. Non-Critical Error During Self Test
Figure 47. Standby Screen Following Self-Test
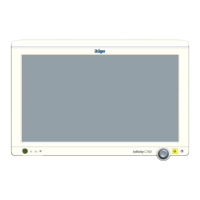
When the self test is completed, the system switches
to Standby mode. The results of the self test are
indicated on the screen by a color-coded circle (1 in
Figure 47): a green circle means the test was
successful, a yellow circle means the machine is
conditionally functional, and an empty circle means
that the self test was aborted. In addition, a message
containing instructions for further procedures, if any,
appears in the middle of the screen (2 in Figure 47).
Figure 48. Self Test Results ScreenMore specific results can be displayed by pressing
the >Self Test Results< key on the Standby screen
(3 in Figure 47). The Self Test Results screen
appears (Figure 48).
The Self Test Results screen contains the >Absorb.
changed< key (1 in Figure 48). If the absorbent is
changed between cases, this key can be pressed to
log the date and time. The label of the key then
changes to >Undo Change<, and can be pushed
again to undo the absorbent change information. The
absorbent change information will be logged in the
system when the Self Test Results screen is exited.
WARNING !
Errors highlighted in red during the self test
must be remedied before starting operation (for
example, if there is no O
2
supply).
CAUTION !
If the flow sensor or gas sensor is not operational,
adequate substitute monitoring must be ensured
before starting the workstation.
1
3
2
1