2. Replacement and adjustment of parts
27440-5
2/3
27440-5
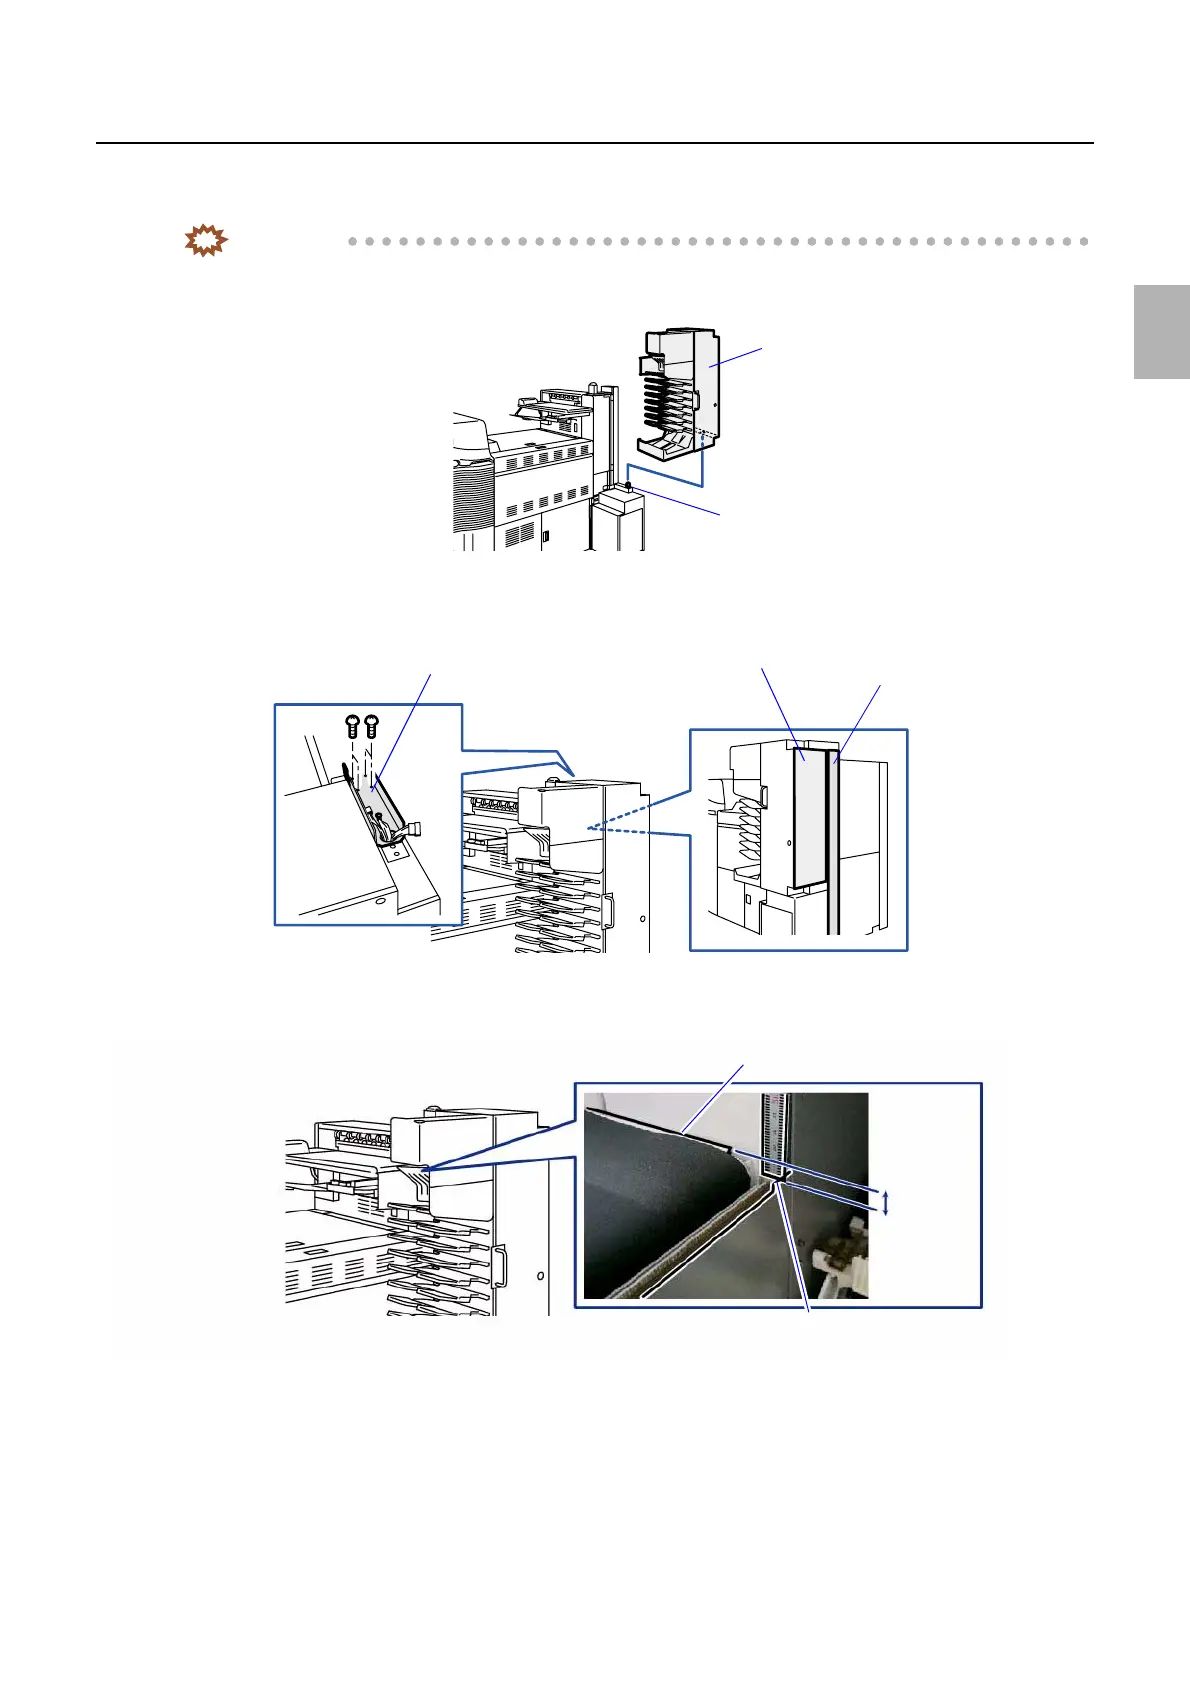
Order sorter section
3. Place the print sorter unit on the print sorter unit mount so that the pin of the print sorter unit mount is
inserted into the attaching hole of the print sorter unit.
IMPORTANT
• Do not remove your hand supporting the print sorter unit until the pin of print sorter unit mount is certainly
inserted into the attaching hole, and the screws for attaching the angle bracket are attached.
4. Fix the angle bracket. (four screws)
Install the print sorter unit so that the side surface of the print sorter unit and the face of the pole are aligned.
5. After installing the print conveyer unit, confirm that the length between the print conveyer unit upper side
and the paper guide upper side is 9±1 mm.
Print sorter unit
Pin
G081211
Angle bracket
Side surface of the print sorter unit
Pole
G090259
Print conveyer unit upper side
Paper guide upper side
9±1 mm
G090267
Distributed by: minilablaser.com