20. Tracking Oscillator Adjustment (Option 002)
Procedure
1.
2.
Remove the A10 Tracking Generator Assembly as described in Chapter 3. With the A10
Tracking Generator positioned next to the the HP 8560A, reconnect W14 (lo-wire ribbon
cable) to
AlOJl.
Reconnect W48 to AlOJ8. Connect the 50
R
termination to AlOJ3.
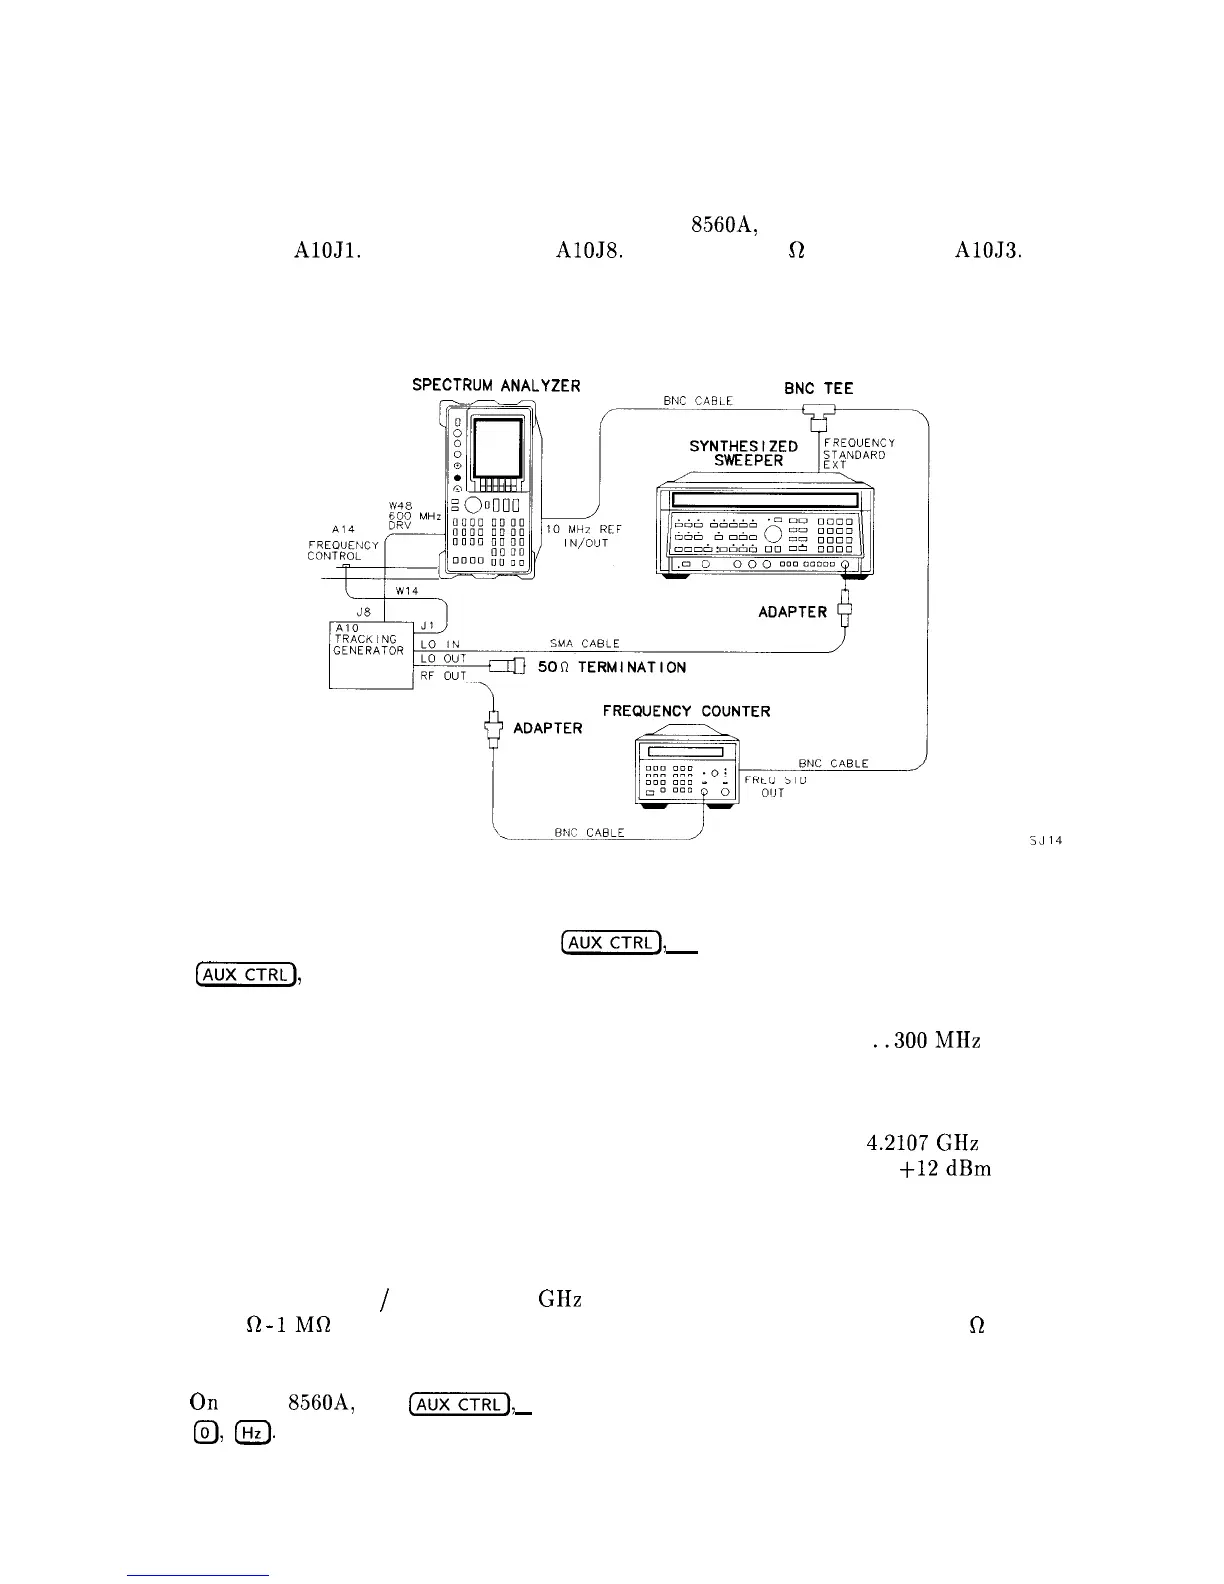
Connect the equipment as shown in Figure 2-23. The frequency counter provides the
frequency reference for the synthesized sweeper and the HP 8560A.
SPECTRUM
ANALYZER
BNC
TEE
SJ14
Figure 2-23. Tracking Oscillator Adjustment Setup
3. Set the HP 8560A LINE switch on. Press
(mCTRL),
TRACKING GENRATOR , SRC PWR ON,
(AUX-),
REAR PANEL, and 10 MHz EXT . Allow the HP 8560A to warmup for at least
five minutes. Set the controls as follows:
CENTERFREQ
. . . . . . . . . . . . . . . . . . . . . . . . . . . . . . . . . . . . . . . . . . . .
..300MHz
SPAN
. . . . . . . . . . . . . . . . . . . . . . . . . . . . . . . . . . . . . . . . . . . . . . . . . . . . . . . . . . . 0 Hz
4. Press INSTR PRESET on the synthesized sweeper and set the controls as follows:
CW . . . . . . . . . . . . . . . . . . . . . . . . . . . . . . . . . . . . . . . . . . . . . . . . . . . . . . .
4.2107GHz
POWERLEVEL
. . . . . . . . . . . . . . . . . . . . . . . . . . . . . . . . . . . . . . . . . . . . .
+12dBm
FREQUENCY STANDARD Switch (rear panel) . . . . . . . . . . . . . . . . . . . . . . EXT
5. Set the frequency counter controls as follows:
SAMPLE RATE . . . . . . . . . . . . . . . . . . . . . . . . . . . . . . . . . . . . . . . . . . . . Fully CCW
10 Hz-500 MHz
/
500 MHz-26.5 GHz Switch
. . . . . . . . . . . . . . . . 10 Hz-500 MHz
50
R
-
1MR
Switch . . . . . . . . . . . . . . . . . . . . . . . . . . . . . . . . . . . . . . . . . . . . . . . 50 fl
6. Remove the dust cap screw used to seal the tracking oscillator adjustment.
7.
On
the HP
856OA,
press
(m),
TRACKING GEMRATOR , MORE 1 OF 3, MAN TRK ADJ ,
a,
a.
Rotate the knob counterclockwise until FINE TRACK ADJ is set to 0.
2-72 Adjustment Procedures