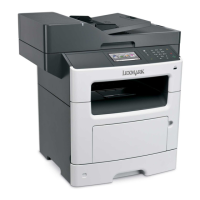
HCIT lift drive motor failure service check
Action Yes No
Step 1
Remove the media tray from the HCIT option and do the following:
• Remove all media and check the paper guides for damage. Move the
paper guide and verify if it can move freely from one position to
another.
• Check the media size finger flag for damage.
• Check the elevator plate. Manually lower down the elevator plate and
check if it springs back to its original position.
• Check the elevator tension cables if there are problems.
• Check the elevator gears for damage.
• Manually turn the drive gear and check if the other gears engaged to
it will also turn.
• Check if the tray can be inserted properly into the HCIT option.
Are the above components ok?
Go to step 2. Replace the media tray.
Go to
“HCIT removal”
on page 665.
Step 2
Remove the media tray and do the following:
• Check the lift drive gears for damage. Manually turn the gears, and
check if it causes the lift drive motor encoder to turn.
• Open the right cover and check the motor connections. Check the
motor cables for damage.
If there is a problem with the lift drive motor, then replace it. See
“HCIT
lift drive motor removal” on page 679.
Remove the left cover, and reseat the connector J1 on the controller
board. POR the machine.
Does the error remain?
Go to step 3. The problem is solved.
Step 3
Separate the HCIT from the printer. Remove also the remaining input
options. Check the HCIT interface cable. If damaged, then replace the
cable. See
“HCIT interface cable removal” on page 681.
Open the left cover, and reseat the connector J1 on the controller board.
POR the machine.
Does the error remain?
Go to step 4. The problem is solved.
Step 4
Remove all other options and install only the HCIT option.
Does the error remain?
Go to step 6. Go to step 5.
Step 5
Check the interface cable of the printer or upper level option for damage.
Is the above component still ok?
Go to step 6. Replace the interface
cable of the printer or
upper level option.
7463
Diagnostic information
298
 Loading...


