REGISTRATION
These settings adjust the margins of the black plane.
To set the Registration:
1 Print a Quick test page.
a From the Diagnostics menu, navigate to:
REGISTRATION > Quick Test
b Retain this page to determine the changes you need to make to the margin settings. The alignment diamonds
in the margins should touch the margins of the page.
The Quick test page contains the following information:
• Printer registration settings
• Code levels
• Alignment diamonds at the top, bottom, and each side
• Horizontal lines for skew adjustment
• General printer information, including current page count, installed memory, processor speed, serial
number, engine ID, and controller board ID
2 Change the value of any of the margin settings.
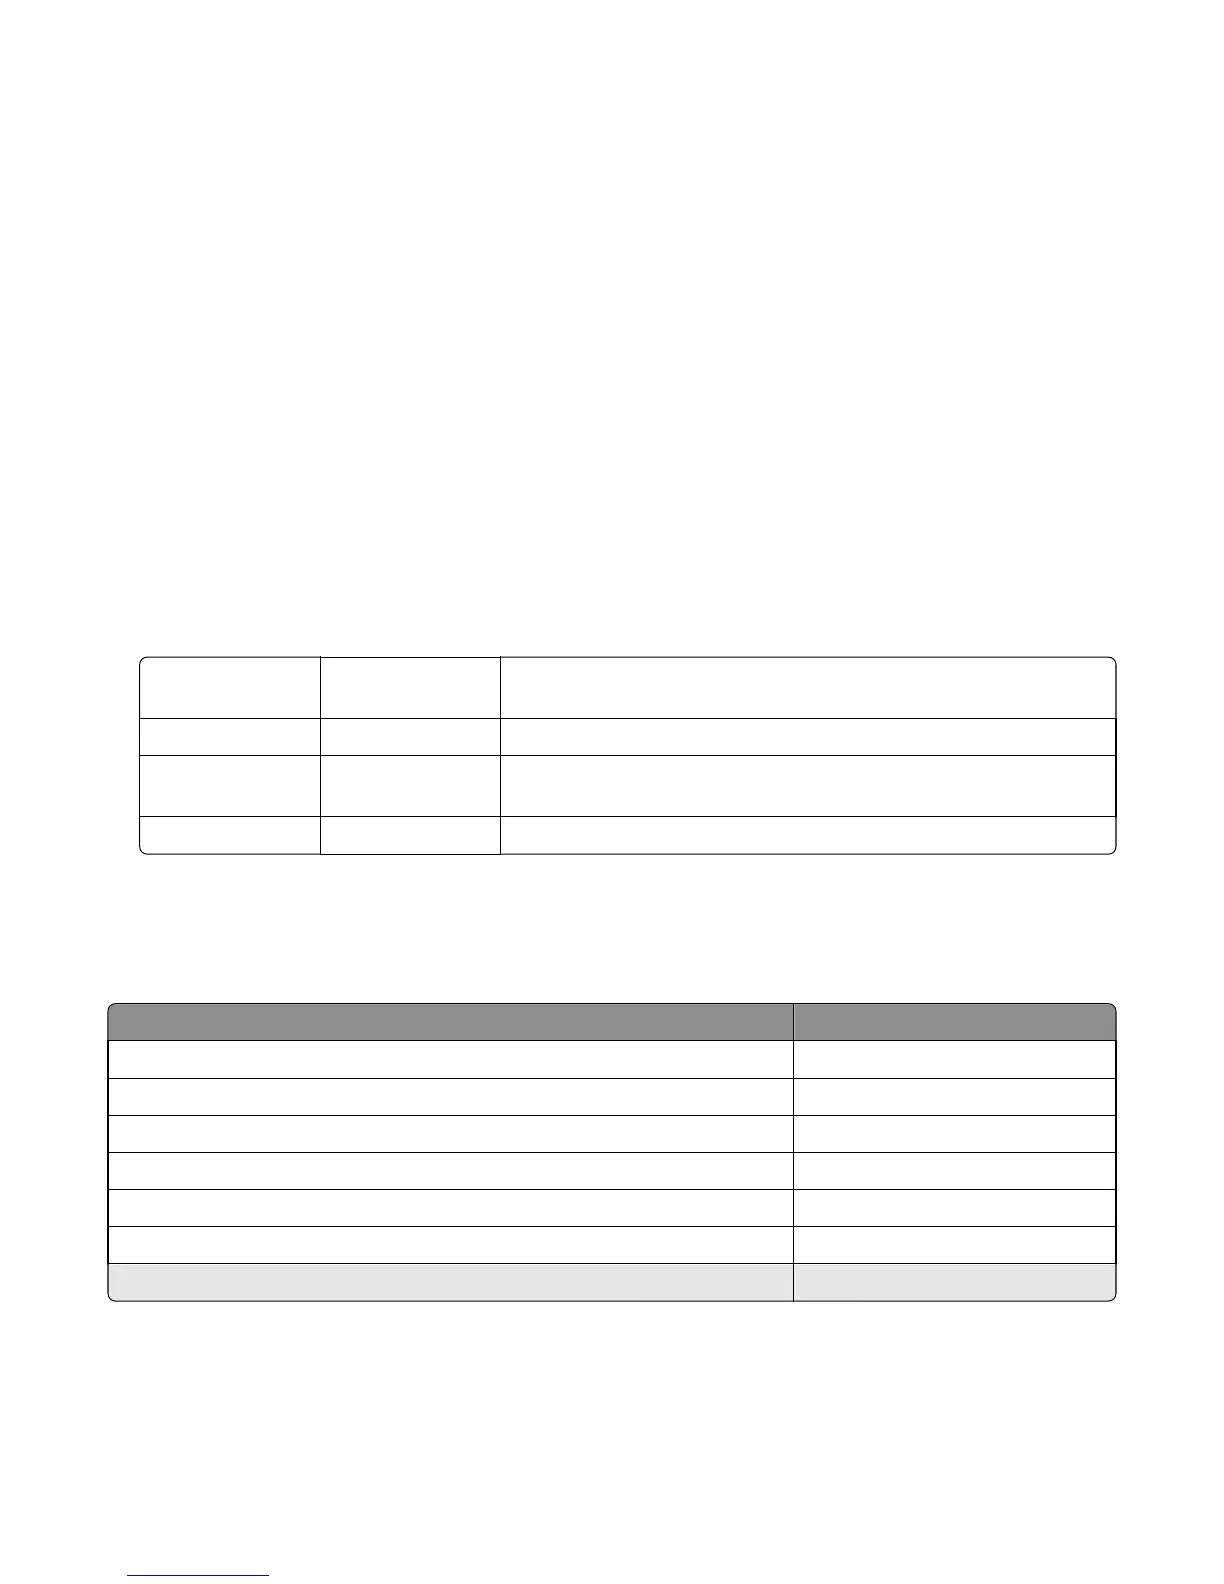
Top Margin -25 to +25 Increasing the value moves the image down the page. Always adjust the
top before the bottom margin.
Bottom Margin -20 to +20 Increasing the value moves the image toward the top of the page.
Left Margin ‑25 to +25 Increasing the value moves the image toward the right margin. Always
adjust the left before the right margin.
Right Margin -15 to +15 Increasing the value moves the image toward the right of the page.
Scanner calibration
This test calibrates the black and white values for the ADF and flatbed. Use the following values to manually adjust a
replacement scanner.
Menu items Values
Flatbed Black ‑10 to 10*
ADF Front Black ‑10 to 10*
ADF Back Black ‑10 to 10*
Flatbed White ‑10 to 10*
ADF Front White ‑10 to 10*
ADF Back White ‑10 to 10*
* The default value is 0.
To adjust a calibration value, do the following steps:
1 Navigate to Diagnostics Menu > Scanner Calibration.
2 Select a calibration value to adjust.
7463
Service menus
337
 Loading...


