OPERATION
Internal Intensity Baffl e
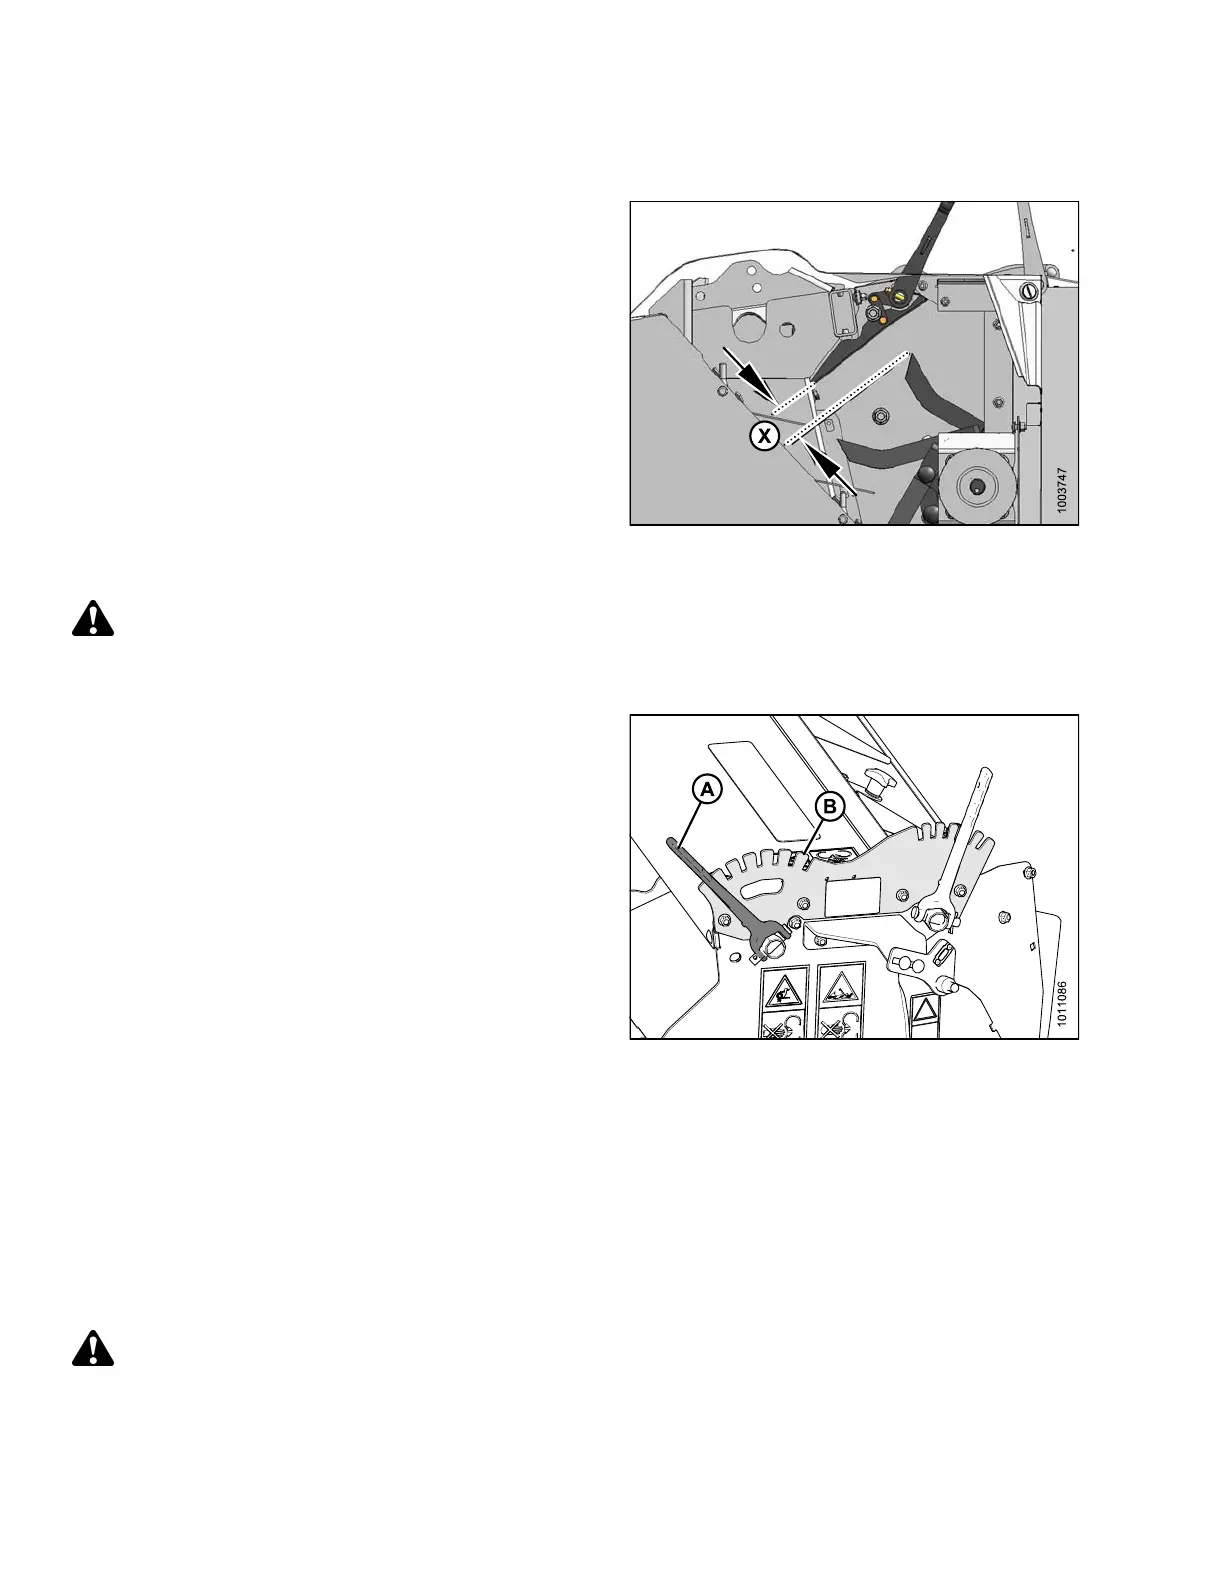
Conditioning intensity is controlled by adjusting clearance
(X) between the rotor and the baffle.
There are seven clearance positions from 5/16–2-3/4 in.
(8–71 mm). The setting chosen depends on crop volume
and the desired level of conditioning.
The highest clearance setting is recommended for heavy
crops, and the lowest clearance s etting should be used for
maximum conditioning in average crops.
The baffle is located immediately in front of and above the
finger rotor and can be positioned as follows:
• To reduce clearance for more conditioning.
• To increase clearance for less conditioning.
Figure 3.109: Internal Intensity Baffle
Adjusting Internal Intensity Baffle Clearance
DANGER
To avoid bodily injury or death from unexpected startup of machine, always stop engine and remove key
from ignition before leaving operator ’s seat for any reason.
1. Pull internal intensity baffle adjustment lever (A) in the
outboard direction to disengage tab from adjustment
plate (B).
2. Move lever (A) forward to lower baffleand
decrease clearance.
3. Move lever (A) rearward to raise baffleand
increase clearance.
4. Release internal intensity baffle adjustment lever (A) so
that tab engages hole in adjustment plate (B).
Figure 3.110: Internal Intensity Baffle
Adjustment Lever
Finger Rotor S peed
The finger rotor is set to 900 rpm at the factory, but it can be set to operate at 600 rpm or 900 rpm depending on
crop conditions, volume, and the desired amount of c onditioning.
In sensitive c rops, 600 rpm may be a suitable speed to minimize crop damage. In light crops and dry grasses,
900 rpm may be a more effective s peed. At 900 rpm, crop damage can occur and power consumption will increase.
Changing Finger Rotor Speed
DANGER
To a
void bodily injury or death from unexpected startup of machine, always stop engine and remove key
fro
m ignition before leaving operator’s seat for any reason.
147910 92 Revision A