K2–116
TRANSFER
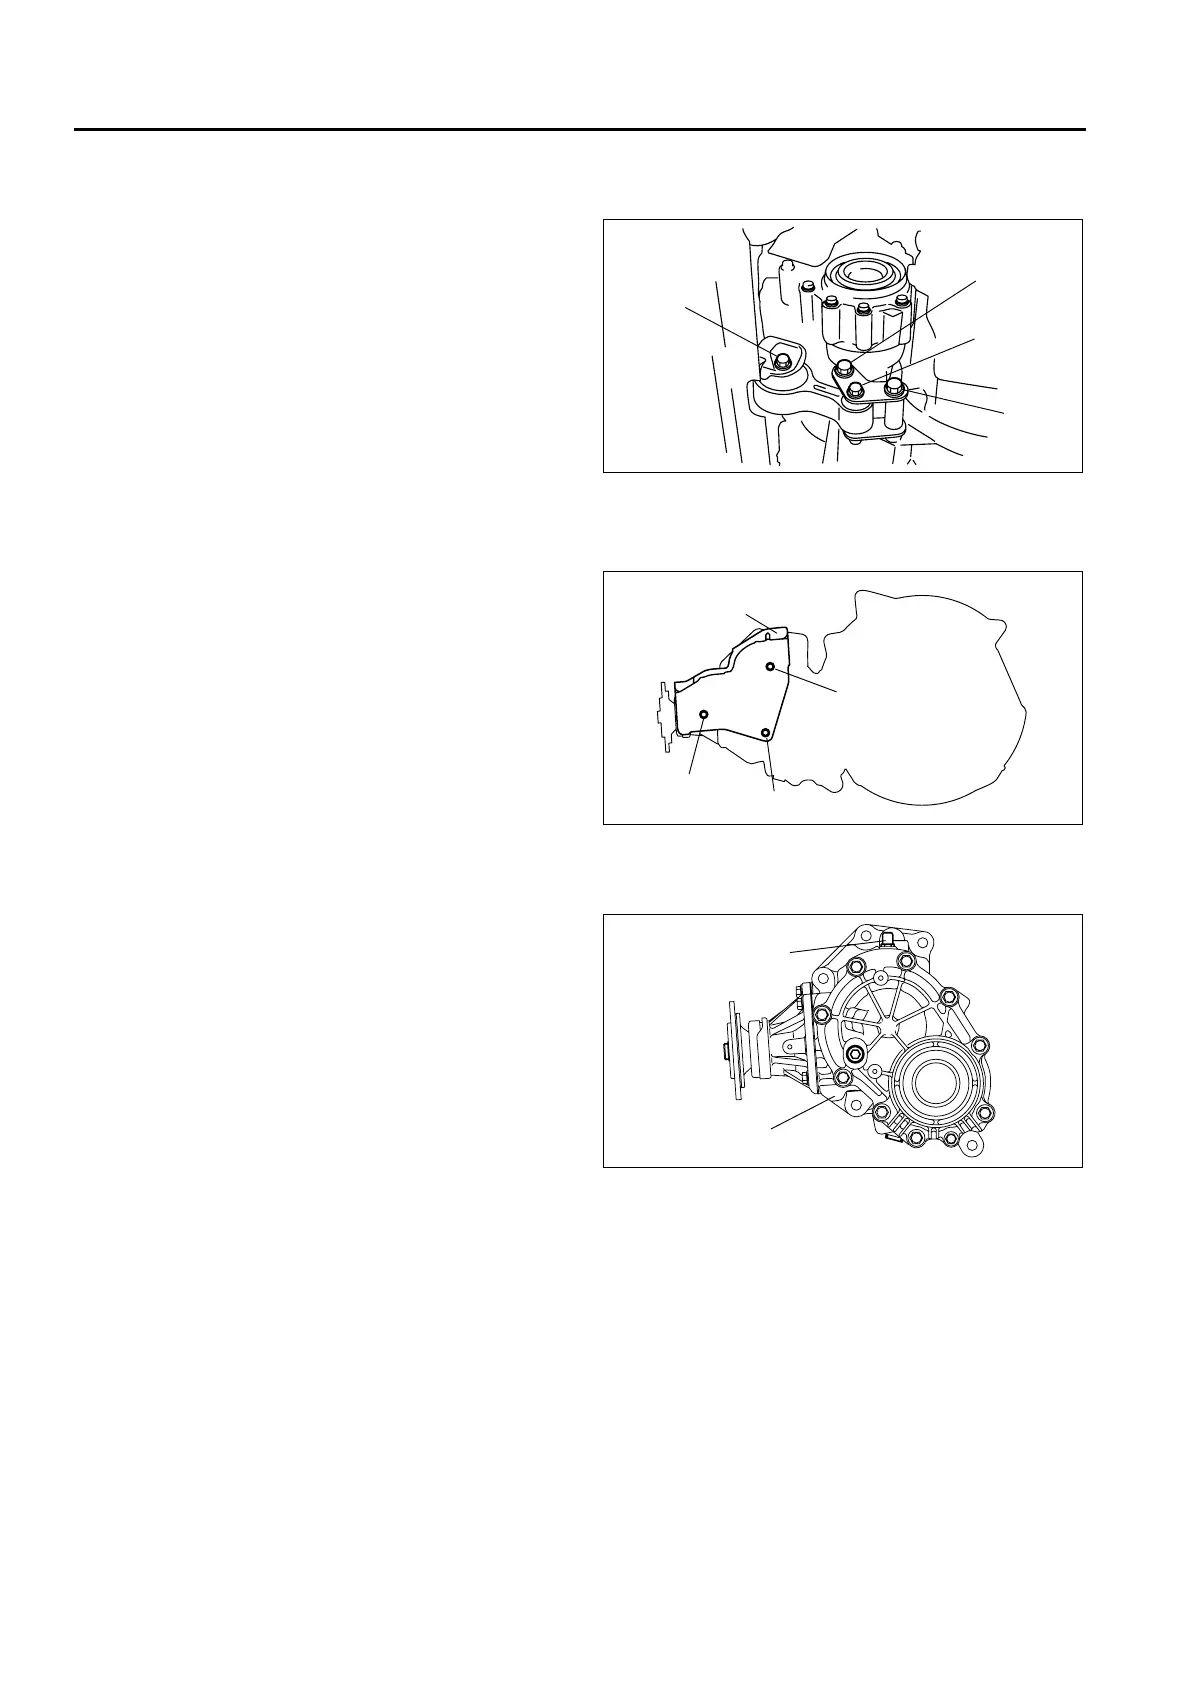
No.1 Engine Mount Installation Bolt Installation Note
1. Tighten the bolt C and D.
2. Lightly tighten the bolt B, then bolt A.
3. Tighten the bolt B and A.
Tightening torque
A, C, D: 93.1—116.6 N·m
{9.50—11.88 kgf·m, 68.66—85.98 ft·lbf}
B: 85.3—116.6 N·m
{8.70—11.88 kgf·m, 62.91—85.98 ft·lbf}
PTO Heat Shield Installation Note
1. Lightly tighten the bolt A.
2. Tighten the bolt B, then bolt C.
3. Tighten the bolt A.
Tightening torque
8—11 N·m
{82—112 kgf·cm, 72—97 in·lbf}
End Of Sie
BREATHER PLUG REMOVAL/INSTALLATION
A6E571817001203
1. Remove the PTO heat shield.
2. Remove the breather plug.
Caution
• Allowing the breather hole to the close
during apply a sealant can affect the
transfer operation.
3. Apply a sealant to the thread area of filler plug.
Specified sealant
TB1215
4. Install the filler plug.
Tightening torque
7.9—11.7 N·m
{81—119 kgf·cm, 71—103 in·lbf}
5. Install the PTO heat shield. (See K2–116 PTO Heat Shield Installation Note.)
End Of Sie
A
C
B
D
A6E5714W138
PTO HEAT SHIELD
A
B
C
A6E5718W104
TRANSFER
BREATHER PLUG
A6E5718W105












 To Next Page