K2–90
AUTOMATIC TRANSAXLE
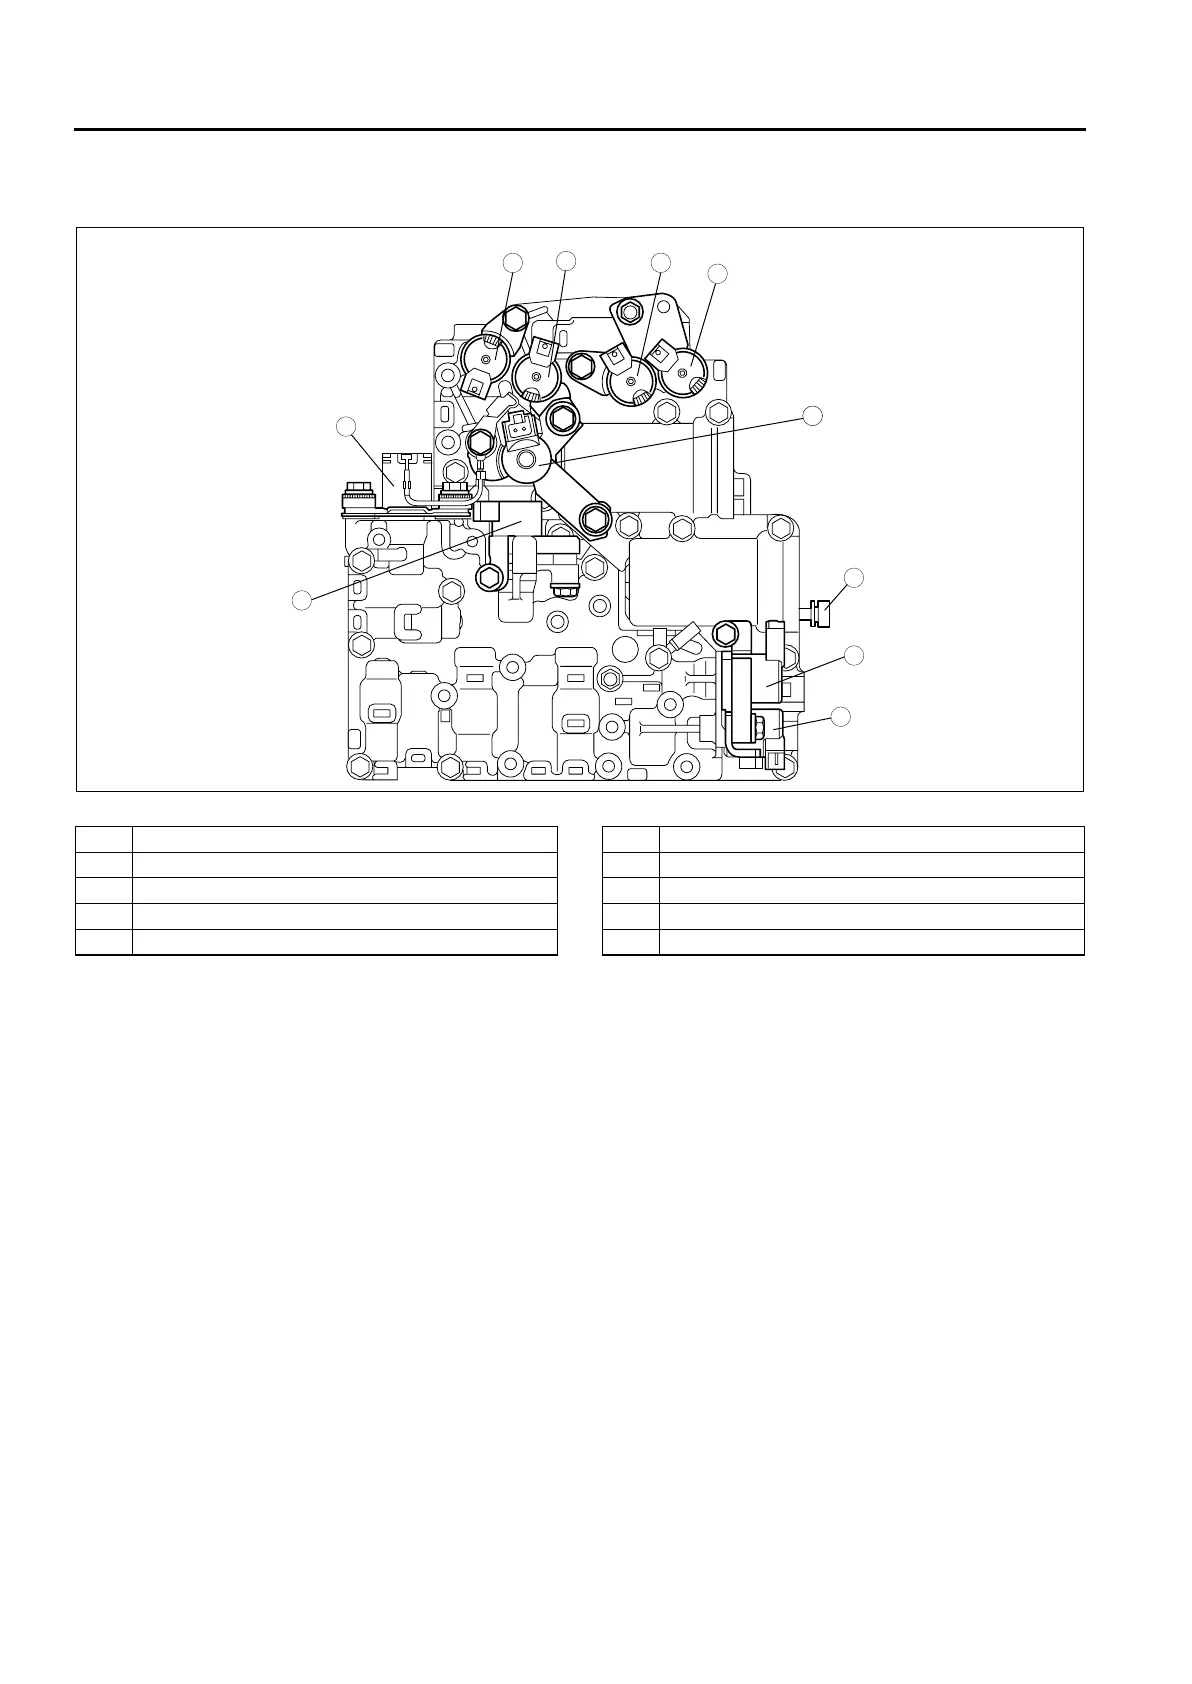
SOLENOID VALVE REMOVAL/INSTALLATION
A6E571421280203
1. Remove the control valve body. (See K2–105 CONTROL VALVE BODY REMOVAL/INSTALLATION.)
2. Remove the solenoid valves and manual valve.
.
3. Apply ATF to a new O-ring and install it on the solenoid valve.
4. Install the solenoid valve and manual valve in the control valve body.
Tightening torque
8.34—10.30 N·m
{85.0—105.0 kgf·cm, 73.78—91.13 in·lbf}
5. Install the control valve body. (See K2–105 CONTROL VALVE BODY REMOVAL/INSTALLATION.)
6. Add the ATF while the engine is idling, and inspect the ATF level and leakage. (See K2–80 AUTOMATIC
TRANSAXLE FLUID (ATF) REPLACEMENT.) (See K2–79 Automatic Transaxle Fluid (ATF) Level Inspection.)
7. Carry out the time lag test and line pressure test. (See K2–72 MECHANICAL SYSTEM TEST.)
8. Carry out the road test. (See K2–75 ROAD TEST.)
End Of Sie
TCM INSPECTION
A6E571418901211
Terminal Voltage Table (Reference)
Note
• Use the ground of terminal 1C and 1Y of the TCM when measuring terminal voltage, as an error may
occur when connecting the negative circuit tester to ground.
5
44
3
10
6
8
7
9
1
2
A6E5714W122
1 Manual valve
2 2-4 brake solenoid valve
3 Neutral shift solenoid valve
4 TCC solenoid valve
5 Shift solenoid C
6 Shift solenoid B
7 Reduction timing solenoid valve
8 Shift solenoid A
9 Pressure control solenoid
10 High clutch solenoid valve












 To Next Page