D–10
OIL PAN
OIL PAN REMOVAL/INSTALLATION
A6E332010040201
MZR-CD (RF Turbo)
Warning
• Hot engines and engines oil can cause severe burns. Turn off the engine and wait until it and the
engine oil have cooled.
1. Disconnect the negative battery cable.
2. Remove the under cover.
3. Drain the engine oil. (See D–8 ENGINE OIL REPLACEMENT.)
4. Remove the lower radiator hose assembly under the oil pan with the cooling hose still connected. Position the
lower radiator hose assembly so that it is out of the way.
5. Remove in the order indicated in the table.
6. Install in the reverse order of removal.
7. Refill the engine oil with the specified type and amount. (See D–8 ENGINE OIL REPLACEMENT.)
8. Start the engine and inspect for oil leakage.
• If the oil leaks, specify the faulty part and repair or replace it.
9. Inspect the oil level. (See D–8 ENGINE OIL INSPECTION.)
.
Oil Pan Removal Note
Caution
• Pry tools can easily scratch the oil pan mounting surfaces. Prying off the oil pan can easily bend
the oil pan flange.
Refer to the following instructions before removing the oil pan.
1. Remove the oil pan mounting bolts.
2. Remove the sealant from the bolt threads.
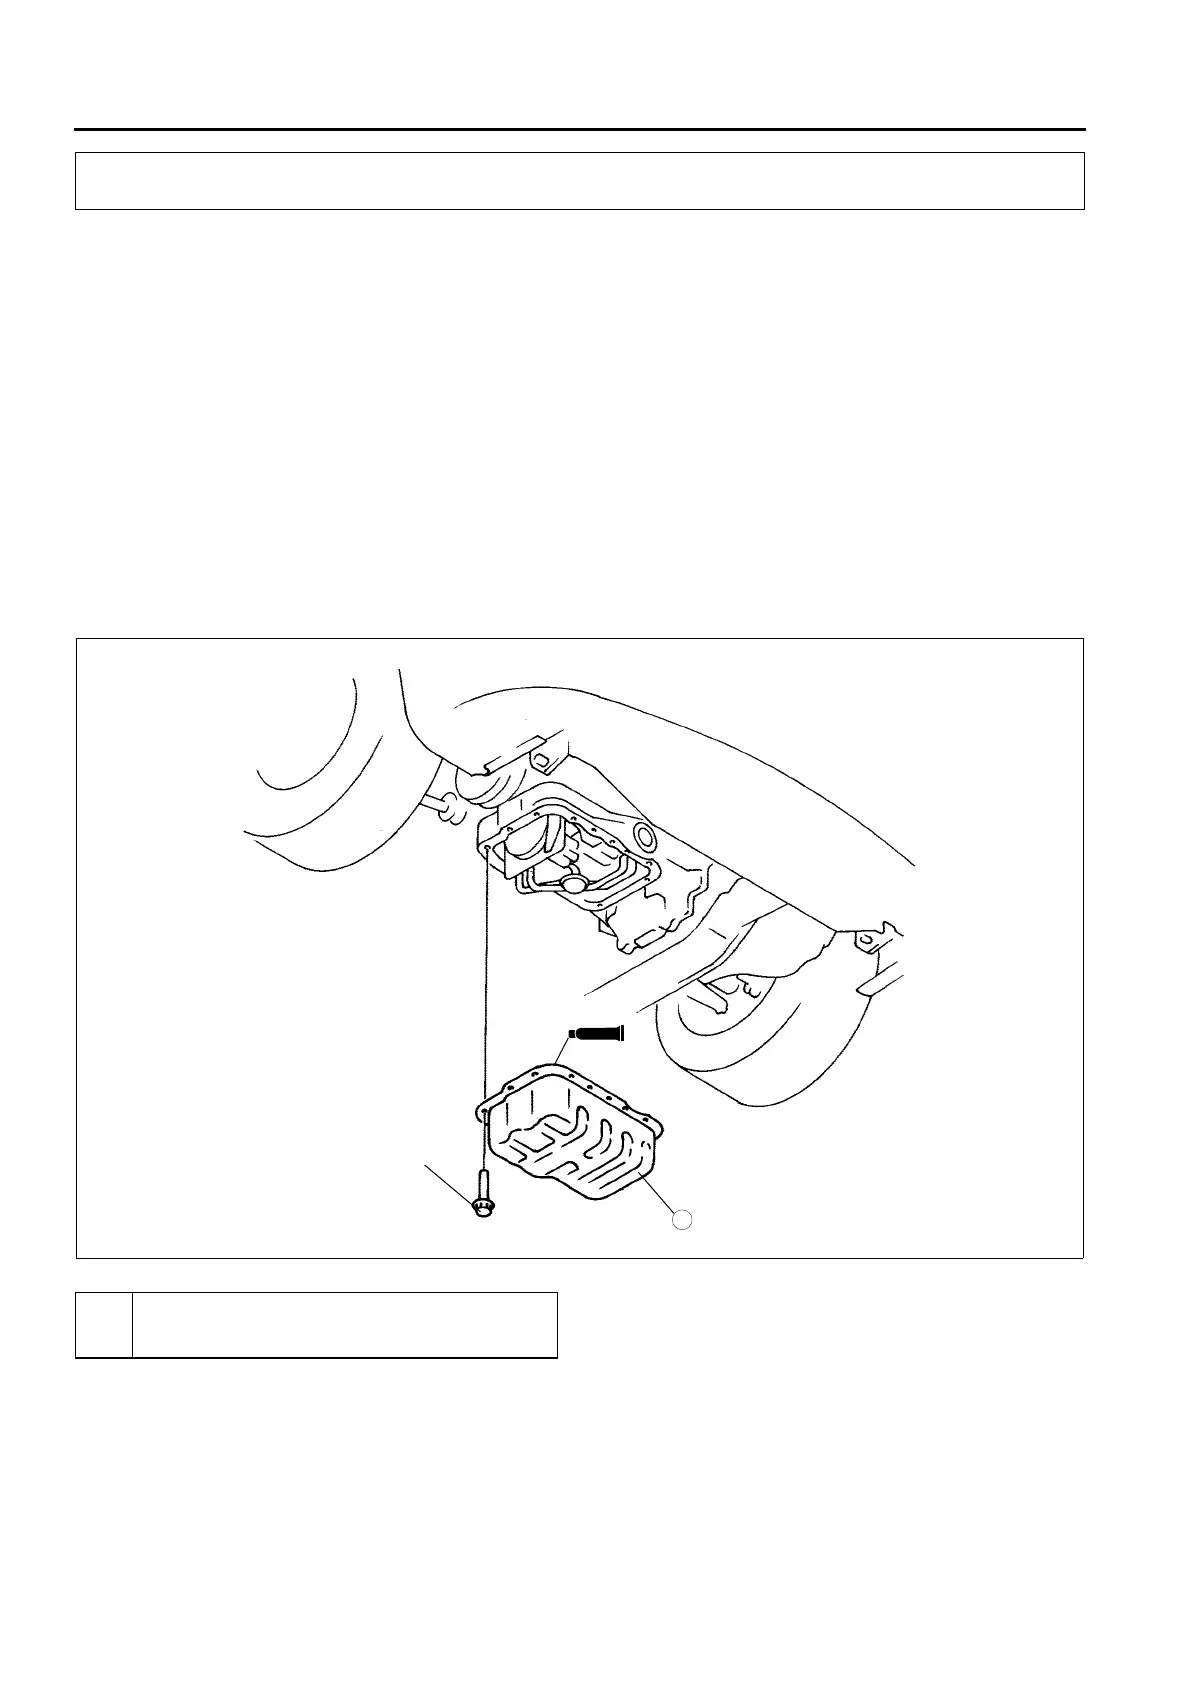
OIL PAN
7.9—10.7
{80—110, 69.5—95.4}
N·m {kgf·cm, in·lbf}
1
SEALANT
A6E3320W100
1Oil pan
(See D–10 Oil Pan Removal Note)
(See D–11 Oil Pan Installation Note)