Activating and Changing Your Pod 5
82
5 Activating and Changing Your Pod
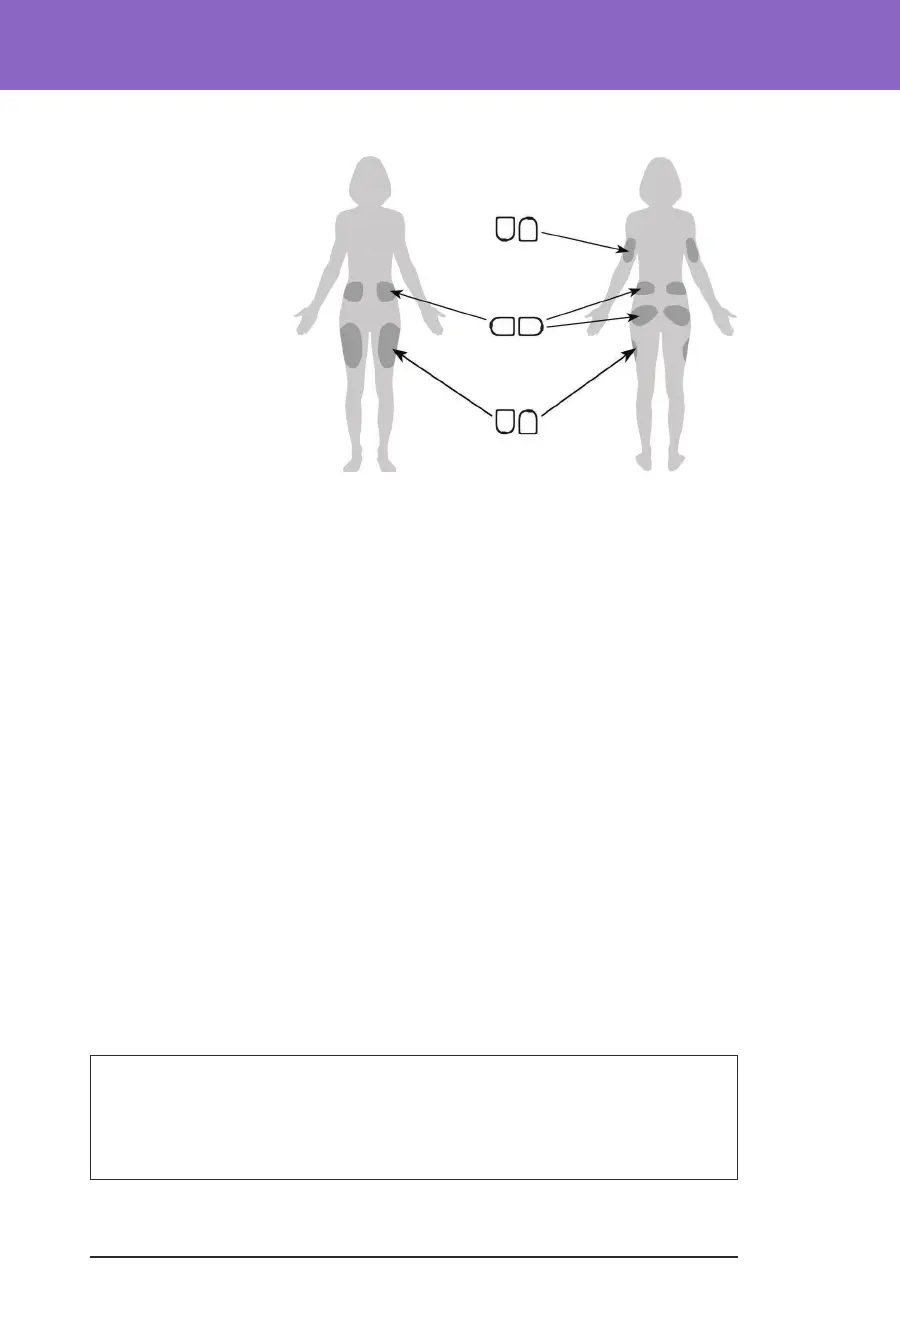
2. Orient the Pod so it is:
• Horizontal
or diagonal
on your
abdomen, hip,
lower back or
buttocks.
• Up and down,
or at a slight
angle on your
upper arm or
thigh.
• For optimal
connectivity,
the Pod should
be placed at least
8 cm (3 inches) from and within the line of sight to the Transmitter.
e Bluetooth connection between the Transmitter and the Pod does
not travel well through the body. Keeping both devices within the line of
sight allows for consistent Sensor communication with the Pod. See
“19.2. Dexcom G6 Sensor Placement” on page 249.
Note: Line of sight means that the Pod and Transmitter are worn on the
same side of the body such that the two devices can “see” one another
without your body blocking their communication
3. Apply the Pod to the selected infusion site, pressing down rmly to secure the
Pod to your skin.
e adhesive is designed for one-time use. Aer a Pod is placed on your body,
you cannot move that Pod to another infusion site.
Note: e Pod’s adhesive keeps it securely in place for up to 3 days. However,
if necessary, several products are available to help with peeling adhesive. Ask
your healthcare provider about these products. Avoid getting any lotion,
creams, sprays or oils near the infusion site as these products may loosen the
adhesive.
Begin Insulin Delivery
Caution: ALWAYS apply the Pod as directed. If you are applying a Pod in a
place that does not have a lot of fatty tissue, squeeze the skin around the Pod
until aer the cannula has been inserted. Blockages (occlusions) may occur if
you do not use this technique for lean areas.
Back
Front
Up, down or slight angle
Horizontal or diagonal
Up, down or slight angle