85
Activating and Changing Your Pod 55 Activating and Changing Your Pod
5.7. Deactivating an Active Pod
Warning: DO NOT apply a new Pod until you have deactivated and
removed the old Pod. A Pod that is not deactivated properly can continue to
deliver insulin as programmed, putting you at risk of over-delivery of insulin,
which can lead to hypoglycaemia.
Caution: NEVER reuse the Pod or ll syringe or try to use a ll syringe that
did not come with your Pod. Always dispose of the used Pod and ll syringe
according to local disposal guidelines. Only use a new Pod with the ll syringe
included with each Pod change. Always carry supplies to perform a Pod change
should you need to replace your Pod at any time.
To deactivate and remove an active Pod:
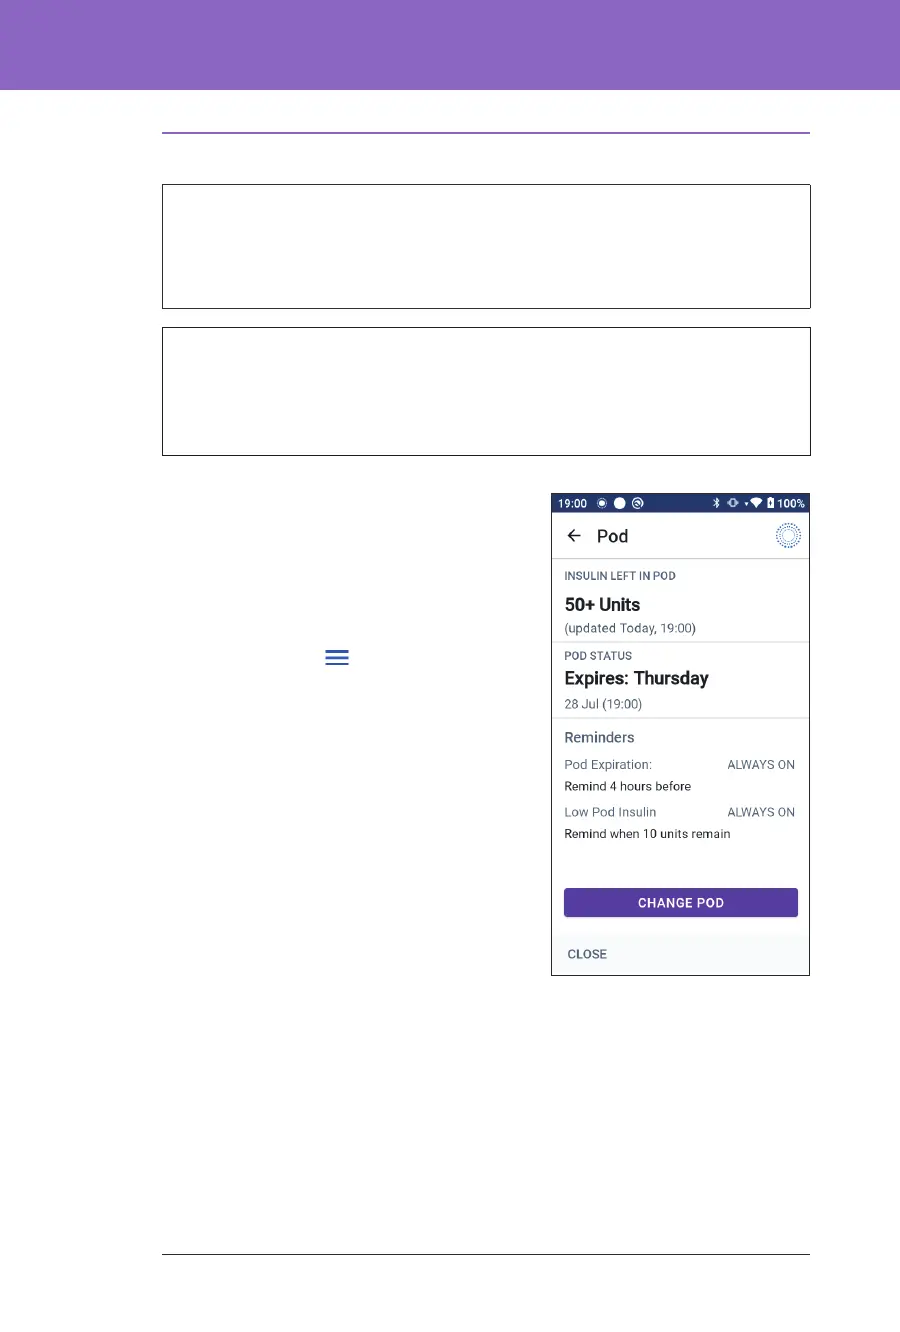
1. Navigate to the Pod change screen:
Home > POD INFO tab > VIEW POD
DETAILS
or
Menu button (
) > Pod
2. Tap CHANGE POD, then tap
DEACTIVATE POD.
If a temp basal, extended bolus or the
Activity feature was in progress, it is
cancelled now.
If you see a communication error
message, see “Error when activating a
Pod” on page 324.
When you deactivate your Pod, the
system exits Automated Mode. When
the new Pod is activated, the system
will be in Manual Mode; however, you
will be prompted to enter Automated Mode if you have a Transmitter serial
number (SN) entered into the Omnipod 5 App.
3. Remove the deactivated Pod from your body:
a. Gently li the edges of the adhesive tape from your skin and remove the
entire Pod.
Tip: Remove the Pod slowly to help avoid possible skin irritation.
b. Use soap and water to remove any adhesive that remains on the skin or, if
necessary, use an adhesive remover.