Related Links
Cabling Workow
Controller Cabling
Routing Cables
Controller Wiring Diagrams
Connect the SAS Cables to the Controllers
1 Slide Controller 1 into the service position.
2 Connect the end of the cable labeled “CU 1 PCIE3-2” to port 2 in the PCIe3
slot on Controller 1, and route the cable through the CMA.
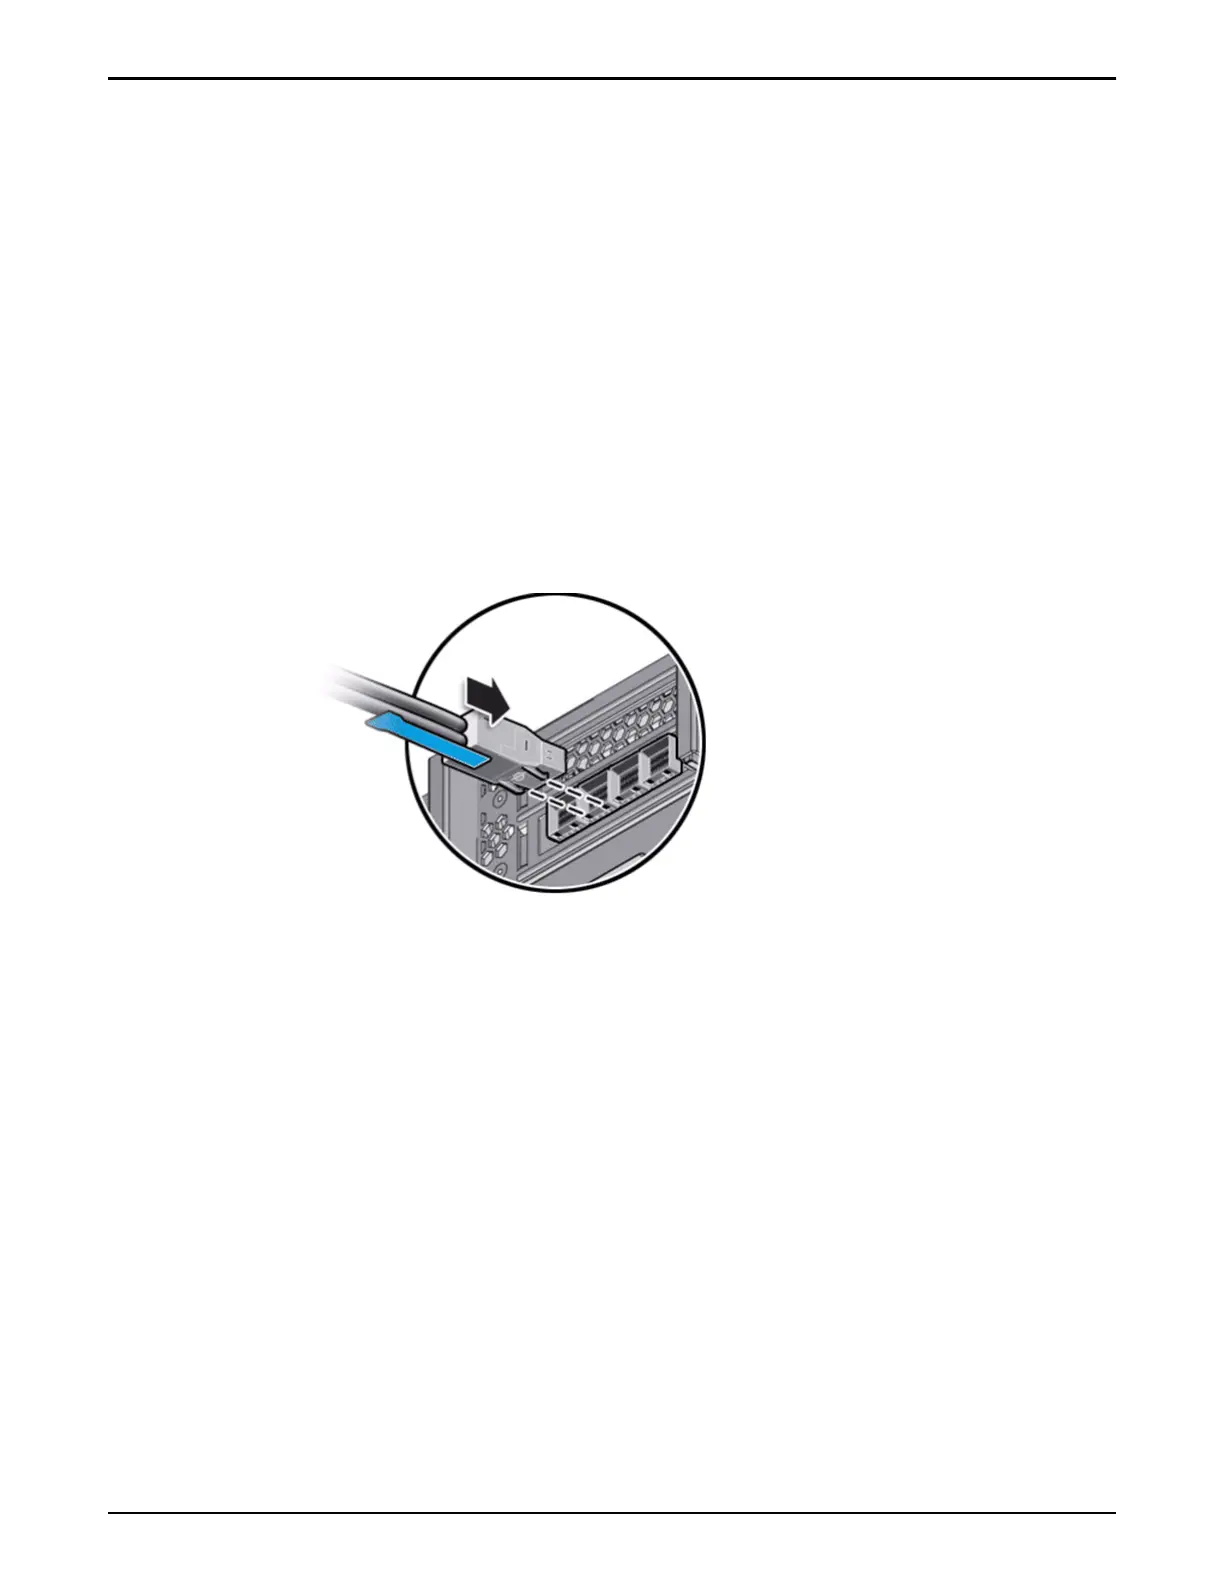
Note: When inserted into the SAS HBA port, the blue tab of the mini-SAS
HD connector faces the boom of the port. The following image shows an
example of how a mini-SAS HD connector inserts into a SAS HBA port.
Figure 90: Mini-SAS HD connector and a SAS HBA port on the Controller
3 Connect the end of the cable labeled “CU 1 PCIE3-3” to port 3 in the PCIe3
slot on Controller 1, and route the cable through the CMA.
4 Slide Controller 1 into the rack position.
5 Slide Controller 2 into the service position.
6 Connect the end of the cable labeled “CU 2 PCIE3-2” to port 2 in the PCIe3
slot on Controller 2, and route the cable through the CMA.
7 Connect the end of the cable labeled “CU 2 PCIE3-3” to port 3 in the PCIe3
slot on Controller 2, and route the cable through the CMA.
If your system is congured with more than two SAS HBA cards, continue
to connect the remaining mini-SAS HD to mini-SAS HD cables. Follow the
information on the cable labels to connect and to route the remaining mini-
SAS HD to mini-SAS HD cables.
Related Links
Cabling Workow
Controller Wiring Diagrams
Connect the Internal Cables
145

 Loading...


