Legend
1 Phillips Number 2 pan head screw with patch lock
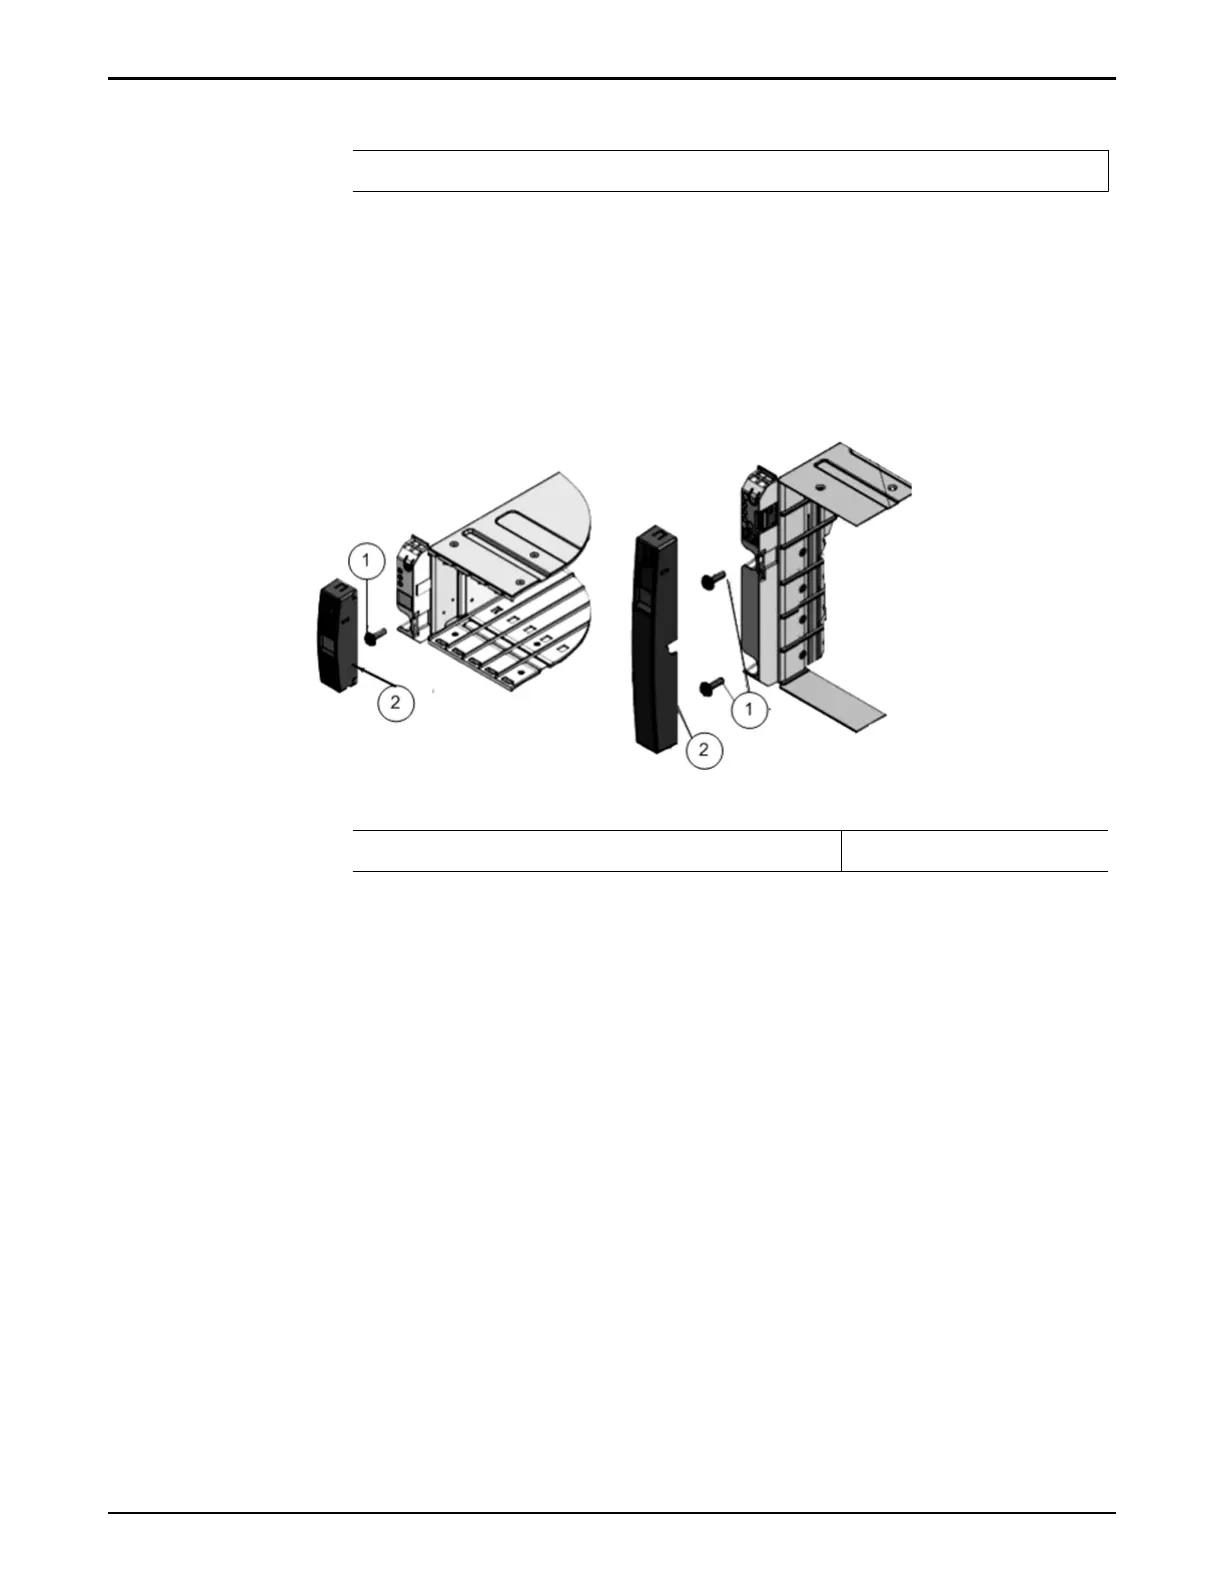
4 Remove the front-side caps on both sides of the Drive Enclosure and secure
a Phillips 13mm head hex ange screw.
Note: The front-side cap on the right side of the Drive Enclosure contains
the RFID tag, which uniquely identies the Drive Enclosure. Take care not
to mix up the right front-side caps among Drive Enclosures.
Figure 51: Left front-side cap and Phillips 13mm head hex flange screw
Legend
1 Phillips 13mm head hex ange screw 2 Left front-side cap
After you have secured the Drive Enclosure to the rails, aach the front-
side caps to the Drive Enclosure.
5 Insert the I/O modules, the power cooling modules, and all of the drives
into their corresponding slots in the chassis.
Insert a DE2-24P Drive Enclosure Into a Rack
1 Carefully lift the Drive Enclosure to the location of the prepared slot and
rest the Drive Enclosure on the boom ledge of the left and right rails.
Caution:
•
The DE2-24C Drive Enclosure weighs approximately 102 lbs (46 kg).
The DE2-24P Drive Enclosure weighs approximately 53 lbs (24 kg).
Use a mechanical lift when handling fully populated Drive
Enclosures.
•
If you are working alone or you do not have access to a mechanical
lift, you can reduce the weight of a Drive Enclosure by removing the
drives, the I/O modules, and the power cooling modules from the
chassis. An empty DE2-24C Drive Enclosure chassis weighs
Install Components into the Rack
83

 Loading...


