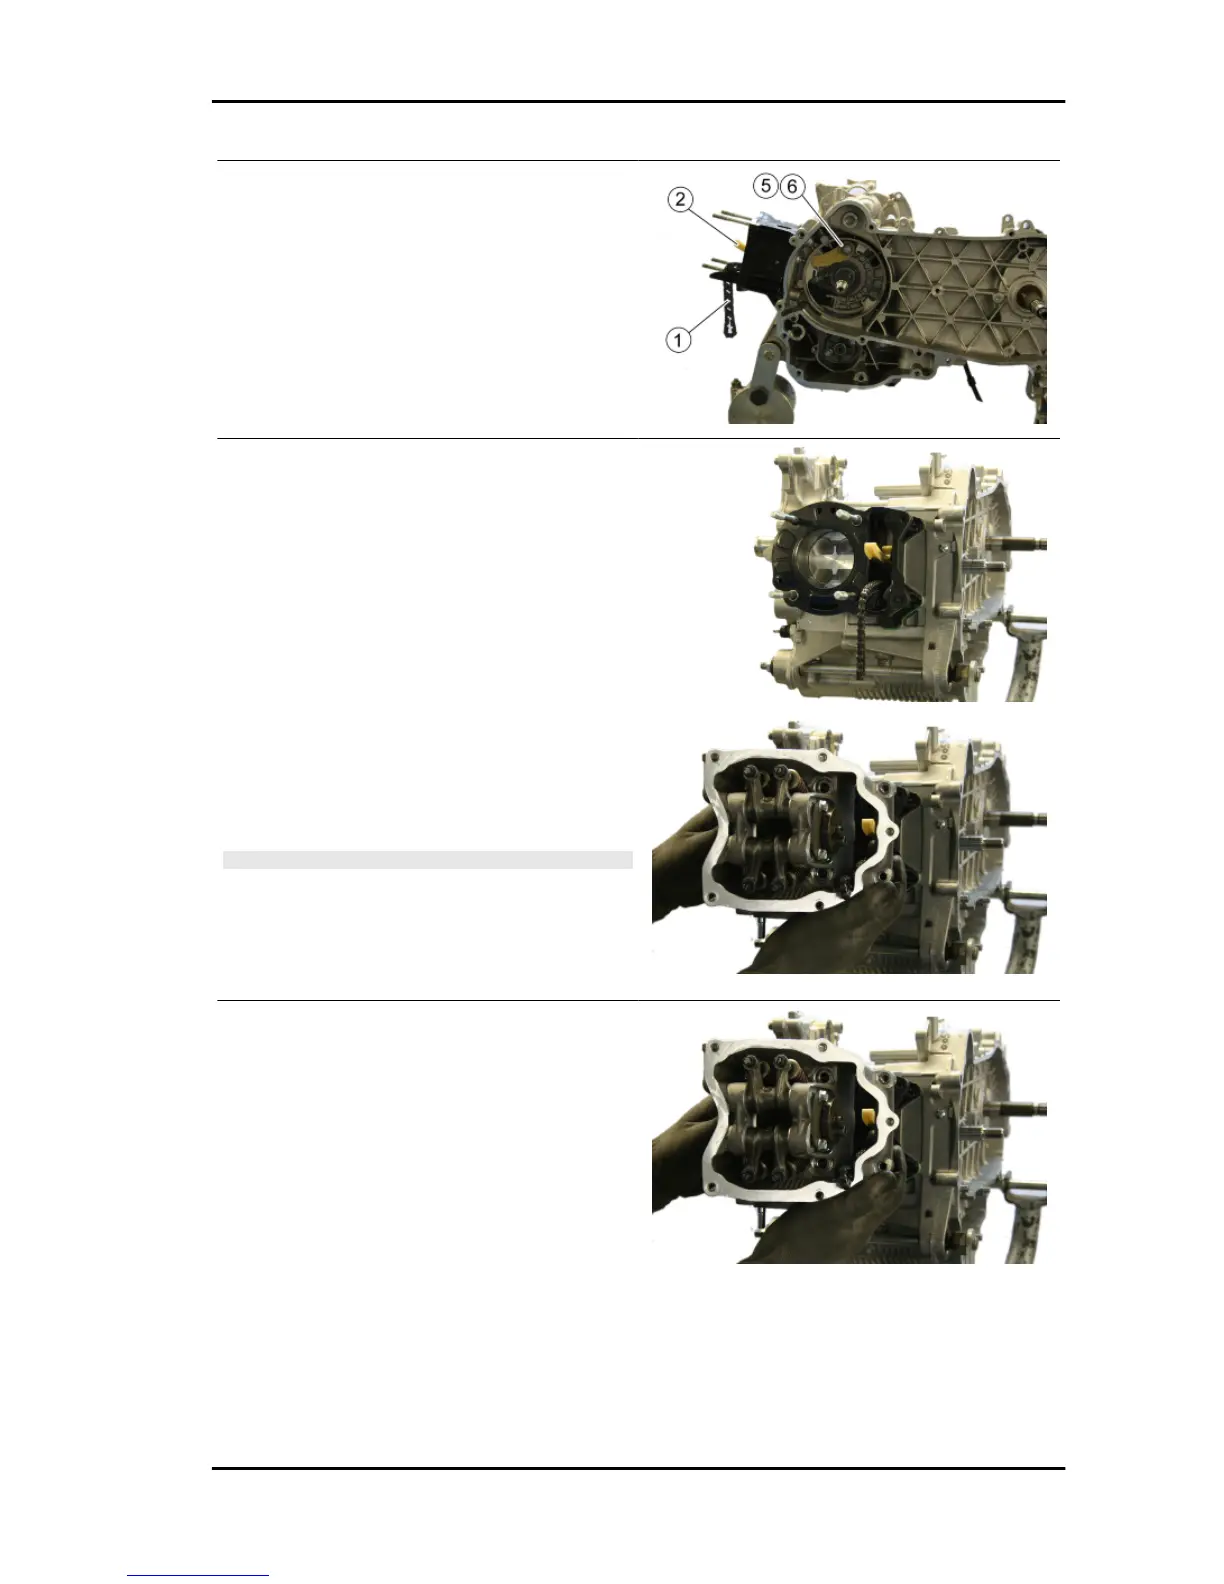
- Loop the timing control chain «1» around the
crankshaft.
- Fit the guide slider and the tensioner pad «2» on
the head side.
- Fit spacer «5» with fixing screw «6».
- Tighten the screws to the prescribed torque.
Locking torques (N*m)
Slider screw 10 - 14 Nm
- Fit the head gasket and check that the alignment
dowels work properly.
- Insert the head.
- Lubricate the stud bolt threads with engine oil.
- Tighten up the nuts to an initial pre-torque of 7±1
Nm.
- Tighten up the nuts to a second pre-torque of 10
±1 Nm
- To carry out the operations described above, fol-
low the tightening sequence in the figure.
- Fit the two screws on the outside of the timing
chain side and tighten them to the specified torque.
N.B.
BEFORE INSTALLING THE HEAD, MAKE SURE THAT THE
LUBRICATION CHANNEL IS CLEAN USING A COM-
PRESSED AIR JET.
Locking torques (N*m)
Timing chain tensioner support screw 11 to 13
Fit the pins and rocking levers.
- Lubricate the two rocking levers through the
holes at the top.
- Lubricate the 2 bearings and insert the camshaft
in the cylinder head with the cams corresponding
to the rocking levers.
- Insert the retention plate and tighten the two
screws shown in the figure to the prescribed tor-
que.
Locking torques (N*m)
Plate screws 4 - 6 Nm
Beverly 300 i.e. Engine
ENG - 149