Set up or remove the Auto Delta feature
Note: The Auto Delta feature is only available in the PCR stage.
1.
In the Method tab, tap Edit4Advanced4VeriFlex
™
Zones / Auto Delta.
Note: Use or to navigate through the method if it is not all displayed.
2.
T
ap
(Edit) in one of the PCR stages.
3.
T
ap Auto Delta settings.
See Figure 8 on page 60.
4.
Enter the starting cycle to apply Auto Delta settings.
5.
Set the Delta temperature slider to the
position or the position, then enter the numerical
value for the dier
ence in the temperature.
6.
Set the Delta time slider to the
position or the position, then enter the numerical value for
the dier
ence in the time.
7.
Tap Done.
A PCR step with an Auto Delta setting applied to it is denoted with an
.
8.
In the Method tab, tap
4Remove4Done t
o remove the Auto Delta setting.
Note: The Auto Delta setting is removed from the Method tab.
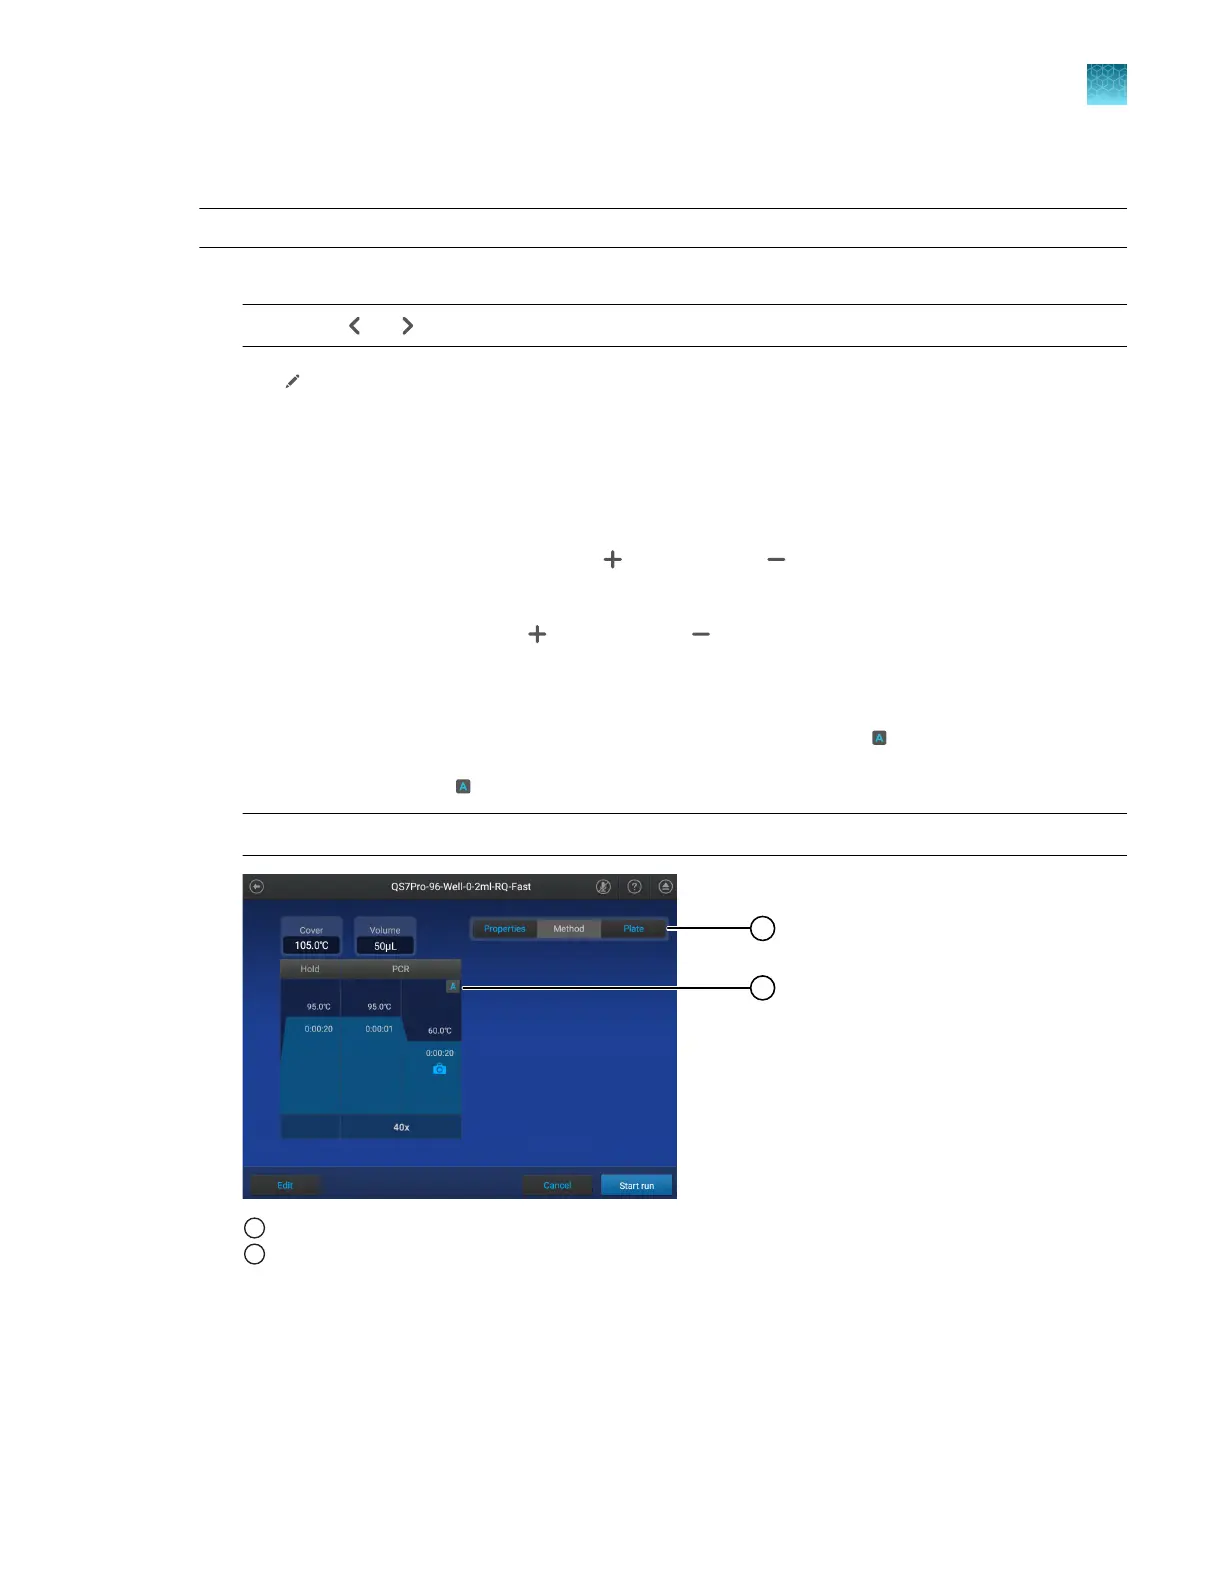
1
Indicates that this is the Method tab wher
e Auto Delta settings can be removed.
2
Indicates that Auto Delta is assigned. Tap to remove the Auto Delta settings.
Chapter 4 Edit a plate before starting a run
Options to edit the method of a plate file
4
QuantStudio
™
6 Pro Real-Time PCR System and QuantStudio
™
7 Pro Real-Time PCR System User Guide
61