10.
Unload the plate from the instrument.
CAUTION! PHY
SICAL INJURY HAZARD. During instrument operation, the plate temperature
can reach 100°C. Allow it to cool to room temperature before handling.
Note: Use Smar
t Help if the instrument does not eject the plate (see “Request technical support
with Smart Help” on page 172).
Calibrate for a custom melt curve run
Use this calibr
ation to prepare for high resolution melt analysis runs.
Note: A custom melt calibration calibrates a custom dye and a melt calibration at the same time.
•
Ensur
e that all calibrations are current (see “View the calibration status on the instrument” on
page 87).
•
Add a custom dye (see “Add a custom dye to the instrument” on page 118).
1.
In the home screen, tap
(Settings)4Maint
enance and service4Calibration4Custom melt.
2.
Select the option for the kit that you are using.
•
PCR + Melt
•
Melt only
3.
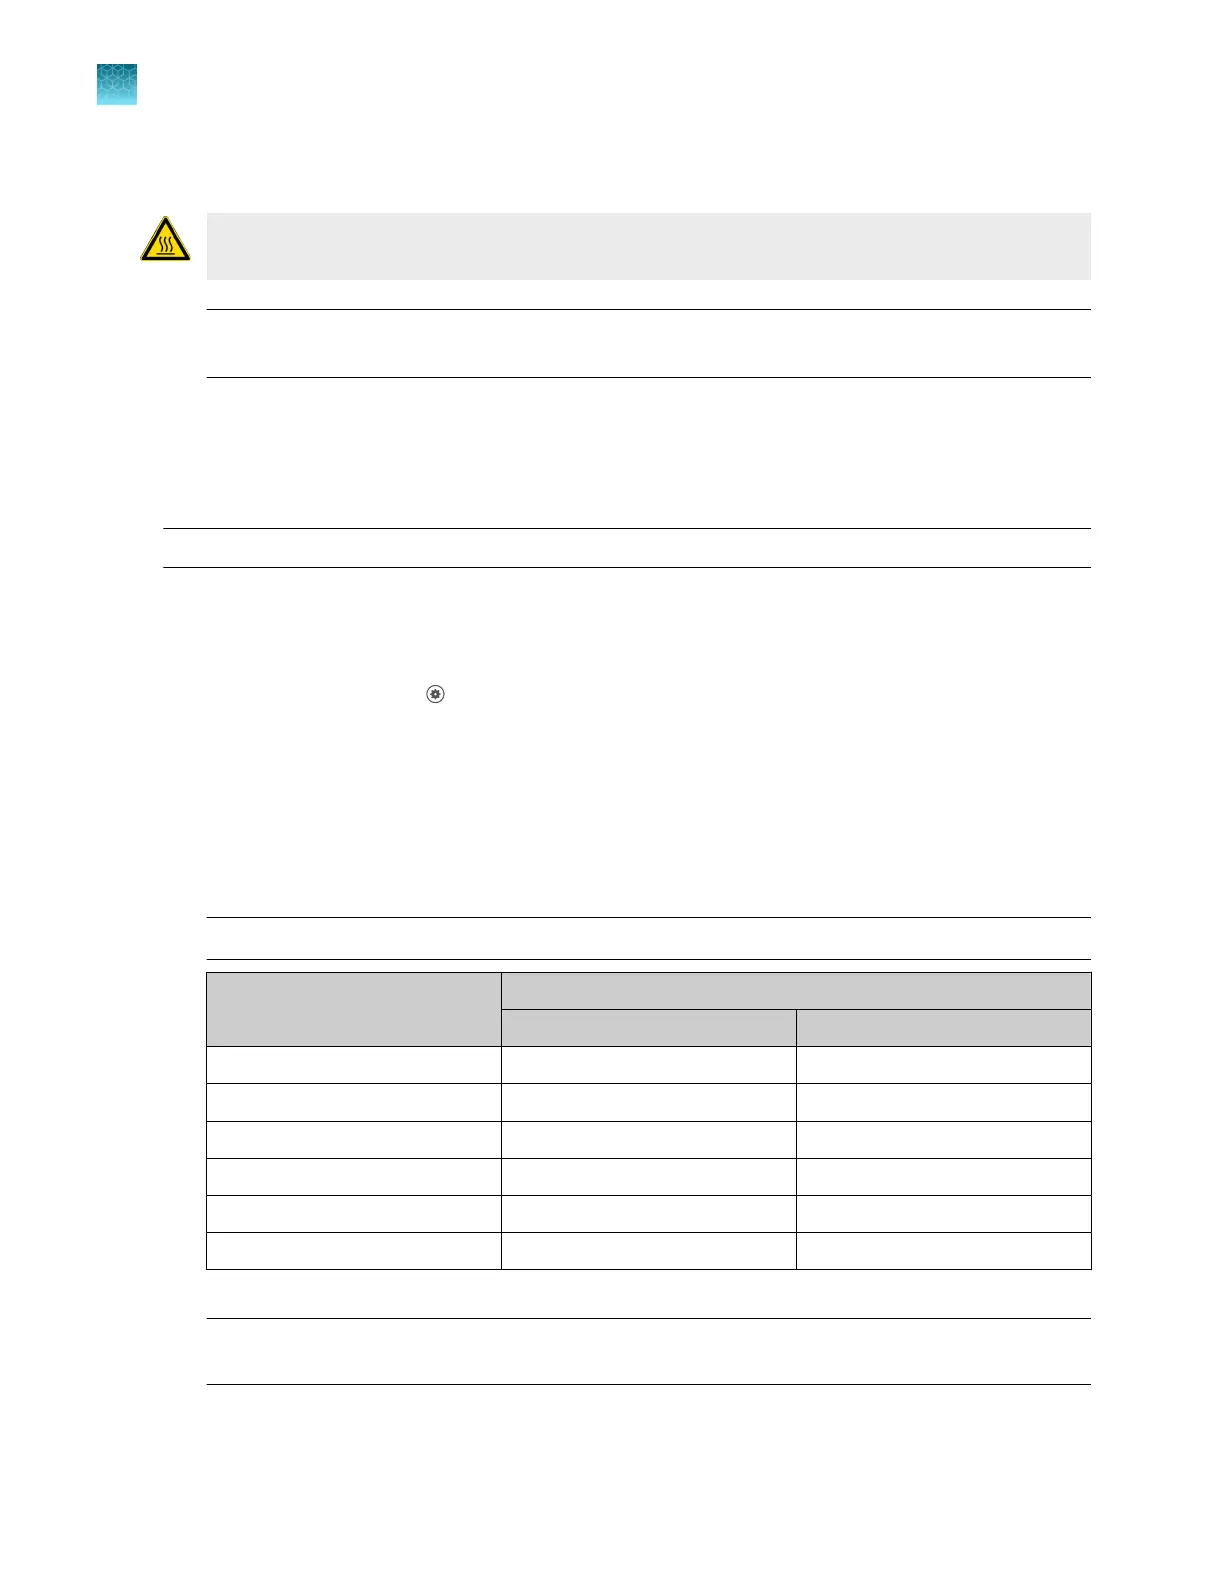
Select or add a dye, then select a filter set appropriate for your dye's wavelength (see filter-
wavelength table below).
Note: See your reagent kit documentation for dye name and wavelength information.
Peak filt
er
Filter wavelength (nm)
[1]
Excitation Emission
x1-m1 470 ± 15 520 ± 15
x2-m2 520 ± 10 558 ± 12
x3-m3 550 ± 10 587 ± 10
x4-m4 580 ± 10 623 ± 14
x5-m5 640 ± 10 682 ± 14
x6-m6 662 ± 10 711 ± 12
[1]
T
he central wavelengths are the optimized wavelengths.
IMPORTANT! If the select
ed filter set does not match your reagent kit documentation, then the
incorrect wavelength may be collected during a run.
4.
(Optional) T
ap Reagents, then enter the reagent information.
Chapter 7 C
alibrate and verify instrument performance
Calibrate for a custom melt curve run
7
120
QuantStudio
™
6 Pro Real-Time PCR System and QuantStudio
™
7 Pro Real-Time PCR System User Guide