4-2
IM DL950-02EN
4.1 Setting the Trigger Mode
This section explains the following trigger settings:
Applicable in Scope Mode
• Trigger mode
► “Trigger Mode (Trigger Mode)” in the Features Guide
Trigger Mode Menu
1.
On the waveform screen’s MENU, tap TRIGGER > MENU, or press TRIG.MENU. A trigger
menu appears.
2.
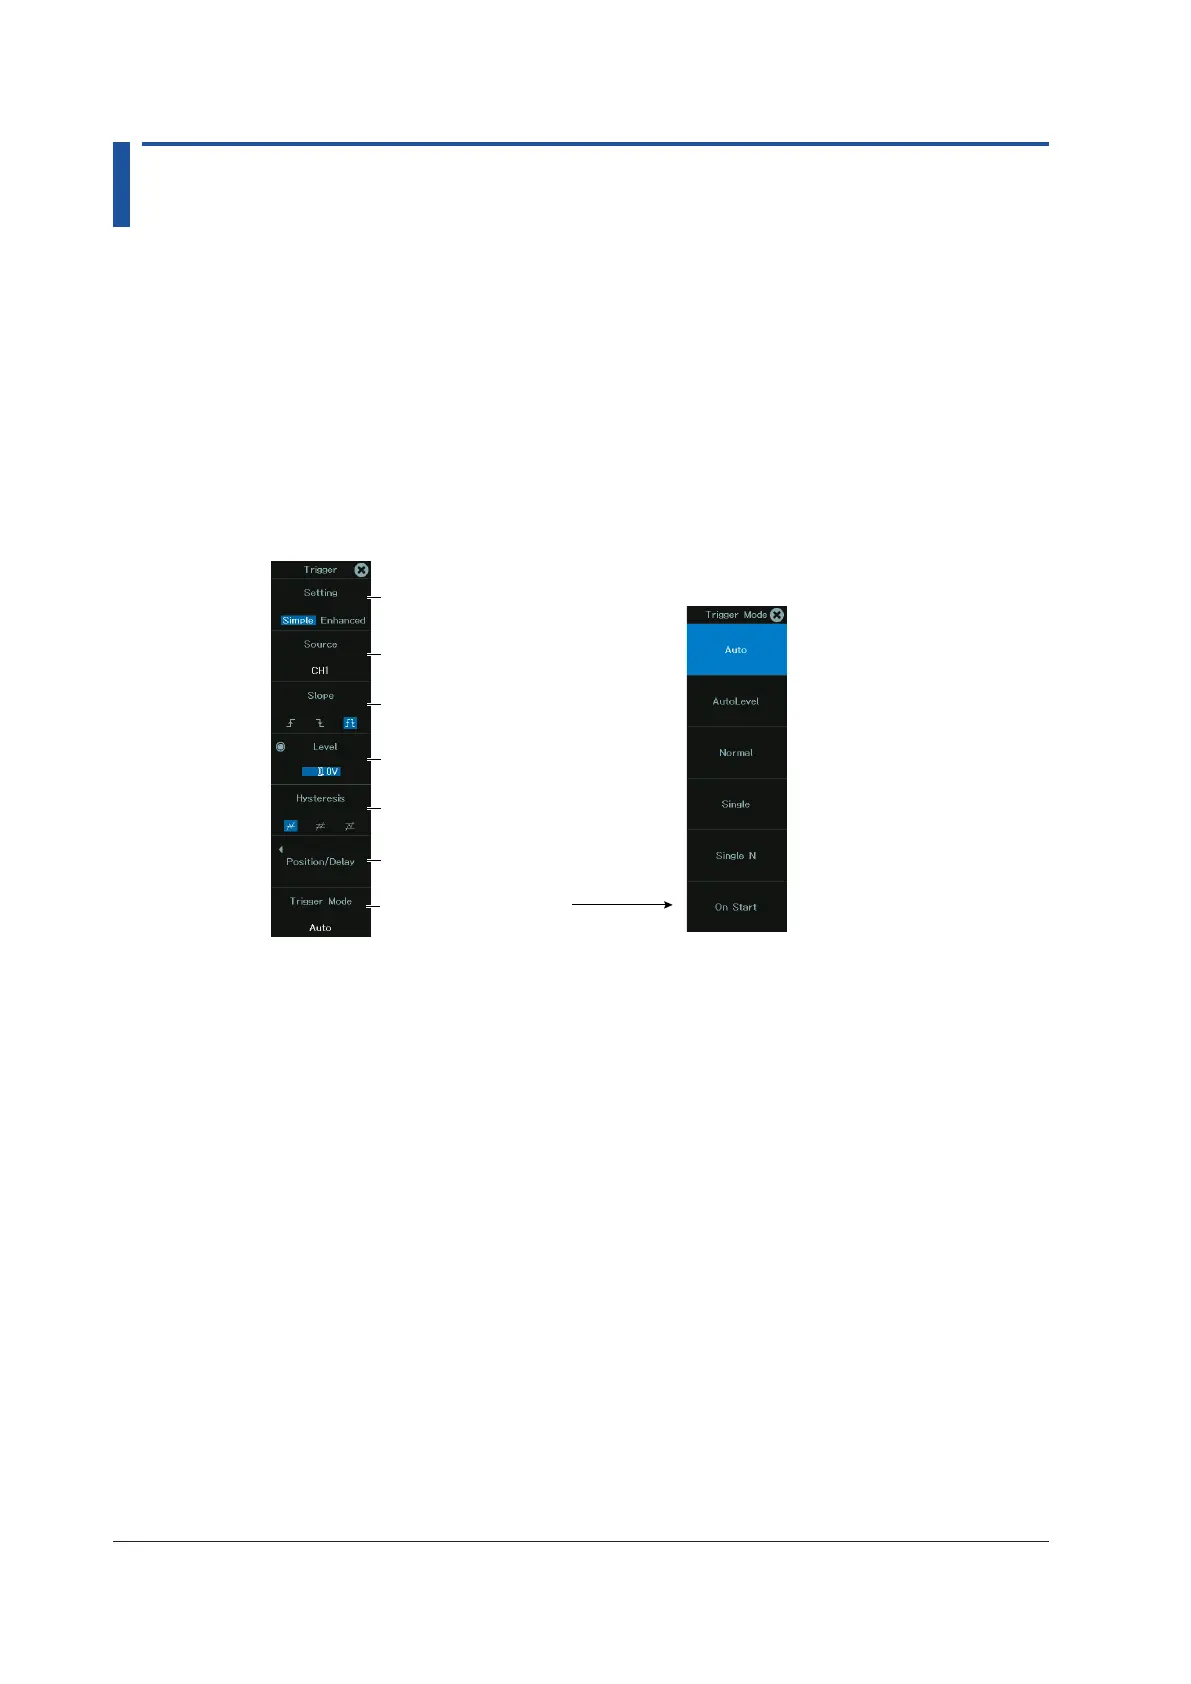
Tap Trigger Mode, or press the soft key. The trigger mode options are displayed.
Set the trigger mode.
Trigger menu
Set the trigger position, trigger
delay, and hold-off ► sec. 4.2
Select Simple or Enhanced.
Set the trigger source.
► sec. 4.3
Set the trigger slope.
► sec. 4.3
Set the trigger level.
► sec. 4.3
Set the trigger hysteresis.
► sec. 4.3
Setting the Trigger Mode (Trigger Mode)
3.
Tap the trigger mode you want to use, or press the soft key.
Auto: If the trigger conditions are met within a 50-ms timeout period, the instrument
updates the displayed waveforms on each trigger occurrence. If not, this
instrument automatically updates the displayed waveforms. If the time axis is set
to a value that would cause the display to switch to roll mode, roll mode display
will be enabled.
Auto Level: If a trigger occurs before a timeout (which is approximately 1 second), the
instrument updates the waveform in the same way that it does in Auto mode. If a
trigger does not occur before a timeout, the instrument automatically changes the
trigger level to the center value of the trigger source amplitude, triggers on that
value, and updates the displayed waveform.
Normal: The instrument updates the waveform display only when the trigger conditions
are met.
Single: When the trigger conditions are met, the instrument updates the displayed
waveform once and stops signal acquisition. If the time axis is set to a range that
causes the display to switch to roll mode, the roll mode display will be enabled.
When the instrument triggers, it begins recording data. When data has been
acquired up to the amount specified by the set record length, the waveform
display stops.

 Loading...