EasyManuals Logo

Zebra ZXP 9 Series User Manual

Zebra ZXP 9 Series
450 pages
To Next Page IconTo Next Page
To Previous Page IconTo Previous Page
Page #418 background imageLoading...
Page #418 background image
410 ZXP Series 9 Card Printer Service Manual P1086708-001
Replacement Procedures for the Laminator
Procedures: Laminator Beam
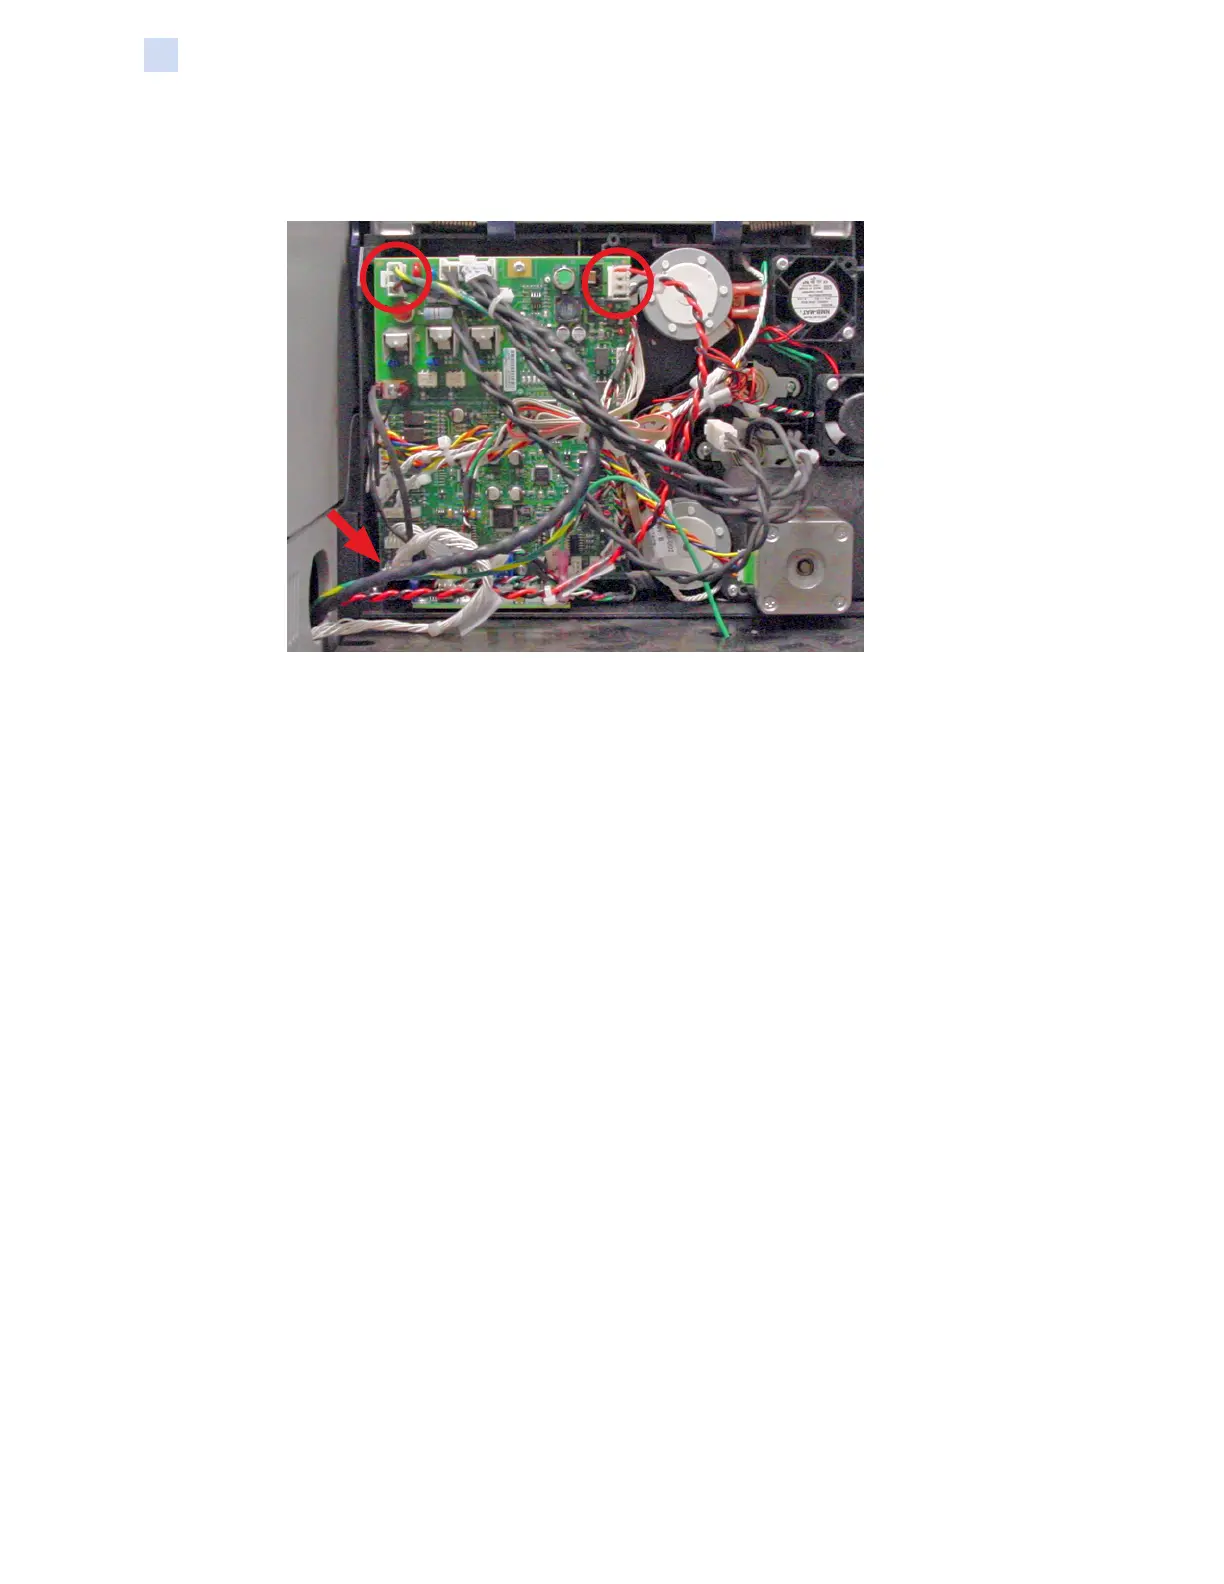
Step 3. Connect the cables (circled below) from the printer to the laminator main PCBA.
a. Plug the AC Power Cable into J8, EXTERNAL PWR.
b. Plug the DC power cable into J15, DC PWR INPUT.
c. Plug the logic interface cable into J14 (arrow above).
Step 4. Install the laminator back panel.
Step 5. Install the media (cards, ribbon, transfer lm, and laminate).
Step 6. Power-up the printer with the laminator. Note that the power switch on the printer
also controls the laminator.
Step 7. Observe the printer go through the initialization process.
Step 8. If no errors are encountered, print a test card via the Operator Control Panel (OCP).
Select MENU > PRINT TEST CARDS > PRINT.

Table of Contents

Questions and Answers:

Question and Answer IconNeed help?

Do you have a question about the Zebra ZXP 9 Series and is the answer not in the manual?

Zebra ZXP 9 Series Specifications

General IconGeneral
Resolution300 dpi
Card Capacity Output100 cards
Memory64 MB
InterfaceUSB, Ethernet
Operating Humidity20% to 80% non-condensing
Print TechnologyDye Sublimation
Print Speed YMCKUp to 190 cards/hour
Card Capacity Input100 cards
Card SizesCR-80 ISO 7810
ConnectivityUSB, Ethernet
Operating SystemWindows, Linux
OptionsMagnetic stripe encoding
Power Requirements100-240V AC, 50/60Hz
Operating Temperature15°C to 35°C
Card Thickness10-40 mil

Related product manuals