DRAFT
September 1, 2004 11:39 am, CH_Run.fm
Step 2 – Applying Detectors and Markers
Applied Biosystems 7900HT Fast Real-Time PCR System and SDS Enterprise Database User Guide 3-13
Copying
and Applying
Detectors to the
Plate Document
IMPORTANT! Once you copy a detector to the plate document, it is no longer linked
to the corresponding entry in the Detector Manager. Consequently, if you modify a
detector using the Detector Manager after you have copied it to a plate document,
you must remove the detector from the plate document and copy it again to update
the plate document with the changes.
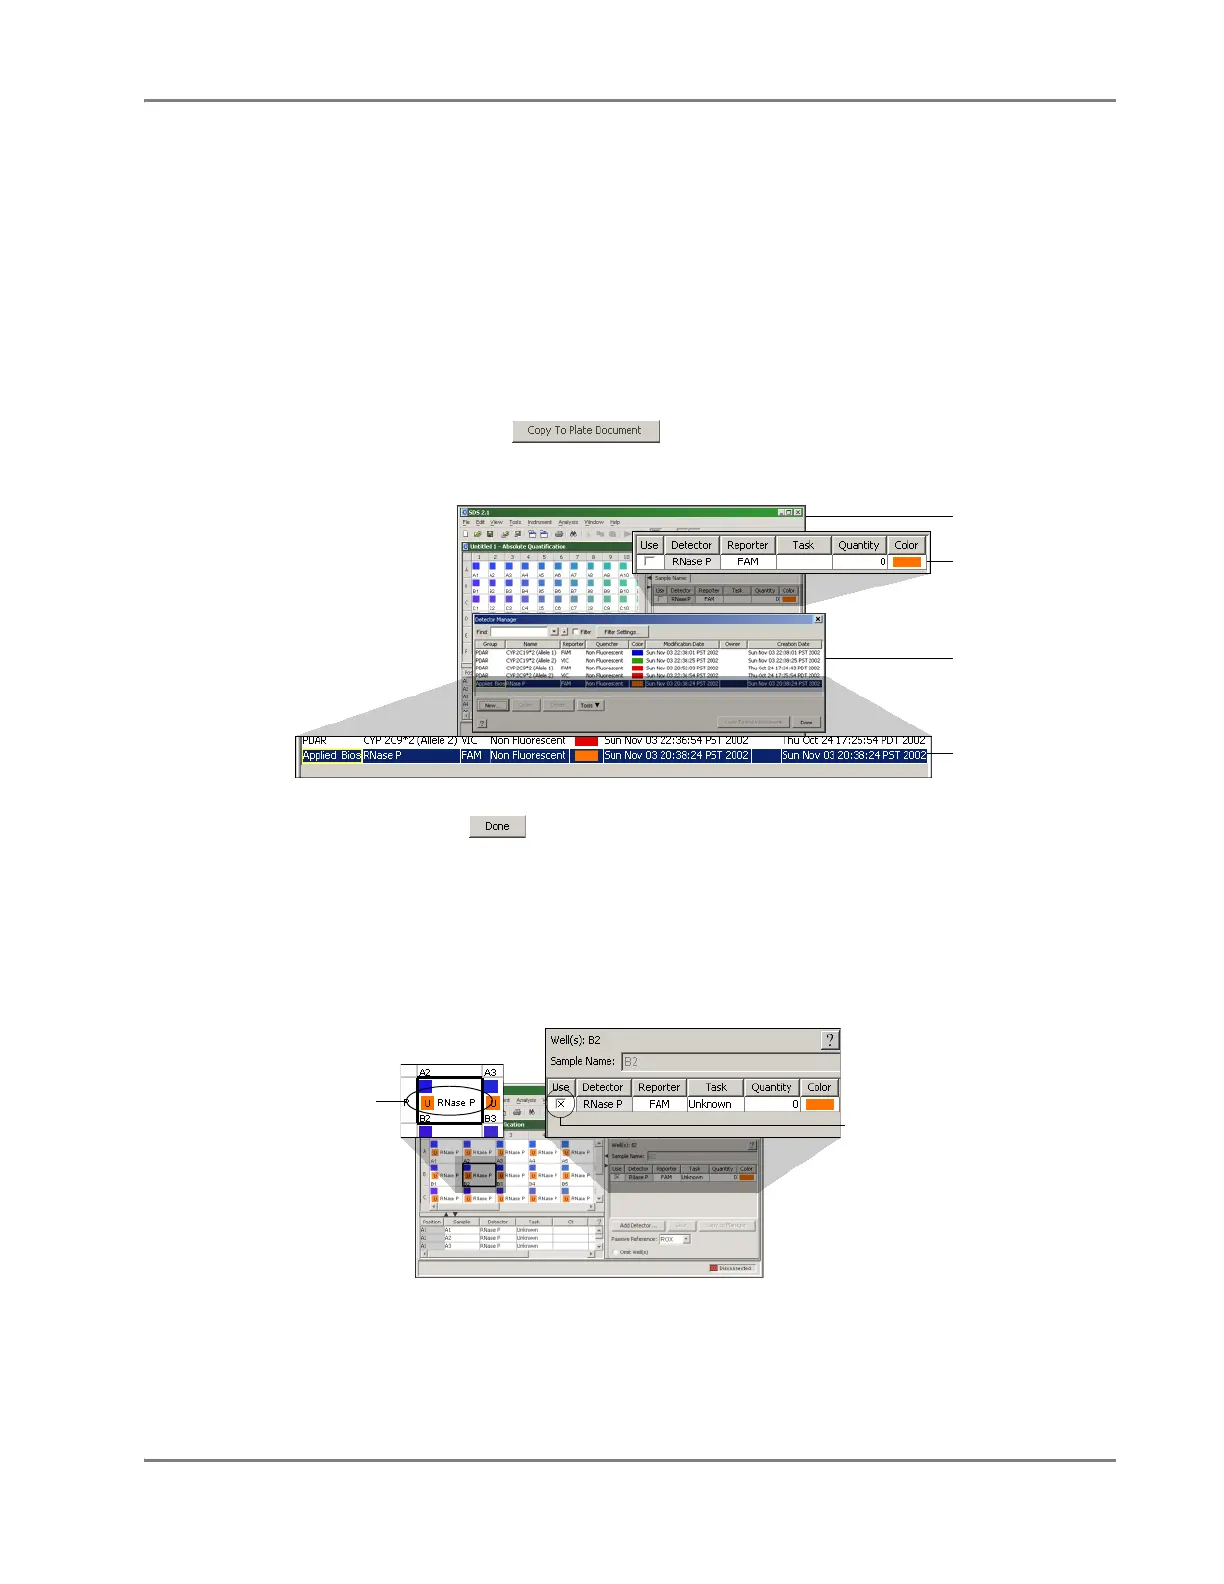
1. In the Detector Manager dialog box of the SDS software, copy the detectors to
the plate document:
a. While pressing and holding the Ctrl key, select the detectors you want to
apply to the plate document.
The software highlights the selected detectors.
b. Click .
The software adds the detectors to the well inspector of the plate document.
2. Click to close the Detector Manager.
3. In the plate grid, select the wells containing the assay for the first detector.
Note: For easier selection of plate grid wells, use the Ctrl and Shift keys to
select wells individually or in groups. See page 2-23 for more information.
4. Apply detector to the selection by clicking the check box for the detector in the
Use column of the well inspector.
5. Repeat steps 3 through 4 to apply the remaining detectors to the plate grid.
6. Configure the plate document with detector tasks as explained in
“Step 3 – Configuring the Plate Document with Tasks” on page 3-16.
Plate document
Copied detector
Detector Manager
Detector selected
for copying
Detector added to
selected wells of the
plate document
Use check box