1 689 989 300 2020-03-24| Robert Bosch GmbH
Maintenance | EPS 118 | 85 en
8.2.8 Changing the test oil filter
Procedure:
1. Drain the test oil (see sec.8.2.6, steps 1 to 7).
! The test oil filter may contain residual oil. Collect
the residual oil when removing the test oil filter.
Dispose of the used test oil filter and the residual
oil in accordance with applicable regulations.
2. Remove the test oil filter (Fig. 44, item 2) and make
sure that the flat sealing ring of the test oil filter is
removed as well. Properly dispose of the test oil
filter and flat sealing ring.
3. Clean the sealing surfaces on the test oil filter con-
nector of EPS 118 and on the new test oil filter.
4. Check the flat sealing ring on the new test oil filter
for damage and correct placement in the groove.
5. Apply a small quantity of oil to the flat sealing ring
on the test oil filter.
6. Screw the test oil filter onto the test oil filter con-
nector and tighten it with a wrench insert suitab-
le for oil filters and a torque wrench. Tightening
torque: 20 Nm.
7. Pour test oil into the test oil tank (see sec. 8.2.8,
step 8).
8. Bleed the system (see sec. 8.2.10).
21
458900-08_Pal
Fig. 44: Changing the test oil filter
1 Shut-off valve
2 Calibration oil filter
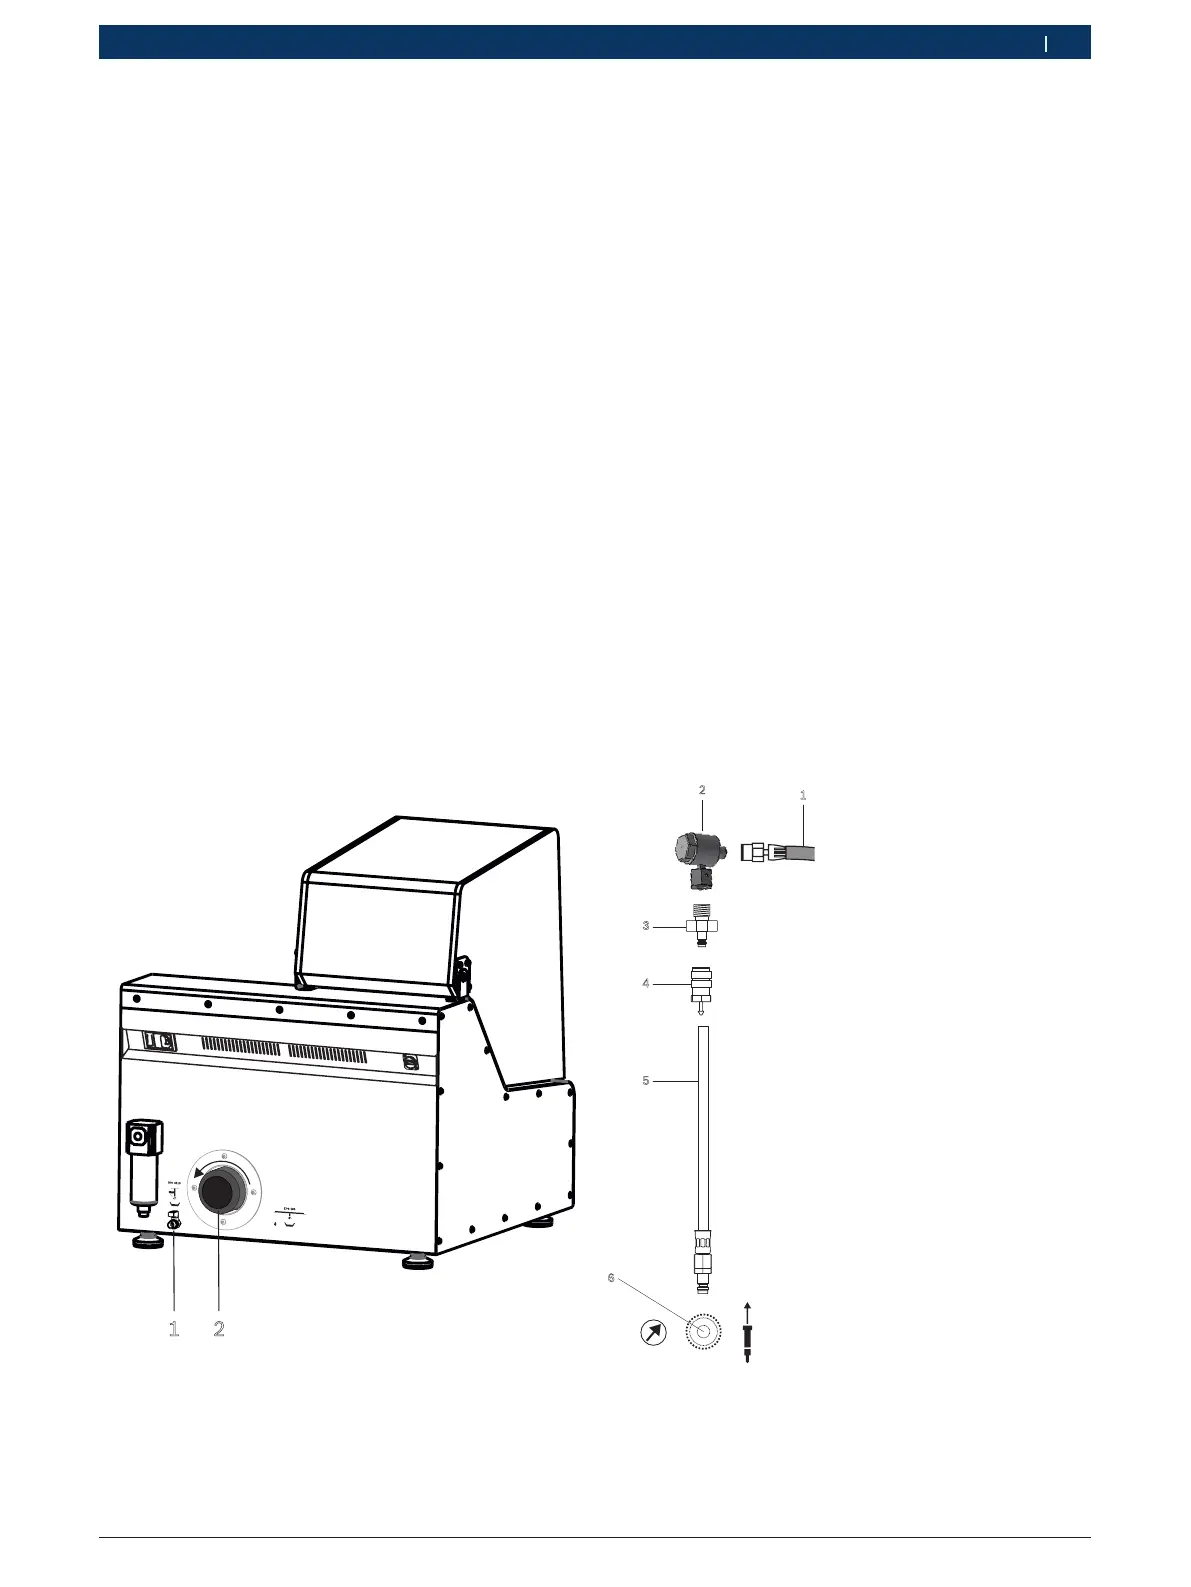
8.2.9 Bleeding the system
i After changing the test oil, the system must be
bled.
Procedure:
1. Connect degassing adapter 1 683457 129
(Fig. 45, item3) to connection adapter
1681032120 (Fig. 45, item2).
Tightening torque 25 — 30Nm
2. Connect the hose assembly 1 684462 570
(Fig. 45, item5) with the CRIN hose fitting
(Fig. 45, item4) to the degassing adapter
1683457129 (Fig. 45, item3).
3. Connect the hose assembly 1684462570
(Fig. 45, item5) to the test connection for return
quantity (Fig. 45, item6).
4. Connect the high-pressure hose assembly
(Fig. 45, item1) to the connection adapter
1681032120 (Fig. 45, item2).
5. Connect the high pressure hose assembly to the
high-pressure connection (Fig. 3, item 2).
6. Close the protective cover.
7. In the start screen, select "Options >> Settings
>> EPS 118 >> Bleed the system" and follow the
instructions.
" Venting is complete.
1
3
4
5
458900-25_Pal
Fig. 45: Connection for bleeding the system
 Loading...