124/188 Maintenance and repair
Bosch Rexroth AG, MIT: ActiveMover, 3 842 564 874/2021-04
10.2 Inspection
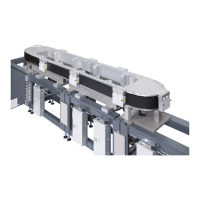
10.2.1 Workpiece pallets
Perform regular checks on the workpiece pallet, both monthly and after disassembly
(see chapter 7.5.14) according to table 7:
Table 7: Workpiece pallet inspections
WT components Inspections Further work
All screws
The following
components can have
clearance:
• V-guide rollers
• Lubricating felt
• Discharge brushes
• Guide rollers
(vertical ≤ 0.5 mm)
Make sure that all screws of
the WT are properly seated.
Tighten any loose screws.
Rubber buffer Check that all rubber buffers
are present and show no signs
of damage.
Replace the rubber buffers if
necessary (see chapter 10.4.3).
Discharge brushes
The length of a new
discharge brush is
4.05 mm. The discharge
brush must be replaced
from a length of
≤ 3.55 mm.
Check that all fi xing screws
of the discharge brushes are
properly seated.
Tighten any loose screws.
Check the discharge brushes
visually for wear and
contamination.
The discharge brushes must
touch the upper V-rail.
Clean or replace the brushes if
they no longer touch the upper
V-rail (see chapter 10.4.4).
Measuring system Check the measuring system
visually for contamination and
damage.
Clean the measuring system
(see chapter 10.1.4).
Check the measuring system
(see chapter ) and replace it, if
necessary (see chapter 10.4.5).
Felt (lubrication device for WT) Check the lubricating felt
visually for damage and wear.
Replace the lubricating felt if
necessary (see chapter 10.4.6).
Check to ensure that the
lubricating felt contains
lubricant.
Lubricate the WT felt
(see chapter 10.3.1).
Check the contact pressure
spring of the lubricating felt.
Press on the lubricating felt,
then release it. The lubricating
felt must return to the starting
position.
Clean the spring seat or
replace the contact pressure
springs (see chapter 10.4.8).
Magnetic kit Check the magnetic kit visually
for contamination, wear and
damage.
If necessary, clean or
replace the magnetic kit
(see chapter 10.4.8).