72A-1589 Rev. C 02/01 5-1
D
DD
D
R
RR
R
A
AA
A
F
FF
F
T
TT
T
3
33
3
/
//
/
5
55
5
/
//
/0
00
0
1
11
1
5. Basic Test Procedures
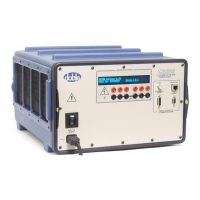
The test procedures in this chapter introduce the various controls on
the F6000 Control Panel. Complete the basic setup procedure in ”Setup
and Configuration” on page 3-1 before conducting these tests. The
following example uses an instantaneous overcurrent relay and assumes
the following:
• The relay tap is set for greater than 5 A but less than 10 A.
• The relay has low burden characteristics.
• The relay output contact is normally open.
• The relay is electromechanical and does not require the use of the
battery simulator.
WARNING The high intensity yellow LED flashes when the battery simulator or any
output source is on or enabled to indicate the potential for dangerous or
fatal voltages.
Prepare for a Pickup Test
1. Connect the instantaneous overcurrent relay to current source I1 and
logic input 1 on the instrument front panel.
2. Turn the F6000 Instrument on.
3. Start ProTesT.
To confirm that ProTesT is set up correctly, follow steps 4 to 6. If you
are sure the setup is correct, proceed to step 7.
4. Click Setup in the ProTesT menu bar to open the Setup display
(Figure 3.3 on page 3-5).
5. Verify that communications between the PC and the
F6000 Instrument are set up properly. Under Connect with,
click the Serial or Ethernet radio button, as appropriate.
N
OTE
For a serial connection, enter the correct Comm Port (1 through 4).
The baud rate for a serial connection must be 57,600 baud per second.
For an Ethernet connection, verify that the IP Address in the Setup
display correctly corresponds to the IP Address in the F6000 Instrument
Display.
6. Click OK to close the Setup display.