220
x Plateaking / Master Feed / Ejection Sectin
chap.4
2. Adjustment for A and C modes
Before adjustment
: A and C mode adjustment must be
carried out AFTER B mode adjust-
ment has been completed.
IMPORTANT
Adjustment procedure
1) Remove the drum from the machine body.
2) Access HELP mode H-20.
For basic HELP mode procedures.
3) Press and hold down the [>] ("up") printing speed
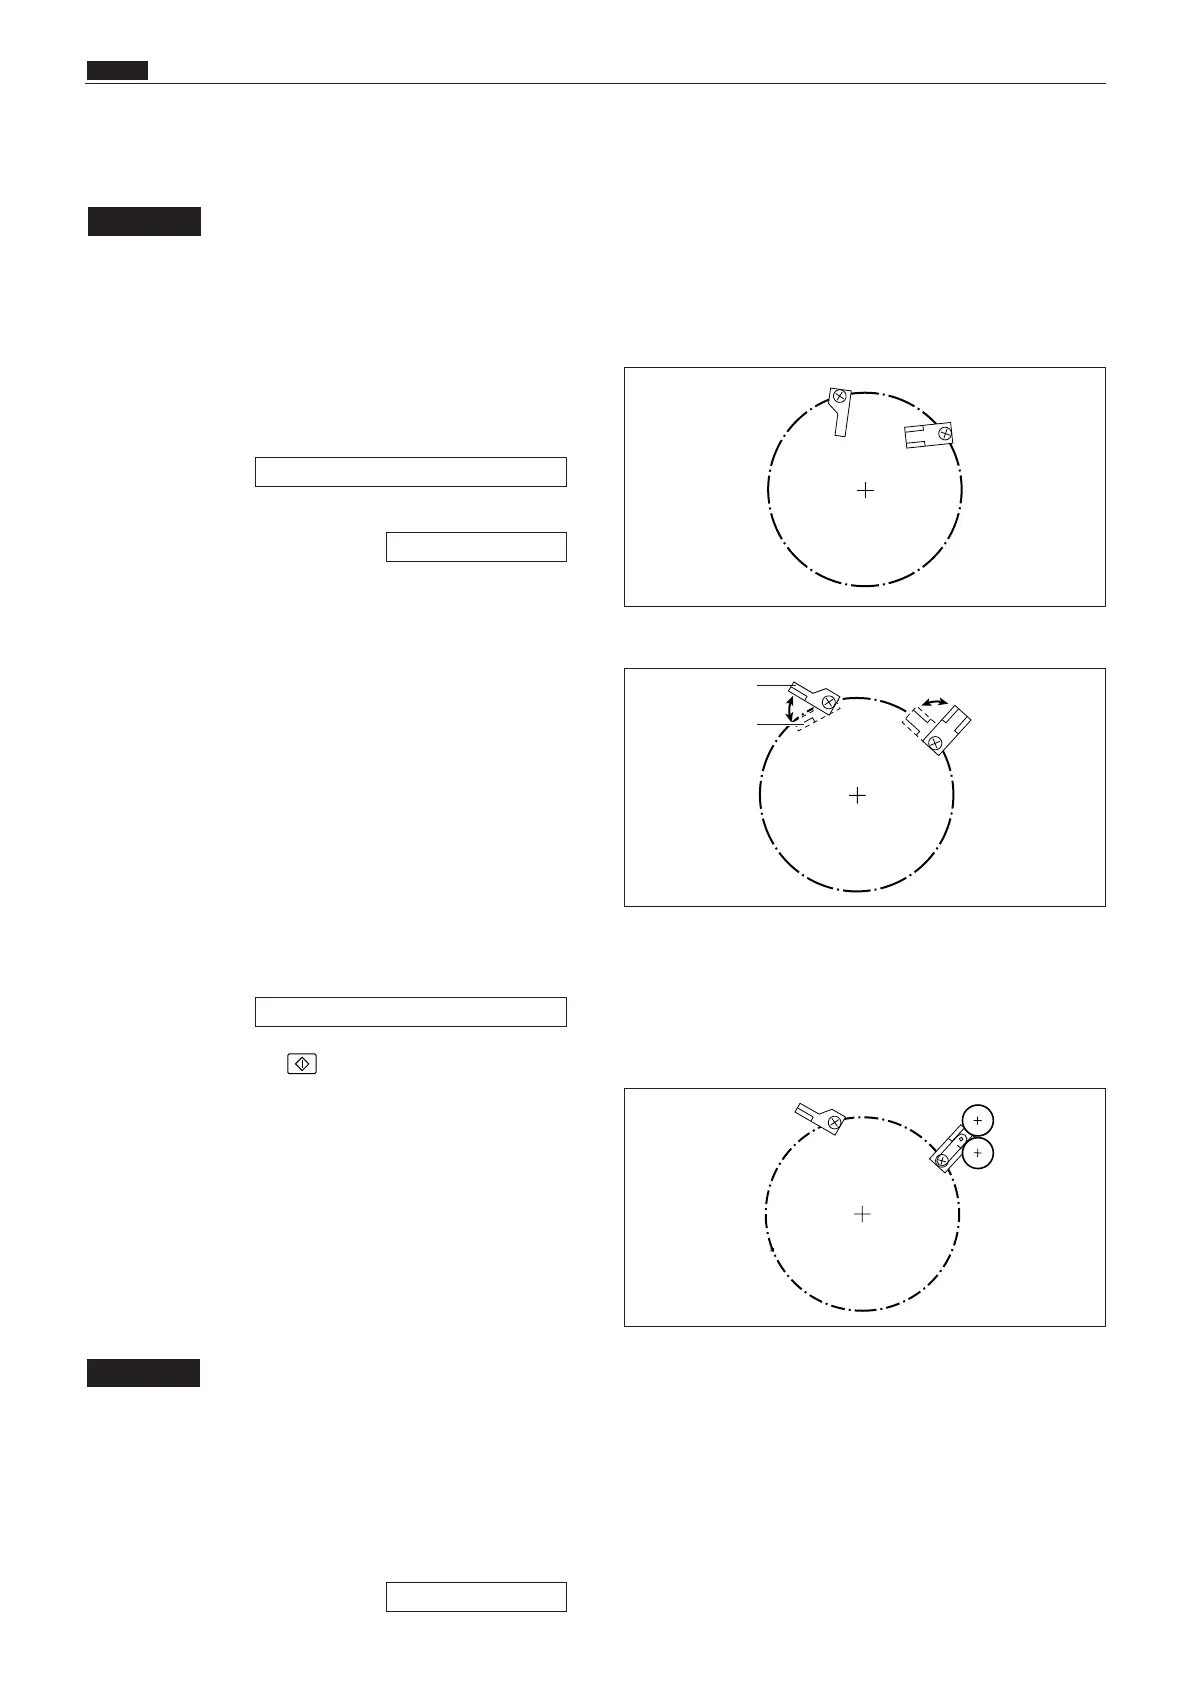
adjustment key, until the master clump
open/close lever moves into the "more open than
B mode (toward C mode) position" (see right).
4) Turn the power off, then on again.
The master clump open/close lever will move into
the B mode position and stop there.
5) Turn off the power, and install the drum to the
machine body.
6) Access HELP mode H-09.
7) Press the PRINT key to move the drum to
the master detachment position, and stop it
there.
8) Use HELP20 to move the master clump open/
close lever to the C mode position.
: Do not move the master clump
open/close lever towards the A
mode position from the B mode
position. Doing so will break the
master clump.
9) Open the scanner unit, and remove the master
feed cover.
IMPORTANT
\See page 291
HELP mode H-20 \ see p.322
\See page 183
HELP mode H-09 \ see p.307
B mode
C mode
¡More open than B mode (toward C mode) position
¡Stopping drum in master detachment position
¡When drum is removed from main body (A mode)