x DRUM Unit Installation Instructions
chap.5
265
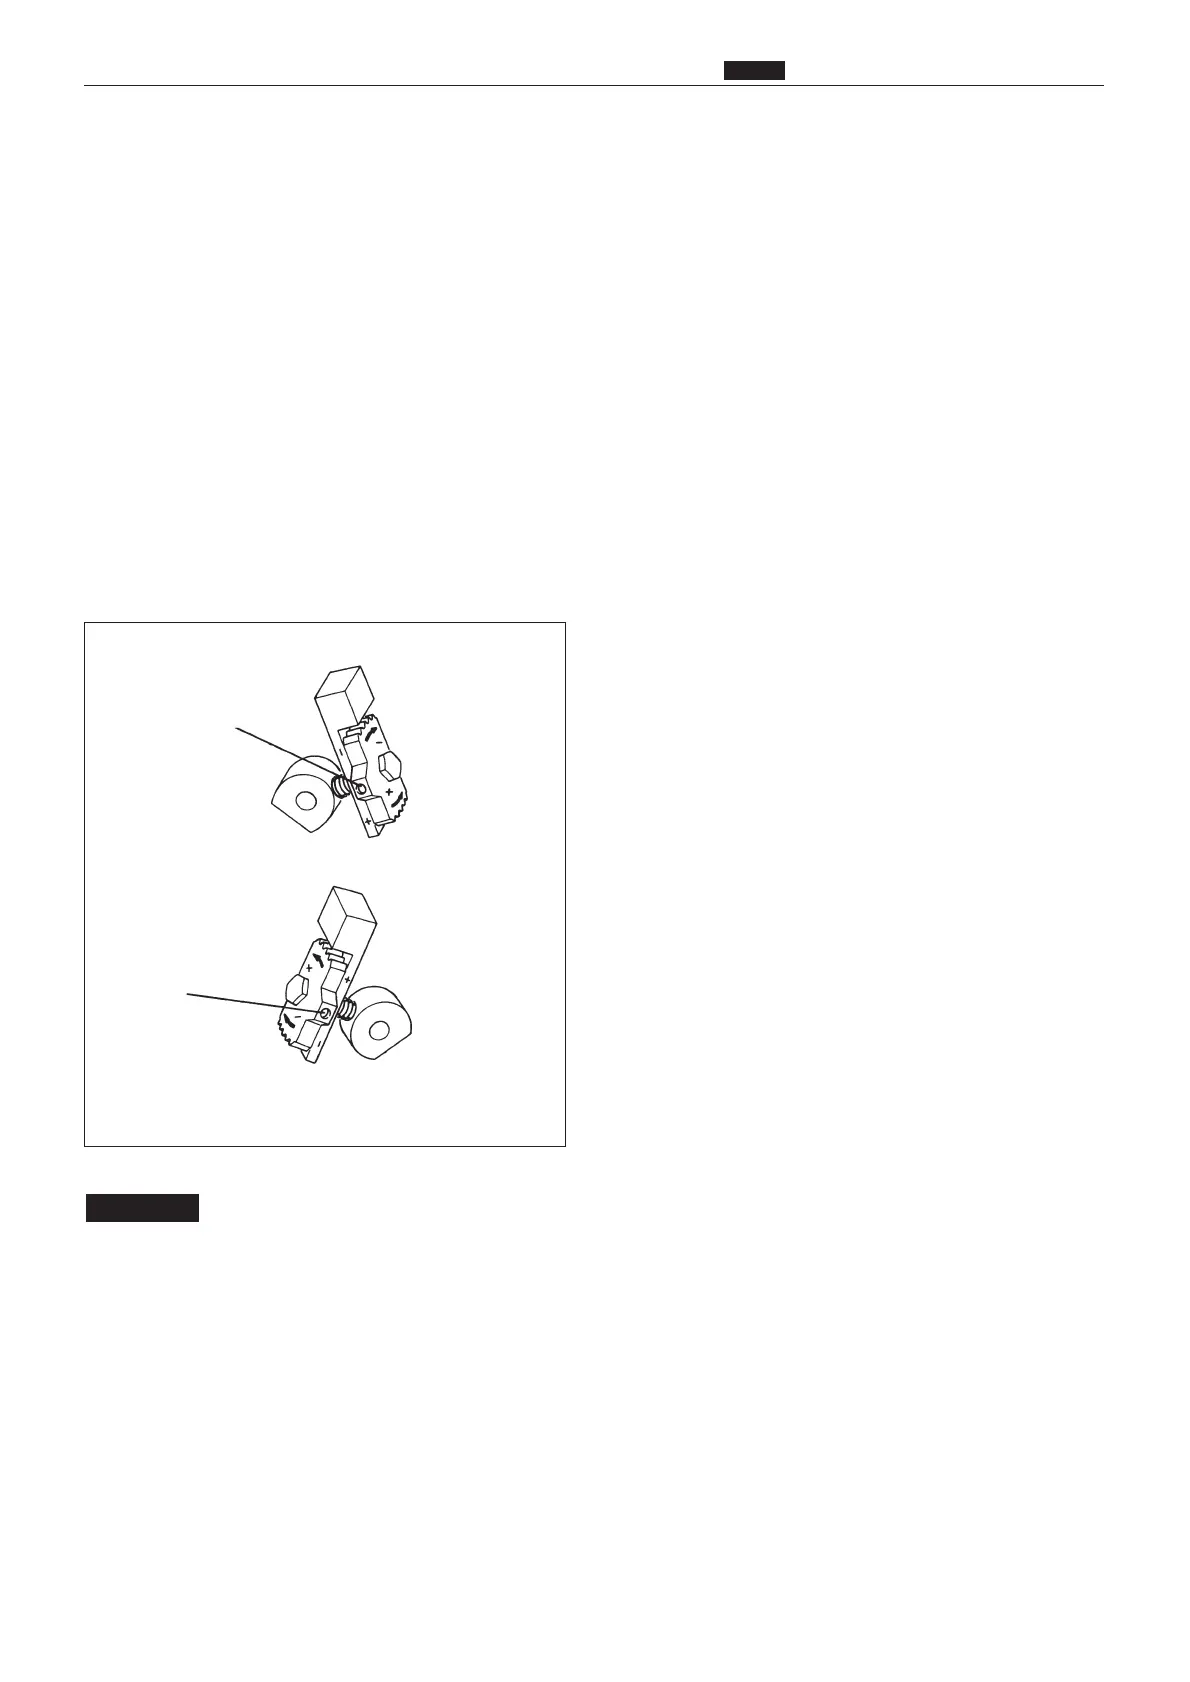
q When the near area is darker or lighter, turn
stepwise the Ink Amount Adjustment Knob on
the near side in the "4" or "3" direction
respectively (3 steps).
w When the far area is darker or lighter, turn
stepwise the Ink Amount Adjustment Knob on
the far side in the "4" or "3"direction
respectively (3 steps).
e When the whole area of paper is darker or
lighter, turn stepwise the Ink Amount
Adjustment Knob on both sides in the "4" or
"3" direction respectively (3 steps).
2. Adjusting Ink Amount
: The Ink Amount Adjustment Knob
has a total of 7 positions: 3
positions for each of "4" and "3"
directions as well as a standard
position.When adjusting the image
density, you should print the image
on dozens of sheets to stabilize the
density every time you change it by
every step.
Repeat the above steps until you
get desired print density.
IMPORTANT
Setscrew Never loosen!
Setscrew Never loosen!
Ink Amount Adjustment Knob on the near side
(Standard Position)
Ink Amount Adjustment Knob on the far side
(Standard Position)