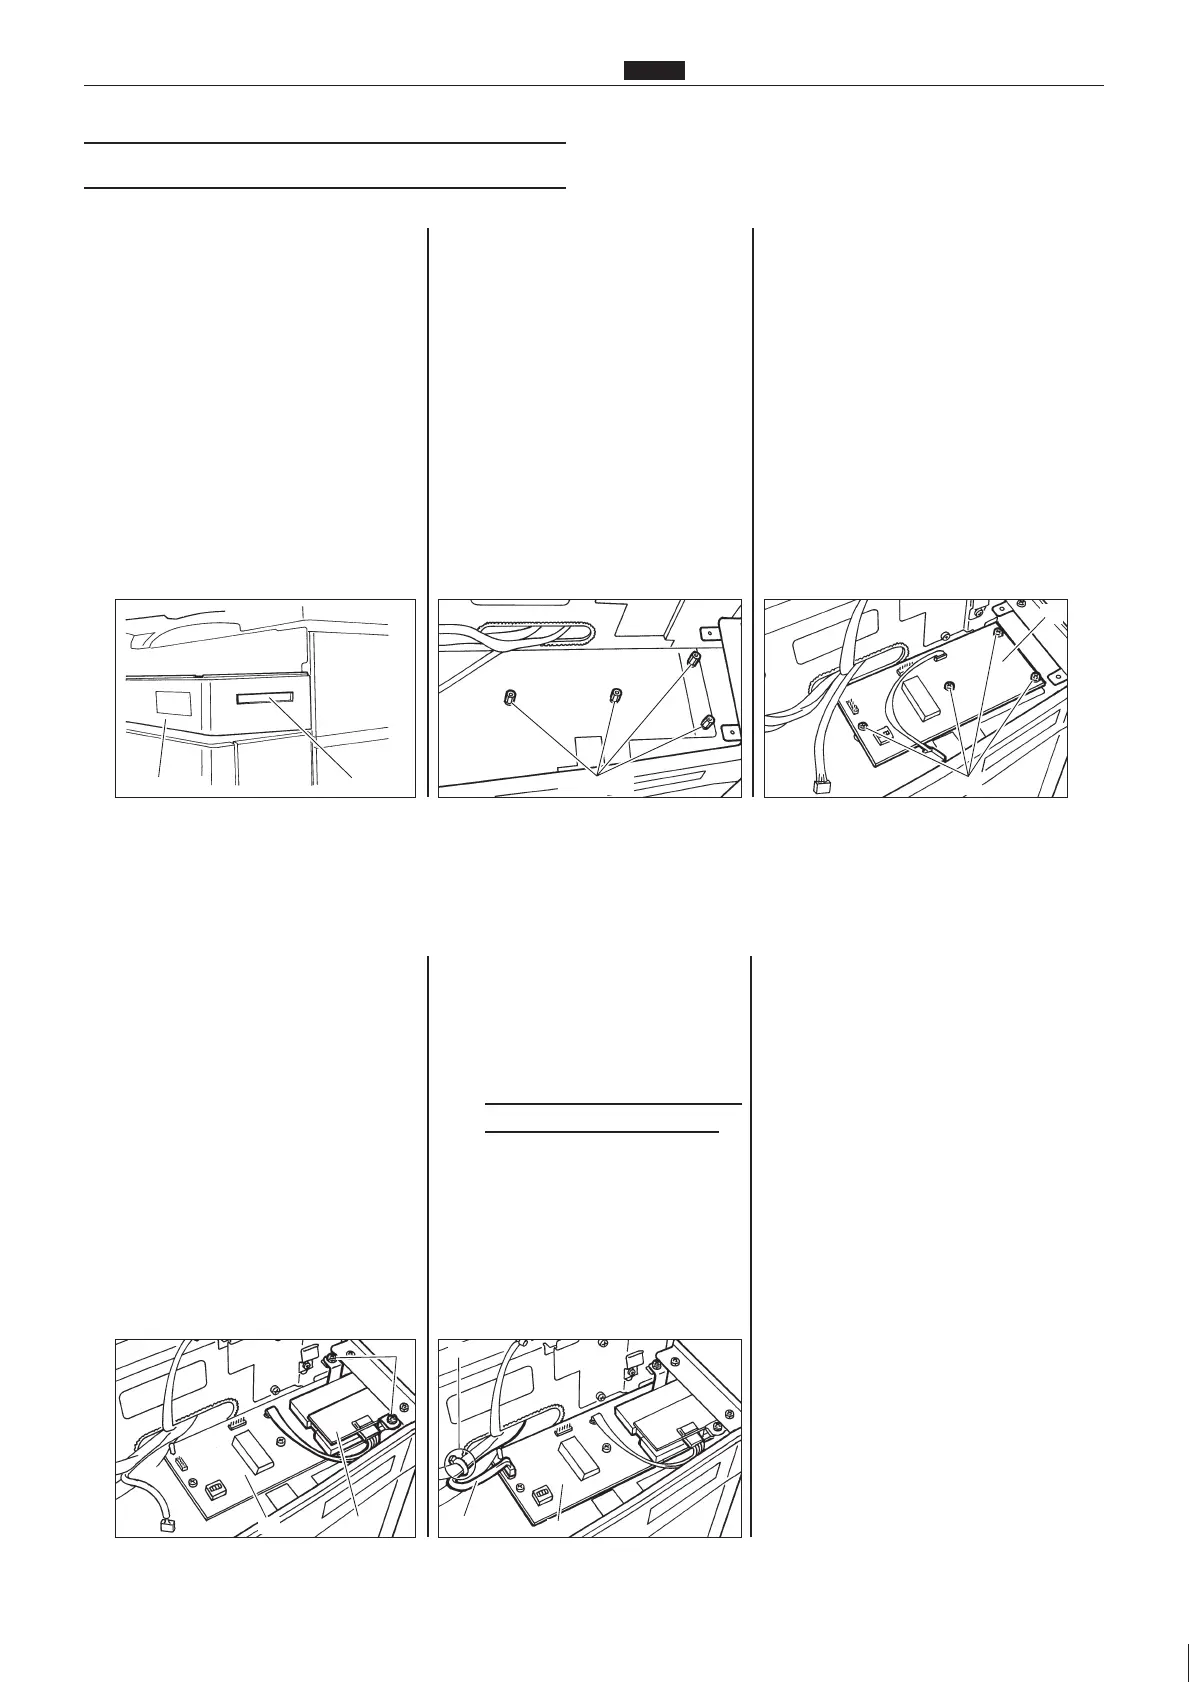
1
Eliminate the card slot in panel
cover B, by cutting it out with a
cutter or similar tool.
2
Fit the spring washers (8) onto
the four spacers (1).
Then install the spacers to the
bracket.
3
Install the KEYCARD COUNTER
3 P.C.B unit (2), and secure it
with the M3x6 screws (6).
4
Insert the cabled wire connectors
attached to the KEYCARD
COUNTER 3 P.C.B unit (2) into
the card reader unit (3).
Then install the card reader unit
to bracket R, and secure it with
the M4x6 screws with SPW (7).
*Be sure to insert the cabled
wire connectors into the
correct places, with the
correct pin color orientations.
5
Insert the connector(s) of the
KEYCARD COUNTER 3 cabled
wire unit (4) into CN3 of the
KEYCARD COUNTER P.C.B unit
(2).
Be sure to orient the connector(s)
correctly when inserting it/them.
*If there is a surplus connector,
fasten it to the panel cord with
the insch lock (11).
6
Check that the KEYCARD
COUNTER P.C.B unit (2), card
reader unit (3), and KEYCARD
COUNTER 3 cabled wire unit (4)
are correctly installed.
*Securely reconnect the panel
cord connector, which was
removed in step 5. Then
install the operation panel,
making sure that it does not
pinch the panel cord or other
cords.
7
Replace all the covers.
Installation is now complete.
card slotpanel cover B
w
e
q3i
y
u
r
CN3
!1
w
w