76
Chap.1 ⁄1 Option
3. Setting the maximum number of cards that can be used with the KEYCARD COUNTER 3
IMPORTANT
Observe the following when setting (increasing) the number of cards that can be used with the
KEYCARD COUNTER 3:
¡Perform the setting operation after installation of the DUPRINTER is complete.
¡Perform the setting operation after installation of the KEYCARD COUNTER 3 is complete.
¡Remove the DUPRINTER power cable's plug from the outlet before performing the setting operation.
¡Be sure to install the various screws in the correct places.
○○○○○○○○○○○○○○○○○○○○○○○○○○○○○○○○
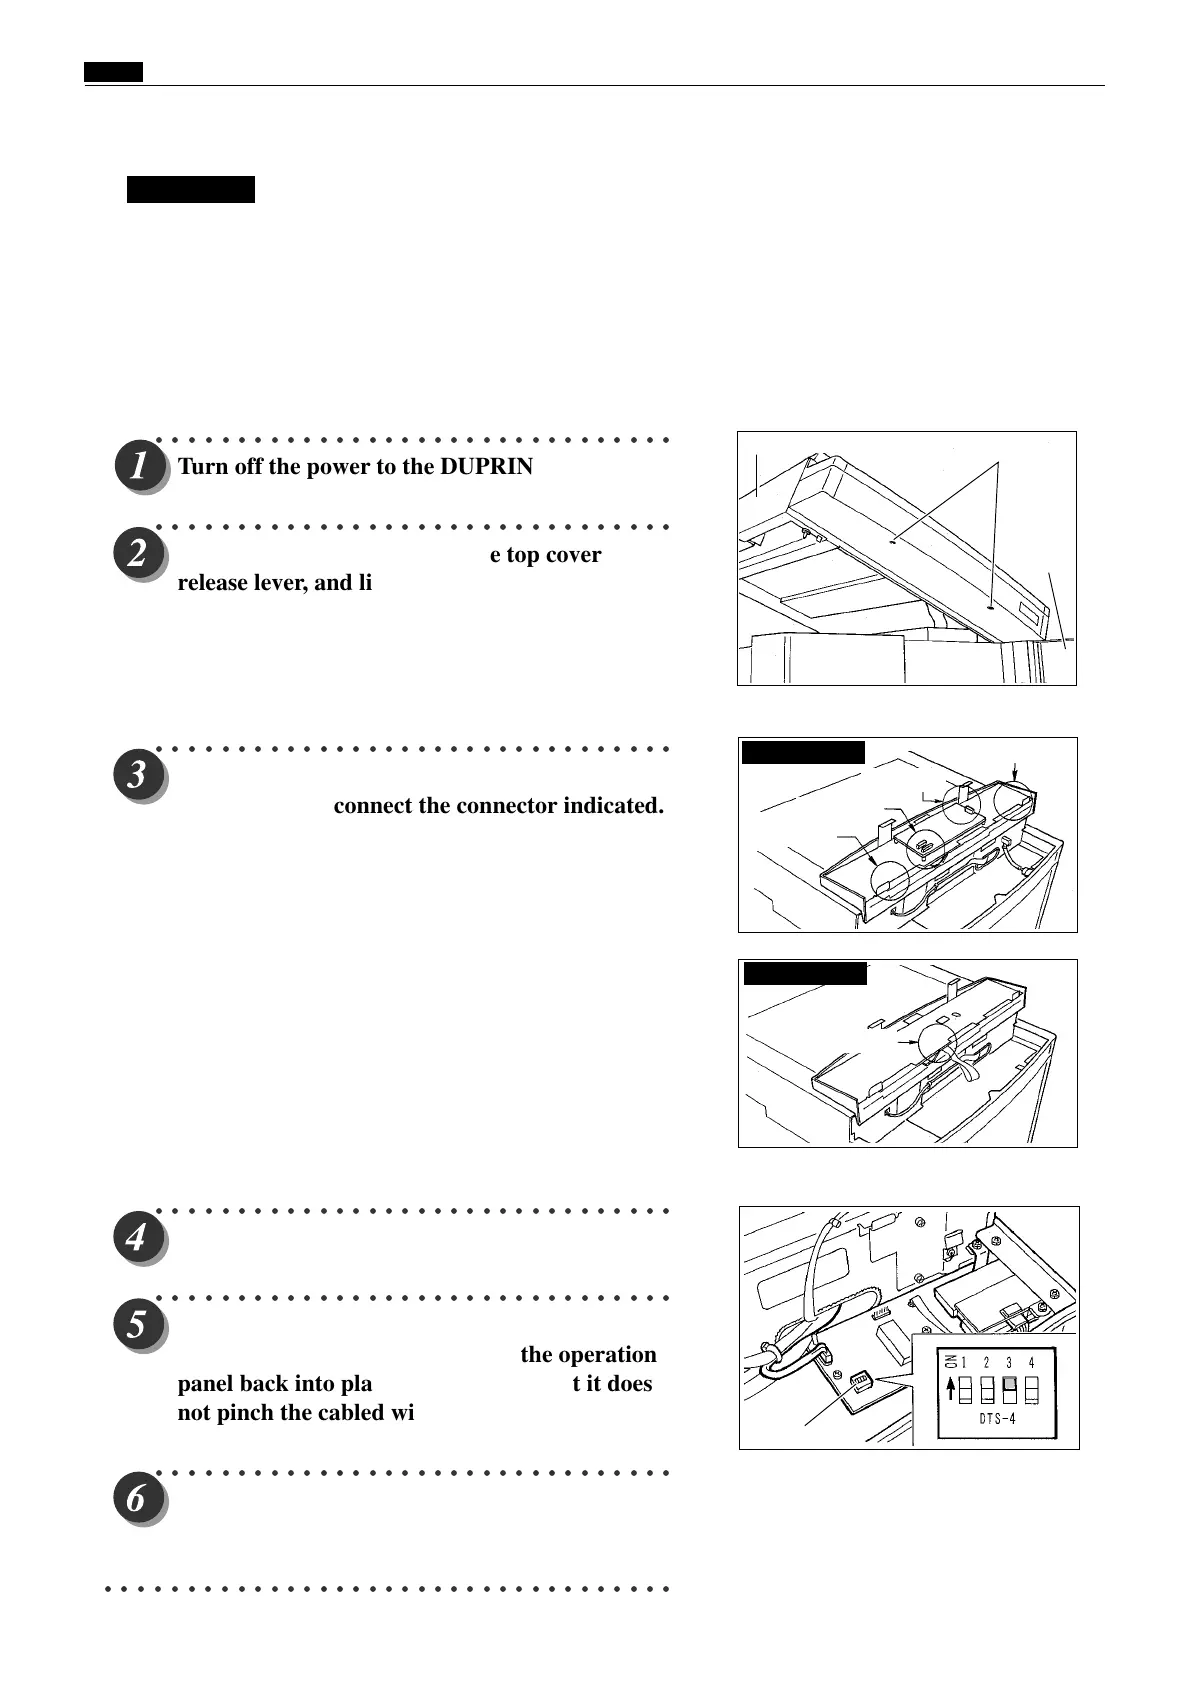
Turn off the power to the DUPRINTER.
○○○○○○○○○○○○○○○○○○○○○○○○○○○○○○○○
Open the front cover, lift up the top cover
release lever, and lift up the top cover. Then
remove the two screws from the underside of
the operation panel.
* Retain the two operation panel mounting screws, as they
will be reused later.
○○○○○○○○○○○○○○○○○○○○○○○○○○○○○○○○
Slightly raise up the upper half of the operation
panel. Then disconnect the connector indicated.
E type : The 5 connectors shown below.
S type : The 1 connector shown below.
○○○○○○○○○○○○○○○○○○○○○○○○○○○○○○○○
Set DIP SW 3 to ON.
○○○○○○○○○○○○○○○○○○○○○○○○○○○○○○○○
Reinsert the cabled wire connector that was
disconnected in step 3, and lower the operation
panel back into place, making sure that it does
not pinch the cabled wire.
○○○○○○○○○○○○○○○○○○○○○○○○○○○○○○○○
Turn on the power to the DUPRINTER.
○○○○○○○○○○○○○○○○○○○○○○○○○○○○○○○○○○○
Screws
Scanner unit
Front
cover
DIP SW
1connector
1connector
2connector
1connector
1Connector
E type models
S type models