2. Replacement and adjustment of parts
26820
7/10
26820
Zigzag adjustment
(2) Check the test print.
If the amount of zigzagging is not within 0.5 mm, adjust the position of paper supply unit A2.
(3) Loosen positioning fixing screws of paper supply unit A2. (Loosen two fixing screws.)
(4) Adjust the position of paper supply unit A2. (One adjusting screw and one nut)
IMPORTANT
• Fix the screw while pressing it in the direction of arrow 1.
(5) Make a test print, and check if the zigzagging amount is within 0.5 mm.
If the amount of zigzagging is not within 0.5 mm, perform from Step 6 again.
7. Adjusting the position of the paper guide inlet
(1) Install the paper magazine in lane A2.
Any paper width is available.
(2) Select the paper width to use via Paper Guide Width Adjustment (for each Paper Width)→F:
Functions→Guide Width Test.
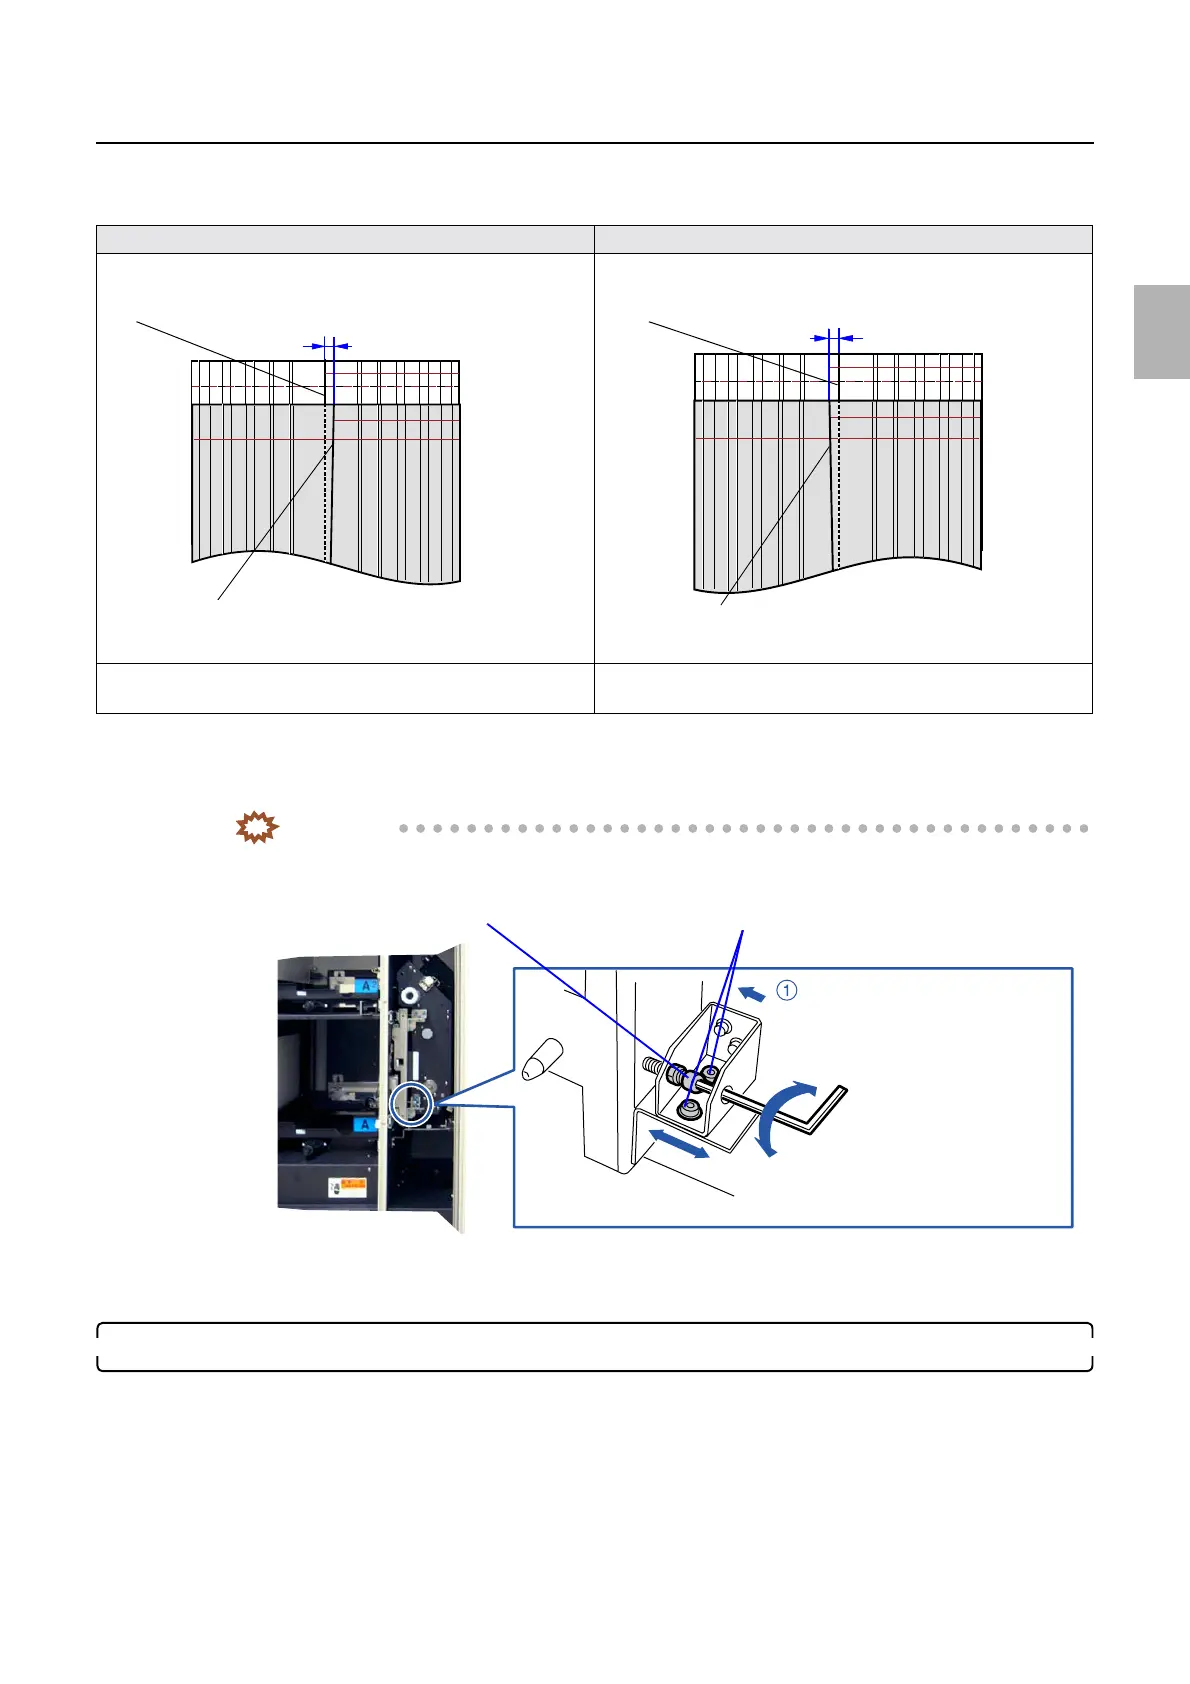
When the center line of the first print is leaned to the right When the center line of the first print is leaned to the left
Turn the adjusting screw to the right.
(Adjust paper supply unit A2 rightward.)
Turn the adjusting screw to the left.
(Adjust paper supply unit A2 leftward.)
A
A
First test print
(Center line on the first print)
Second test print
(Center line on the second print)
A
A
First test print
(Center line on the first print)
Second test print
(Center line on the second print)
Adjusting screw
Fixing screws
Turn the adjusting screw to the right.
Turn the adjusting screw to the left.
G085419
Distributed by: minilablaser.com